
18 Built-In Window Seat Ideas for Small Apartments

Your window is 36 inches wide, a radiator sits right under it, and your lease says no permanent changes. You can still get a built in window seat. Not the $2,500 millwork version either. The 18 ideas below run from a no drill bench that lifts out on moving day to a full bay build with three drawers, and every one carries numbers you can hold a tape measure against tonight.
Small apartments make this hard in one specific way that the big design sites skip. A bench 18 inches deep takes 18 inches of floor out of a room that might only be 10 feet across. Sizing has to be right the first time, because there is no second wall to move it to.
So each idea here comes with its real depth, height, and length, pulled from carpenters who publish their cut lists, plus the storage style that matches how you actually use that corner. Renters first, owners second. Where a method needs a drill, there is a version that does not.
1. The Lift-Out Bench That Reads As Millwork
Renters get the worst advice on this one. Every guide says “build it in,” which is exactly the thing your lease forbids. The workaround is a freestanding box that touches three surfaces and fastens to none.
Build or buy a bench 16 inches deep and 16 to 18 inches tall, push it tight to the wall under the window, then close the two side gaps with a strip of painted 1×3 held by removable adhesive. From four feet away the shadow line disappears and the bench reads as part of the wall.
It comes out in ten minutes with a putty knife. That is the whole trick.
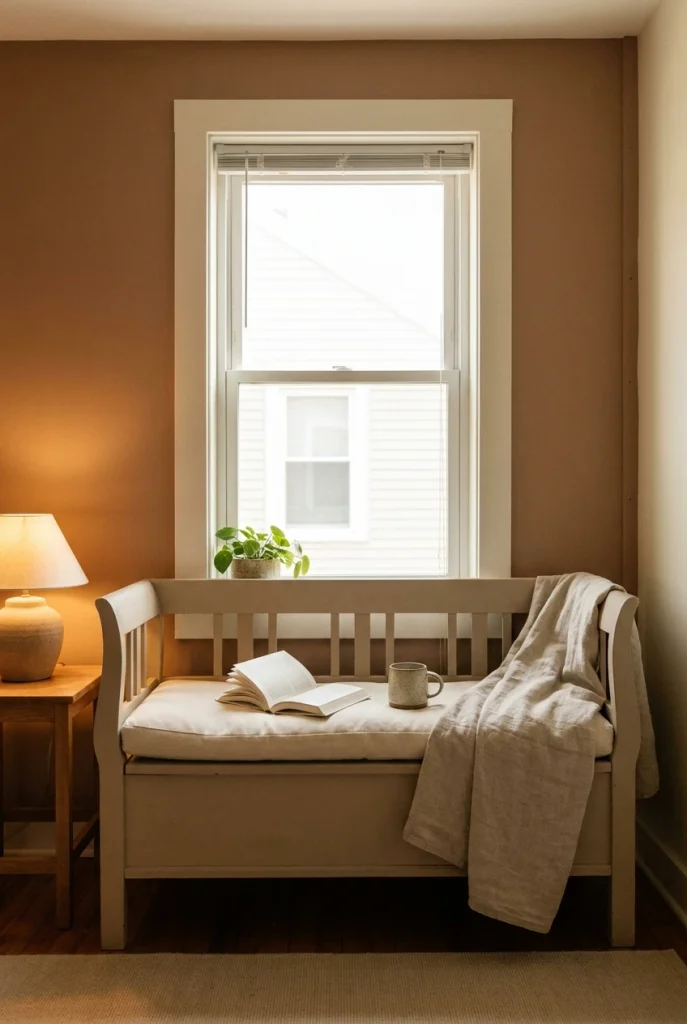
2. The 30 Inch Cabinet Box Under A Standard Apartment Window
Standard apartment windows are narrower than the ones in the magazines, which turns out to help you. A single 30 inch cabinet box centered under the glass gives a real seat without swallowing the room.
Three things make the box read as built in rather than parked:
- A base frame that lifts it to 18 inches and sets it back 3 to 4 inches, creating a toe kick your feet can tuck into
- A plywood top that overhangs the front by a quarter inch, so the edge catches light the way millwork does
- Paint matched to the wall trim, not to the wall
Narrow windows also mean you can skip the second cabinet entirely and put a floor lamp in the leftover 18 inches. If the corner itself is the problem, these small space ideas for awkward corners sort the layout before you cut anything.
Recreate this box
3. The 16 / 18 / 20 Rule For Rooms Under 12 Feet
Three numbers decide whether the seat gets used or becomes a shelf for laundry. Depth, height, and the floor you have left afterward.
Carpenters publish depth bands of 16 to 24 inches and heights of 14 to 20 inches, which is useful until you notice nobody subtracts. In a 10 foot room, a 20 inch bench leaves 8 feet 4 inches. Put a 32 inch armchair opposite it and your walking lane is down to 24 inches, which is narrower than most hallways.
Hence the rule below. Deep enough to curl up, low enough to read, and short enough to keep the room walkable.
16 inches deep for a room under 12 feet. 18 inches high including the cushion. 20 inches of clear walking lane left over, minimum.
Miss the third number and you will stop using the first two.
4. Match The Seat To Your Actual Body
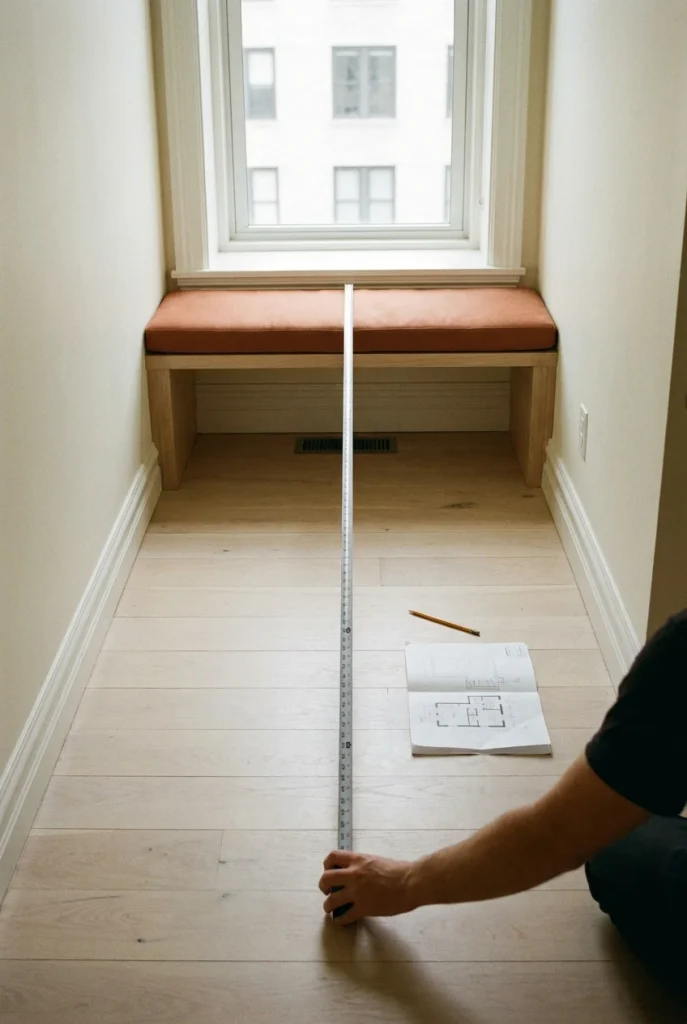
Measure your shin from floor to the back of your knee. Whatever that number is, the finished seat height including cushion should land within an inch of it, which for most adults means 17 to 19 inches.
Here is what the published ranges look like side by side, and where a small apartment should sit within them.
| Dimension | Published range | Small apartment pick |
|---|---|---|
| Seat height | 14 to 20 in. | 18 in. with cushion |
| Depth | 16 to 24 in. | 16 to 18 in. |
| Length | 30 to 64 in. | 30 to 48 in. |
| Backrest | 10 to 20 in. | pillows instead |
| Cushion foam | 2 to 4 in. | 3 in., not 2 |
Write your three numbers on painter’s tape and stick it to the window frame while you shop. It stops the impulse buy that is two inches too deep.
5. Use The Whole Bay, Not Just The Middle
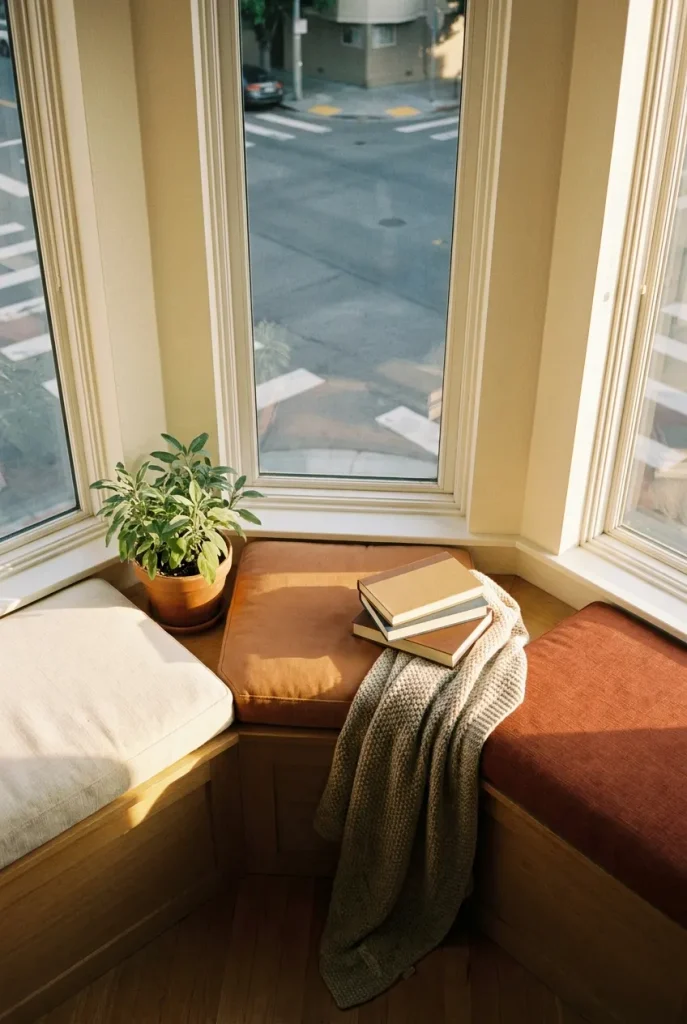
Bay windows in older apartment buildings almost always get treated as one flat wall, and the two angled cheeks end up holding a dying plant. Running the bench around all three faces buys you roughly 40 percent more seat in the same footprint.
Cut three separate tops rather than one continuous piece. The angles are rarely the 45 degrees they look like, and three pieces let you scribe each one to its own wall.
Where the segments meet, run a strip of the same trim vertically. Your eye reads the break as intentional. A single mitered top that is a half degree off reads as a mistake forever, which is the honest reason most bays end up with three cushions instead of one.
More full-bay layouts here, including the awkward shallow bays: bay window seat reading nook setups.
6. Flank It With Shelf Towers, Then Anchor Them
Shelf towers on either side of the seat are what turn a bench into a bookish corner, and they are also the part people get wrong. A tall narrow tower with books on the upper shelves is top heavy by design.
Safety note: anchor tall furniture to the wall, keep candles and cords away from fabric, and use a licensed electrician or contractor for hardwired lighting, ceiling mounts, or anything structural.
Renting? Use towers no taller than 48 inches and load the bottom two shelves first. Owning, or willing to patch two screw holes at move out? Strap them. The CPSC furniture anchoring guidance covers the hardware and the why in about five minutes of reading.
⚠️ Watch Out
A 72 inch tower loaded with hardbacks on the top shelf can tip from a child pulling one book. Two straps cost less than a lamp and leave a hole the size of a pencil tip.
7. The Cabinet Hack Build, Totaled
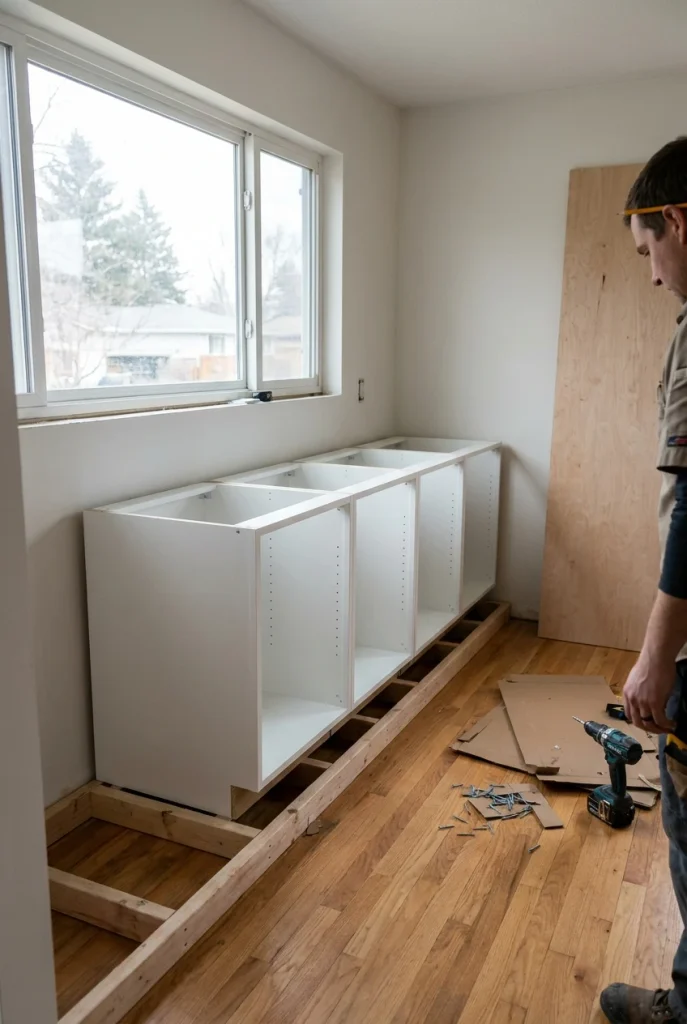
Four cabinets, one frame, one weekend. The most copied version of a built in window seat with storage uses ready made cabinet boxes instead of a built from scratch carcass, because the boxes arrive square and you only have to get the frame right.
Cabinet boxes in this style run about 15 inches tall, so a 3.5 inch base frame lands the seat at 18.5 inches before the cushion, right in the band from entry 4. Check the exact figures on the IKEA KALLAX shelf unit dimensions page before you buy, since the cube units and the kitchen boxes are not the same height.
| Piece | Archetype | Reported cost |
|---|---|---|
| 🪵 Base frame | 2x4s on edge, 3.5 in. tall | lumber, under $40 |
| 🗄️ Boxes | Four 30 in. cabinets, 15 in. tall | bulk of the build |
| 🪑 Top | 3/4 in. plywood, pocket screwed | one sheet |
| 🧶 Cushion | 3 in. high density foam, batting, fabric | foam is the spend |
| Total | 126 in. of finished seat | $400 as published |
Builders who went the all plywood route instead reported $100 to $150 in materials for a 71 inch bench, with more cutting and a lot more sanding.
8. Build The Base Frame First, Always
Skip the base frame and your bench sits at 15 inches, which is stool height, and every person who sits on it will slide forward within a minute. The frame is four boards and it fixes three problems at once.
Cut 2x4s and set them on edge for a true 3.5 inches of lift.
Make the frame 20 inches deep and hold it back 4 inches from the cabinet fronts, which creates the toe kick.
Add cross runners about every 12 inches so the top never flexes underfoot.
Shim the frame level before anything sits on it. Old apartment floors run out by a half inch across six feet.
Level frame, square boxes, flat top. Get those three and the rest of the build is decoration.
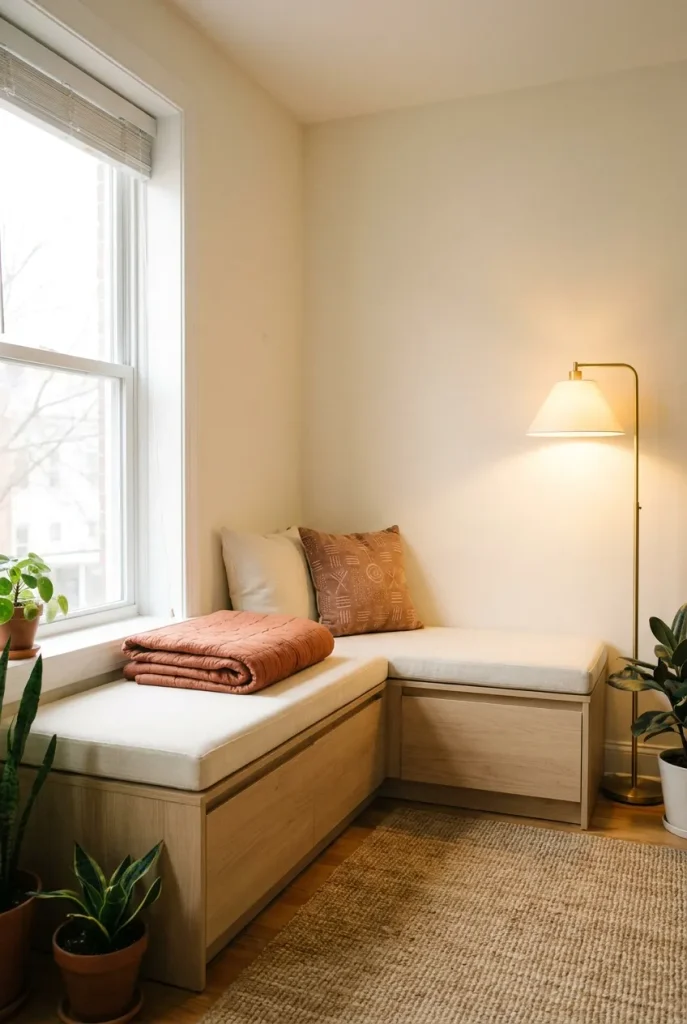
9. The L-Shaped Corner Seat For Two Short Walls
Corners are where small apartments hide their square footage. A window that stops 20 inches short of the corner looks unusable until you wrap the bench around and pick up a whole second seat out of dead floor.
Keep the return leg shorter than 30 inches. Longer than that and you have built a sofa you cannot get behind to clean.
A 20 inch strip of wall between the window and the corner. Too narrow for a chair, too wide to ignore, currently holding a floor lamp and a charging cable.
A 20 inch return leg with a lift lid, holding off season bedding. One more person can sit, and the lamp moved to the corner behind the seat back.
10. Drawers Instead Of A Lift Lid
Drawers cost more and win anyway, for one reason that has nothing to do with looks: you cannot open a lift lid while someone is sitting on it.
- Drawers stay usable with a cushion, three pillows, and a person on top
- A three drawer bank across 54 inches is the published standard for a bench about 16 inches high and 16 inches deep
- Full extension slides let you reach the back, which is where the second half of your storage actually lives
The trade off is real. Drawers eat 2 to 3 inches of depth in hardware and need the box built square to within a sixteenth. Lift lids forgive a sloppy build. Drawers do not.
- ▸Daily items go in drawers: blankets, chargers, the current TBR pile.
- ▸Seasonal items go under a lift lid: winter bedding, holiday boxes.
- ▸Mixed use bench: drawers on the end you sit on, lid on the end you do not.
11. Know Which Lid You Are Actually Going To Open
Lift up lids photograph well. Six months in, most of them are holding a stack of books that has to move before the lid does, which means the storage underneath has quietly become an attic.
Fit soft close hinges or a lid stay so it cannot drop on a hand.
Split a long seat into two or three lids instead of one heavy slab.
Line the inside with felt so the lid closes with a thud, not a drum note.
One 60 inch lid with a loose cushion on top of it.
Piano hinge with no stay, in a home with kids.
Storing anything you need weekly under a seat you use daily.
Ask yourself how often the thing inside comes out. Weekly means drawers. Twice a year means a lid is fine.
12. Light It For 9 p.m., Not For The Listing Photo
Light is what decides whether the seat gets used after dark. Daylight sells the corner. A 2700K bulb is what keeps you in it.
Put the light source behind your shoulder rather than overhead, at roughly 48 to 52 inches off the floor when you are seated, so the page is lit and the glass is not. Overhead light turns a night window into a mirror of your own living room.
Plug in fixtures do all of this with no wiring, which matters when the wall behind a window seat rarely has an outlet where you want one. Options that fit a rental are collected here: no wiring wall sconces for reading.
💡 Quick Tip
Run the cord down the wall inside a paintable cord channel and paint it the wall color. From the seat you stop seeing it by day two.
13. Three Inches Of Foam, Not Two
Two inches of foam feels fine in the store. On a plywood lid it compresses to about three quarters of an inch under an adult and you feel the seam of the seat through it within twenty minutes. Builders who tried 2 inch foam went back and redid the cushion in 3 inch high density, which is now the working standard.
Wrap the foam in batting before the fabric goes on. Batting is what gives the edge that slightly rounded, upholstered line instead of a hard foam corner.
Put the zipper on the back edge, not the front. Front zippers press into the back of your legs and you will notice every time.
14. Choose The Window Treatment Before The Cushion
Curtains behind a bench have one job the rest of your curtains do not have: they must not land on the seat. Full length panels pool on the cushion, collect crumbs, and get sat on until the hem is gray.
| Roman shade or cafe curtain | Full length panels |
|---|---|
| Stops above the seat, nothing to sit on | Pool on the cushion, wear at the hem |
| Mounts inside the frame, tension rod option for renters | Needs a rod wider than the bench, usually drilled |
| Keeps the built in line of the seat visible | Hides the millwork you just paid for |
Cordless is the pick in any home with kids or pets, and it is worth the small upcharge even when it is not.
15. Solve The Cold Glass Before January Does
January is when a window seat gets judged. Single pane glass in an older building radiates cold straight into your shoulder, and no cushion thickness fixes that.
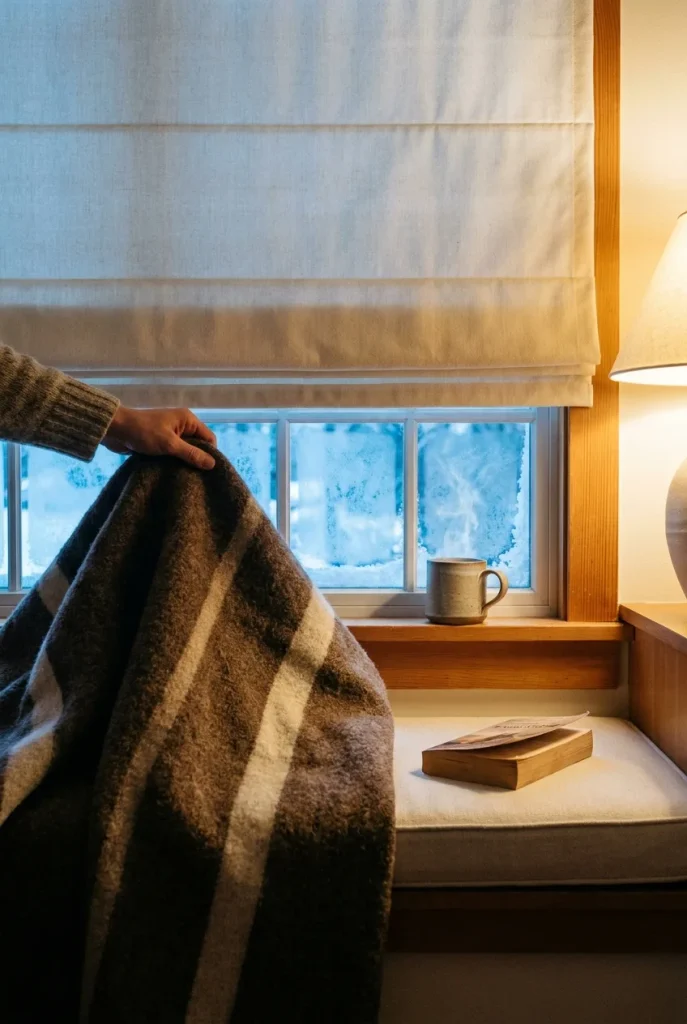
Three moves that do. Line the inside of the seat box with rigid foam board so cold air stops circulating under you. Hang a lined shade you can drop behind your back at night. Keep a wool throw on the seat rather than cotton, because wool holds warmth at a fraction of the bulk.
Cold you feel at a window is mostly radiant loss and draft, not air temperature. Block the draft under the seat and put one insulating layer behind your back, and the same corner gains about two usable months a year.
16. The Studio Seat That Sleeps A Guest
Studios ask every surface to do two jobs. Push the bench depth to 24 inches instead of 16, run it to at least 60 inches long, and you have a daybed ledge that a guest can actually sleep on without a mattress on your floor.
Make it sleep ready
Do the floor math from entry 3 before you commit. A 24 inch bench in a 10 foot studio is a real decision, not a detail.
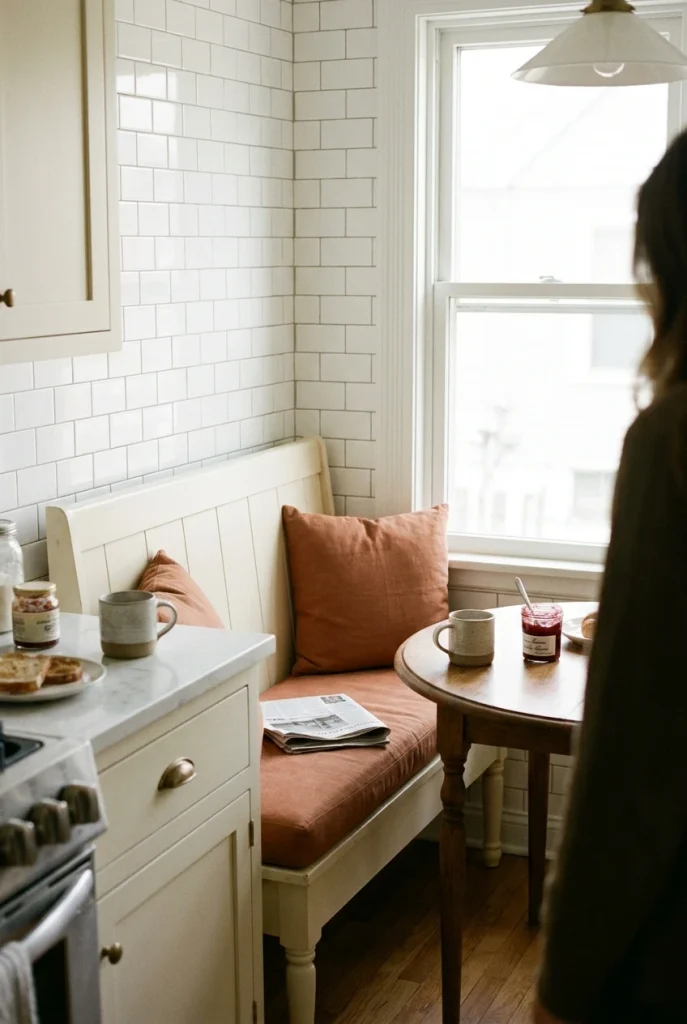
17. The Kitchen Corner Banquette In 42 Inches
Kitchen corners in small apartments hold a table meant for four and seat two badly. Swap the two chairs on the window side for a bench and the same corner seats three, because bench seating does not need pull out clearance behind it.
Two chairs that have to slide back 18 inches to be usable, into the only path to the sink.
A 42 inch bench against the window wall, zero pull out clearance, an extra seat, and small appliance storage under the lid.
18. The $30 Of Trim That Sells The Whole Thing
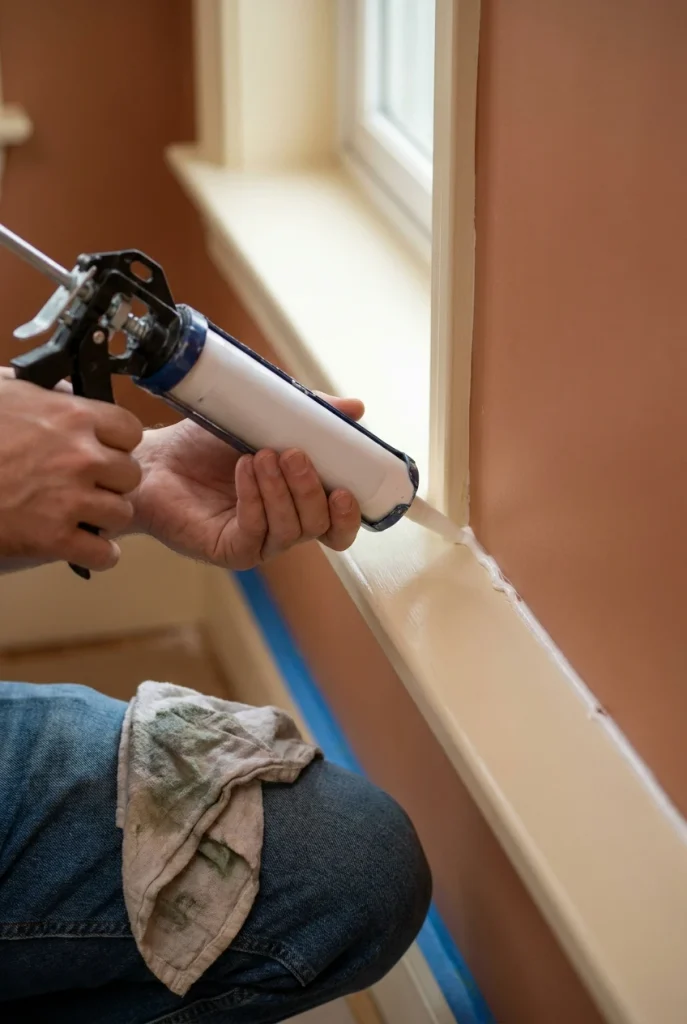
What separates a bench from millwork is about $30 of trim and one afternoon of patience. Everything up to this point is carpentry. This part is illusion, and it is the part that decides whether visitors ask where you bought it.
Scribe the side panels to the wall. Old plaster is never plumb, and a scribed edge kills the tapered gap that gives a bench away.
Run the room’s existing baseboard profile across the toe kick so the bench meets the floor the way the walls do.
Caulk the top seam where the seat meets the wall, then paint over it. Renters use removable caulk strip instead, which peels off in one piece.
Paint the bench the same color and sheen as your window casing. Matching the wall instead is what makes a built in look like a box.
Frequently Asked Questions
How deep should a built in window seat be?
Published guidance runs from 16 to 24 inches, with 18 to 22 inches recommended for reading and 24 to 30 inches if you want daybed use. In a room under 12 feet across, 16 to 18 inches is the practical pick, because every inch of depth is an inch off your walking lane. Measure the clear floor you will have left before you settle on the number.
How tall should a window seat be?
Aim for about 18 inches from the floor to the top of the cushion, which is standard chair height. Carpenters build the box itself at 14 to 18 inches and let the cushion make up the difference. Ready made cabinet boxes are often 15 inches tall, so a 3.5 inch base frame brings the finished seat to roughly 18.5 inches.
How much does a built in window seat cost?
Reported real builds land in three bands. An all plywood bench about 71 inches long came in at $100 to $150 in materials. A four cabinet build covering 126 inches was totaled at $400. Professionally built custom millwork starts around $2,500 and climbs from there, with roughly $500 quoted as the low end for a simple DIY version.
Can you build a window seat in a rental apartment?
Yes, without drilling. Build or buy a freestanding bench at 16 inches deep and 16 to 18 inches tall, push it tight to the wall, and close the side gaps with painted filler strips held on removable adhesive. Removable caulk strip seals the top seam and peels away in one piece. Keep any flanking shelf towers under 48 inches and load the low shelves first.
How thick should a window seat cushion be?
Three inches of high density foam is the working minimum. Two inch foam compresses on a hard plywood lid and you feel the seat through it within about twenty minutes, which is why builders who start with 2 inches usually redo it. Wrap the foam in batting before the fabric goes on so the edge reads upholstered rather than blocky.
Does a window seat need a backrest?
Not in a small apartment. Built in backrests run 10 to 20 inches tall and push the whole assembly further into the room. Pillows do the same job, cost less, and move when you want to lie down. Save the built backrest for a bench that sits out in a room rather than tight under a window.
Can a window seat go over a radiator or heat vent?
Only with the right box. Blocking a radiator or floor vent with a sealed cabinet traps heat and starves the room. Build that section as an open front with a metal or slatted grille panel instead of a solid door, leave the back open, and skip the storage in that bay. For anything involving the heating system itself, get a licensed contractor to look at it first.
Start With The Measuring Tape
Pick your three numbers before you pick your finish. Depth that suits your room, 18 inches to the top of the cushion, and a clear walking lane you can live with. A built in window seat gets used or ignored based almost entirely on those, and almost never on the fabric.
Then choose your lane. Renting means the lift out bench and filler strips from idea 1. Owning means the cabinet build from idea 7 and a weekend.
Save this to your window seat board so the dimensions are with you when you are standing in the aisle with a tape measure and a decision to make.
Keep reading
More cozy nook ideas
 Nook Ideas
Read →
Nook Ideas
Read →
Reading Nook With View: Designing Around Your Best Window
You don’t need a beach house, a mountain cabin, or a landlord who lets you knock down walls. You need one decent…
 Nook Ideas
Read →
Nook Ideas
Read →
Coastal Window Seat Reading Nook Ideas for Beach House Vibes (Even in the City)
You don’t need an ocean view. You don’t need a bay window, a renovation budget, or a landlord who says yes to…
 Nook Ideas
Read →
Nook Ideas
Read →
Bay Window Seat Reading Nook: 14 Ideas That Use the Full Bay
If your bay window is currently storing a dying spider plant, a stack of unopened mail, and a curtain rod three inches…