
Reading Nook Built Into a Wardrobe: Closet Conversion Without Losing Storage

You don’t need a renovation budget or a landlord who likes you. You need one wardrobe you already own, a cushion the right depth, and a code-safe light. That’s the entire wardrobe reading nook formula. The version we’re building keeps your hanging storage intact, fits a 5-foot-7 reader comfortably, and totals about $180 if you’re starting from scratch. The trick is splitting the wardrobe in two zones instead of gutting it. We’ll get into that in the first section, because that’s the move every Pinterest tutorial skips.
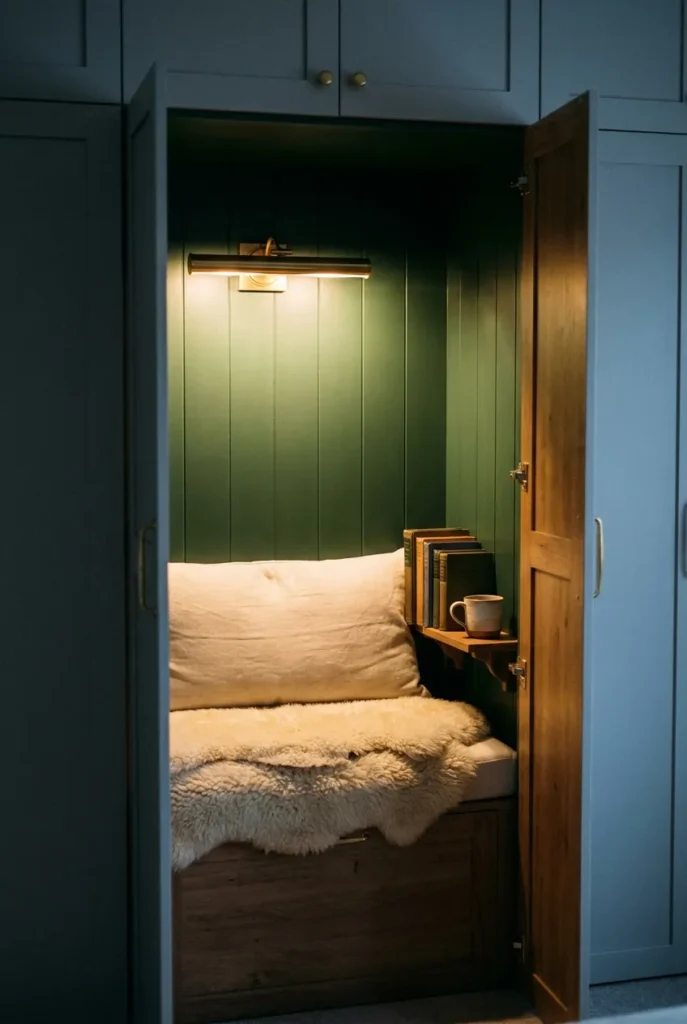
The Split-Zone Layout (How to Keep Your Storage)
Here’s the move competitors miss. A standard reach-in closet or freestanding wardrobe is usually 78 to 84 inches tall. Your seated head clearance only needs about 40 to 44 inches. That leaves 34 to 40 inches of vertical space above the bench for a hanging rod, a single shelf, or a row of fabric bins. You build the reading bench across the bottom 18 to 20 inches and run the storage above it.
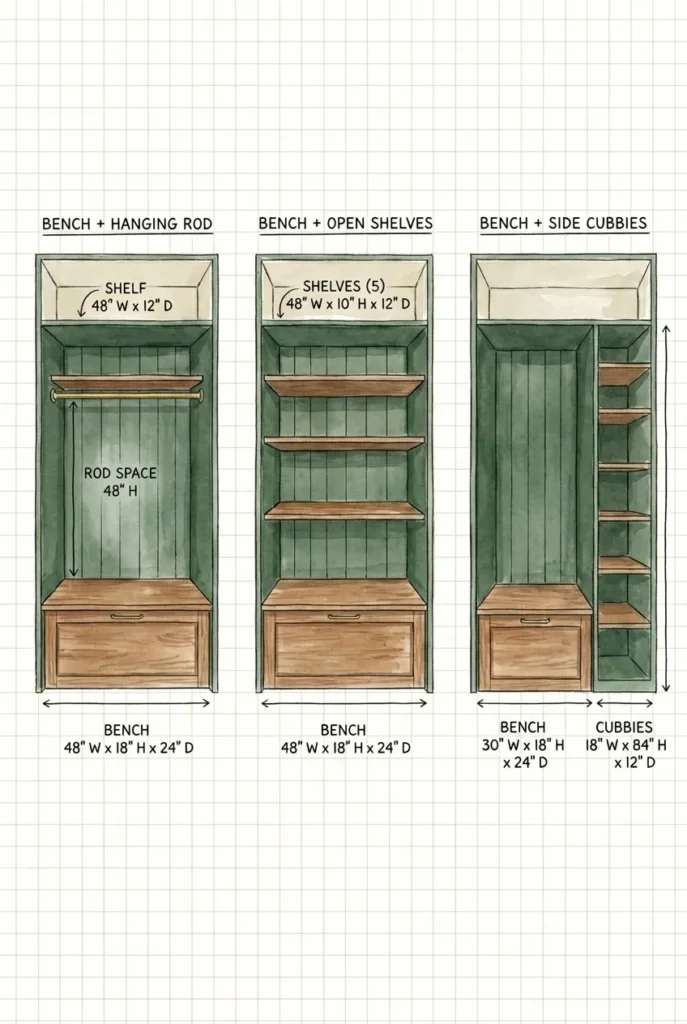
Three sketches for the split:
- Bench + hanging rod above. Bench at 18 inches, then a clear 30 to 36 inch gap (so you can swing your legs out and read), then a 24 to 30 inch hanging zone for off-season jackets and dresses. Best for narrow reach-in closets.
- Bench + open shelves above. Same bench height, then two shelves at 16-inch spacing for books, bins, or folded sweaters. Best for kids’ wardrobes and for anyone whose hanging storage already lives elsewhere.
- Bench + cubbies on one side. Bench runs three-quarters of the width, with a vertical column of three cubbies on the remaining quarter for shoes, bags, or library returns. Best for walk-in wardrobes wider than 48 inches.
I made the mistake of going all-in on a full closet conversion in my first apartment and then realized in October I had nowhere to hang a winter coat. Don’t do that. Pick a split before you measure anything else.
Measure Your Wardrobe Before You Buy Anything
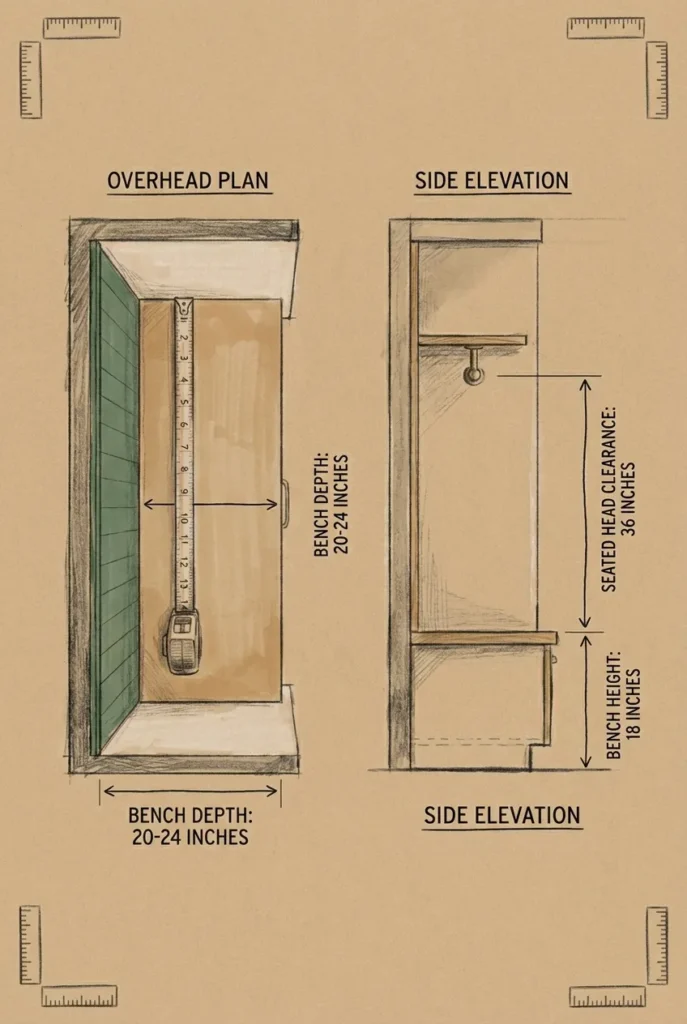
A wardrobe reading nook fails on two measurements: bench depth and seated head clearance. Get those right and the rest is decoration.
Bench depth needs to land between 20 and 24 inches. Less than 20 and you can’t tuck your knees up. More than 24 and the back of a reach-in closet pushes you into a slouch. If your wardrobe is shallower than 20 inches (some IKEA Brimnes units run 19.5), build the bench so it overhangs the front lip by 2 inches and add a face board to hide the gap.
Seated head clearance from the cushion top to the underside of the rod or shelf above wants to be at least 36 inches if you read with your back against the wardrobe wall, or 30 inches if you read with a bolster propping you upright. Most adults can’t make this work in a wardrobe shorter than 72 inches. Kids can fit comfortably in wardrobes as short as 60 inches.
Width matters less than people think. A 30-inch-wide wardrobe fits one curled-up adult with a throw. A 36-inch fits one stretched out with knees bent. A 48-inch fits two kids or one adult laid flat. If you’re in a studio apartment reading nook setup, the freestanding wardrobe route is usually the right call because you can move it later.
Lighting That Won’t Burn Your Sweaters Down
This is the section every viral wardrobe reading nook video gets wrong. Enclosed spaces with combustible materials (clothes, blankets, books, that’s all combustible) have rules. The National Electrical Code section 410.16 spells them out for clothes closets, and the same logic protects you in any enclosed wardrobe.
The National Electrical Code rules for closet luminaires require fixtures with a completely enclosed light source, and they require 12 inches of clearance between a surface-mounted LED fixture and the nearest storage area. Pendant fixtures and exposed-bulb fixtures are explicitly not permitted in clothes closets. So no bare Edison bulb dangling from a fabric cord, no matter how good it looks in the pin.
What does work:
- Plug-in swing-arm sconce mounted to the side wall of the wardrobe, with the cord routed down to a floor outlet through a small notch cut in the back panel. The enclosed shade satisfies the spirit of the code and the arm pivots over your shoulder onto the page.
- Battery-operated puck lights stuck under the upper shelf with adhesive. Three pucks at 100 lumens each give you about 300 lumens of reading light. No wiring, no drilling, no code worry. Best for renters.
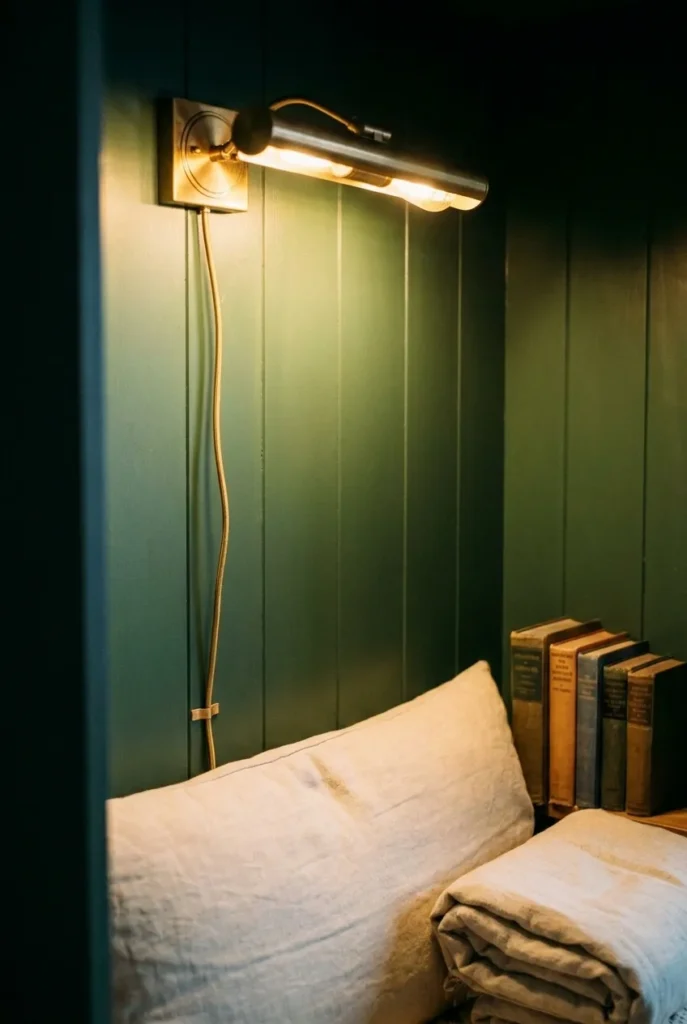
- Brass picture light mounted at the top of the back wall, plug-in version, pointing down at the cushion. Enclosed shade, low heat, decorative.
Use a 2700K bulb. The U.S. Department of Energy’s LED color temperature guide classifies 2700K as warm white, which reads like late-afternoon sun against linen and lets your brain settle into the parasympathetic state that makes reading feel like rest. Add a dimmer if your sconce takes one. Skip the dimmer and your 2700K bulb still reads like a dentist’s office at the brightest setting.
If you want a deeper lighting walk-through after this, the best reading nook wall sconces guide covers swing-arm versus picture light versus plug-in pendant tradeoffs in detail.
The Soft Layer: Cushion, Bolster, Throw
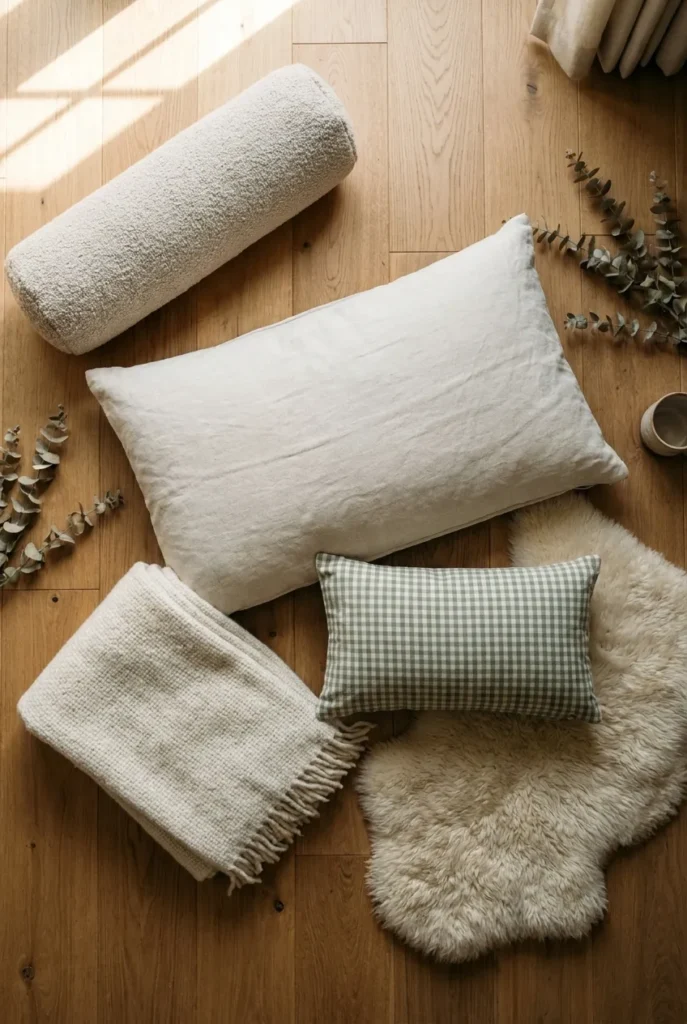
The bench cushion is where most builds get cheap and regret it. A 2-inch foam pad on plywood feels great for 6 minutes. After 40 minutes your tailbone files a complaint. Aim for at least 4 inches of high-density foam (1.8 to 2.2 pounds per cubic foot is the standard for seat cushions). For under $80, you can order a custom cut from FoamOrder or Foam Factory in your exact bench dimensions. Wrap it in a washable linen or canvas cover.
Add one lumbar pillow at the small of your back and one bolster at the wall end of the bench. The bolster doubles as a backrest when you flip your legs up. A wool or boucle throw goes folded at the far end, ready to grab. Sheepskin layered under your hip adds a temperature buffer that matters more than people expect because wardrobe interiors hold cold in winter.
Honest trade-off: floor cushions look amazing in photos. After half an hour your back disagrees. Build the bench properly the first time.
The DIY Wardrobe Reading Nook Build (Under $200)
For the budget version inside an existing reach-in closet, here is the build order and the totals I’ve actually seen hold in 2025 to 2026 pricing.
Materials and rough cost:
- 1 sheet 3/4-inch plywood, cut at the lumberyard to your bench top and sides: $55 to $70
- 2×4 framing for the base box: $18
- 1 x 4 pine for the front face: $14
- Custom 4-inch foam cushion cut to size: $65 to $85
- Linen cover fabric or pre-made cushion cover: $25 to $40
- Plug-in brass sconce or picture light: $30 to $60
- 2700K bulb: $6
- Paint, screws, brackets: $20
Build order:
- Empty the wardrobe and vacuum it out. Save the existing hanging rod and brackets if you can.
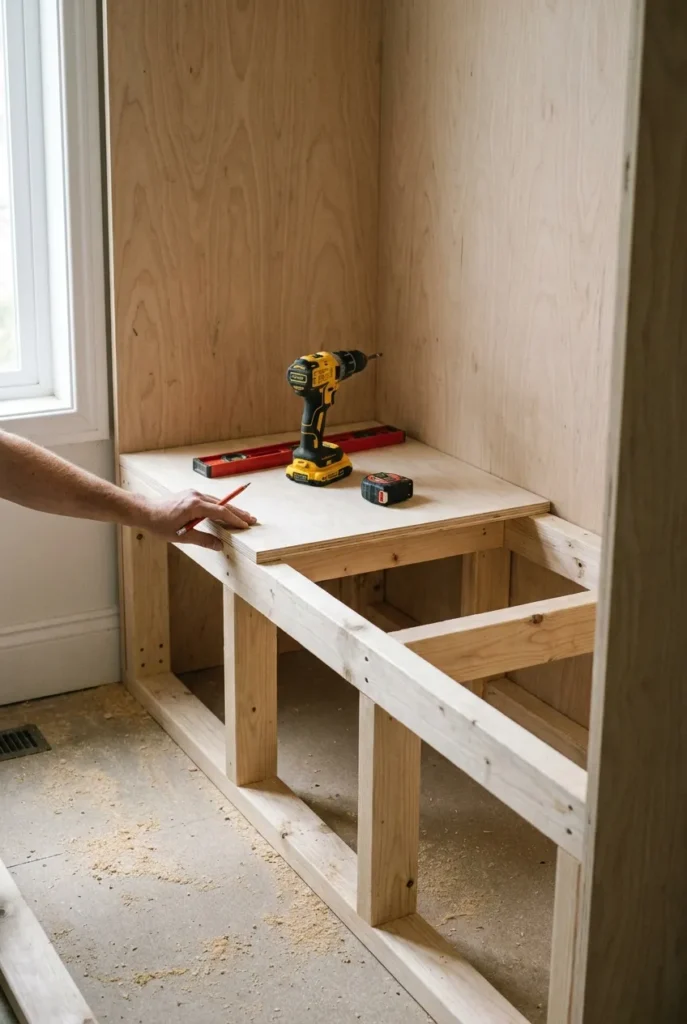
- Frame a 2×4 base box at 18 inches tall, screwed to the side walls, never to the back wall (the back is often thin and won’t hold).
- Cap the box with plywood, sanded edges, screwed down from above.
- Face the front lip with 1 x 4 pine for a finished look. Caulk the gap where it meets the wall.
- Prime and paint. A semi-gloss in a darker color than your wardrobe interior makes the nook feel deeper.
- Reinstall the hanging rod above the bench at your chosen height. If you went with the open-shelf split, cut and install your shelves now.
- Mount the sconce or picture light per the 12-inch clearance rule above.
- Drop in the cushion, layer the textiles.
Finish time: one full weekend if you’re competent with a drill, two if you’re learning. Adventures from my own build log: the first bench I framed was 2 inches too tall and my knees still remember.
Renter-Safe Wardrobe Reading Nook (Zero Drill)
If your lease bans drilling or your landlord is the type to deduct from a deposit for a thumbtack, you can still build a complete wardrobe reading nook in one afternoon. The trick is using a freestanding wardrobe as the shell.
The three freestanding wardrobes that work well:
- IKEA Pax frame (without doors, or with cracked-open doors). 39 inches wide, 23 inches deep, 79 inches tall. Pax is the workhorse. Pull the interior fittings, slide in a daybed mattress segment or a custom cushion, and the bench is done. The 23-inch depth is right at the upper edge of comfortable.
- IKEA Brimnes with the mirror doors removed. 30 inches wide, 19.5 inches deep. Tighter, fits one curled adult, kid-perfect.
- Vintage armoire from Facebook Marketplace. Often deeper than IKEA (24 to 28 inches), heavier, more character. Average price in my market right now is $80 to $250.
Renter-safe install steps: no anchoring to the wall (unless you use the included anti-tip strap, which only needs a single small screw and patches with a dot of toothpaste at move-out). Cushion sits on the wardrobe floor or on a low platform of stacked plywood. Light is battery puck or plug-in only. Off-season clothes vacuum-sealed in flat bags slide under the platform for storage you didn’t lose.
If you want more no-drill options elsewhere in your home, the reading nook guide for renters covers freestanding setups across the bedroom.
The Narnia Effect: Styling the Doors and Reveal
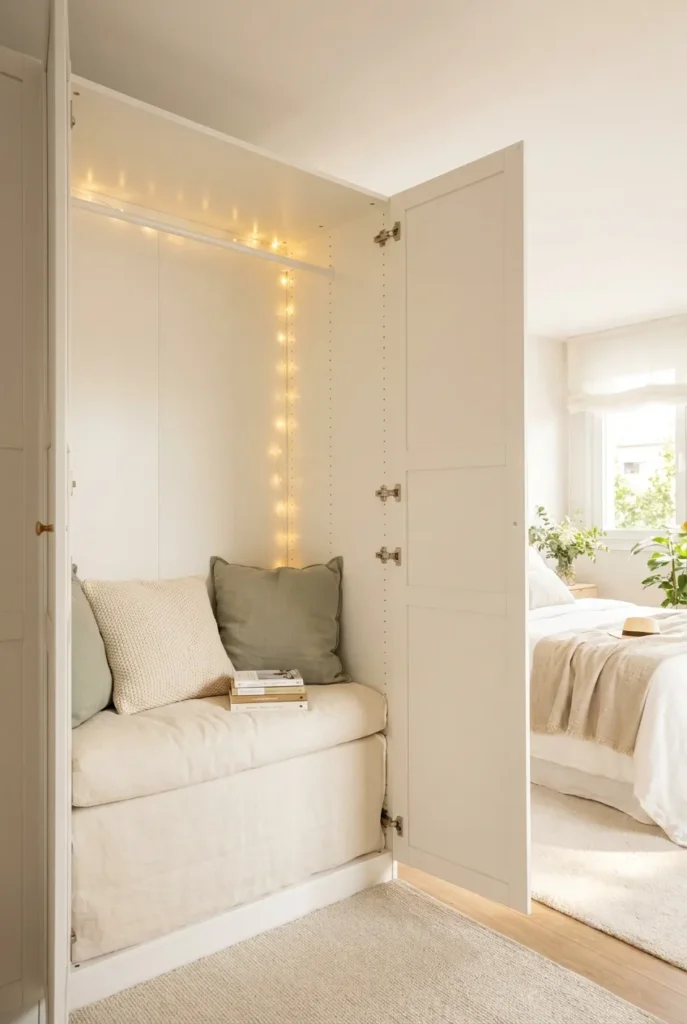
The pin-worthy moment is the door cracked open. That’s the Narnia wardrobe reading nook visual the algorithm rewards, and it’s worth styling on purpose.
Three door treatments that work:
- Doors removed, curtain installed. Hang a tension rod across the top of the wardrobe opening with two linen panels you can close for privacy or pull aside for the reveal. Best for renters because there’s no carpentry.
- Doors kept, swung open and styled. Tack a small framed botanical print or a brass hook with a hanging throw to the inside of each door. When the doors are open, the interiors become part of the scene.
- Doors replaced with cane or fluted panels. A weekend swap that takes the wardrobe from generic to deliberate. Pulls about $40 of cane webbing and an hour of staple gun work.
For a kids’ nook, paint the back wall in chalkboard paint and add a single fairy-light strand for the actual Narnia move. The fairy lights stay USB-powered with a battery pack so there’s no hot fixture near the textiles.
Kids’ Wardrobe Reading Nook (and the Safety Specs Nobody Lists)
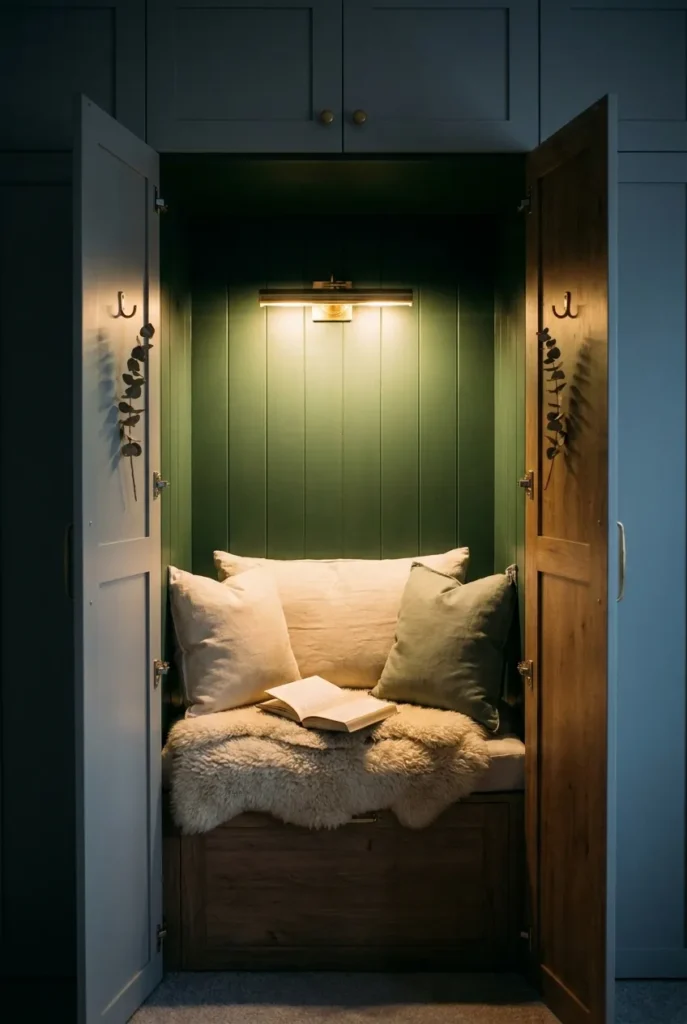
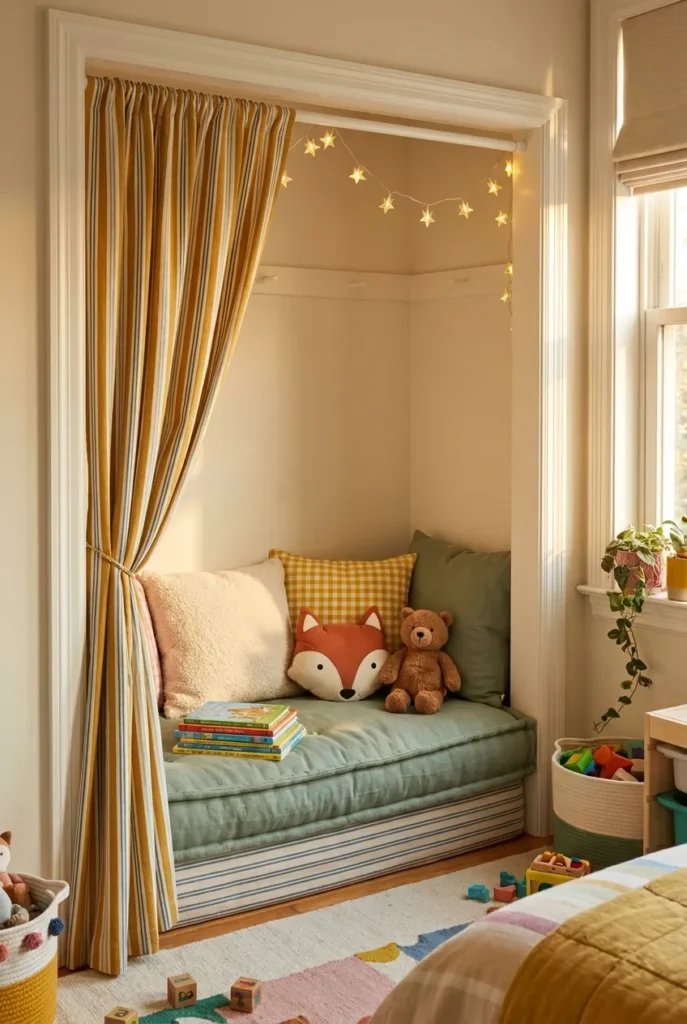
A kids reading nook in a wardrobe is the easiest sell on Pinterest and the easiest to get wrong on safety. Three specs nobody writes down:
- Anchor the wardrobe to the wall. A child climbing into a freestanding wardrobe shifts the center of gravity forward. Tip-over deaths from furniture are real. Use the manufacturer’s anti-tip strap or a generic furniture strap kit (about $12 on Amazon).
- No hardwired fixture inside the wardrobe if the kid is under 8. Battery puck lights only, switched off at bedtime.
- Door type matters. Sliding doors can crush little fingers. Hinged doors with soft-close hinges or doors removed entirely with a curtain are safer.
Layer in floor cushions, a small bookshelf at toddler eye level (28 inches), and a warm wool rug just outside the wardrobe so they can flop in and out. A toddler reading nook works best with the doors removed entirely. A tween wants the doors and the privacy. If you’re styling for a tween, the tween reading corner ideas guide has color palette and signage moves that land with that age.
Ventilation, Condensation, and the Stuffy Box Problem
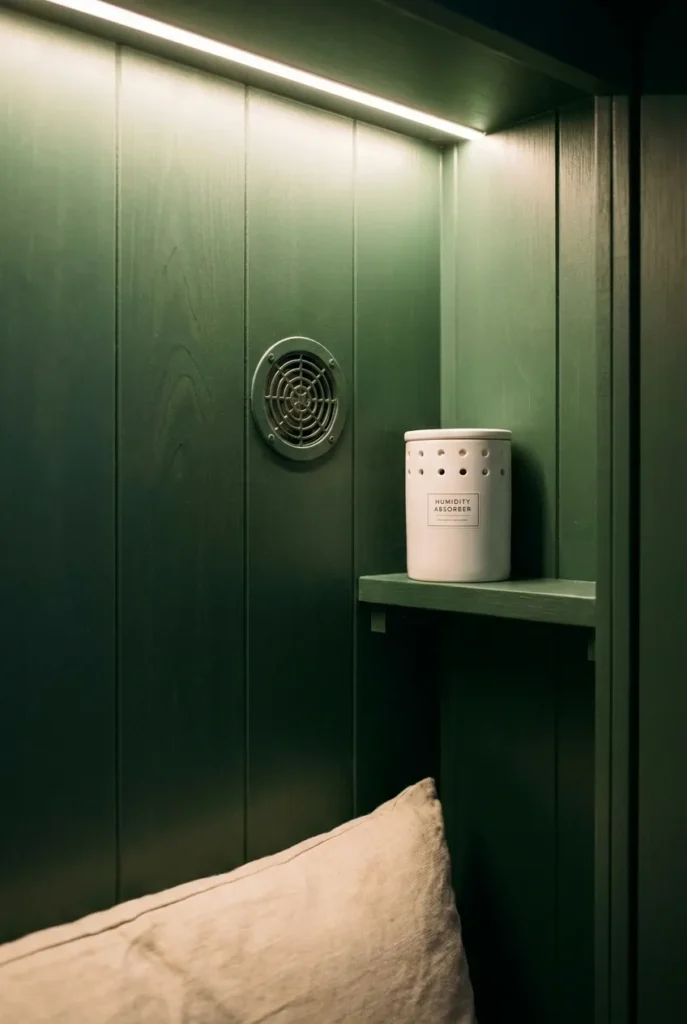
Honestly, this is the failure mode that nobody warns you about. An enclosed wardrobe with no airflow and one warm body in it gets stuffy in 20 minutes. Especially in summer. Especially after a hot shower in the next room. And condensation on the back wall over a humid week ruins paint and grows mildew.
Three fixes:
- Crack the doors at least 4 inches when you’re inside. The “Narnia” pin look does this for you.
- Drill a 2-inch vent hole near the top of the back panel and one near the bottom (renters skip this and use a small clip-on USB fan instead).
- Toss a moisture absorber (DampRid or similar, $6 at Target) on a corner shelf and swap it every 60 days. This matters most if your wardrobe shares an exterior wall.
For a walk-in wardrobe reading nook, ventilation is rarely a problem because the volume of air is bigger. For a reach-in or freestanding wardrobe, treat it like a tent.
Walk-In Wardrobe Reading Nook (For When You Have the Space)
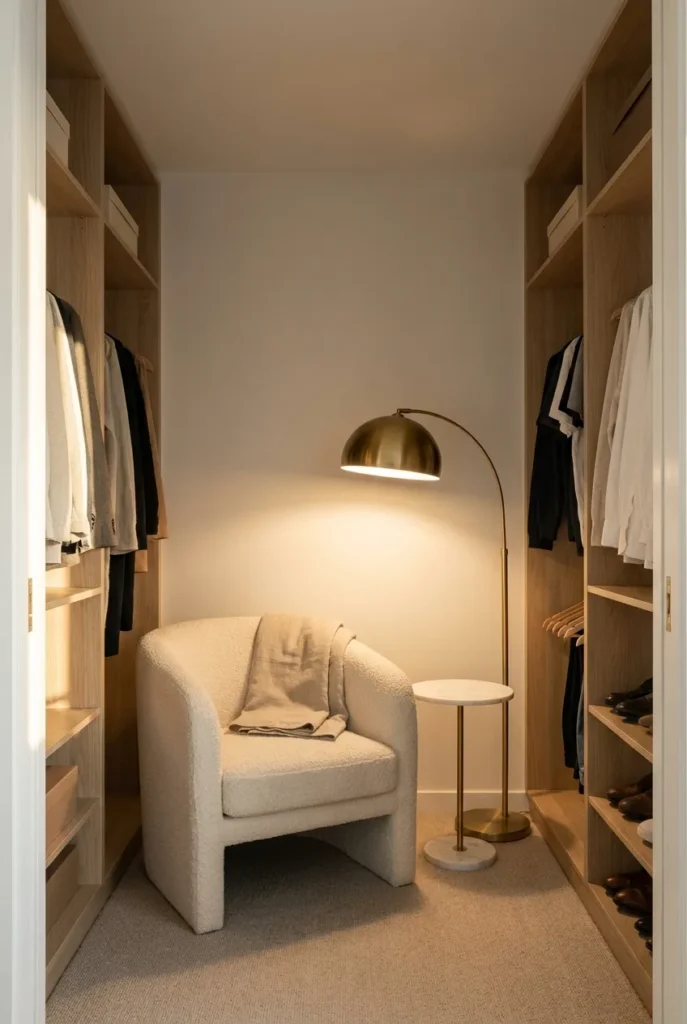
A walk-in wardrobe reading nook is the dream version because you keep all your storage and add a real chair. The rules change a bit.
Bench is optional. An accent chair or chaise fits comfortably in any walk-in deeper than 48 inches. A 32-inch round side table parks beside it. The lighting question gets easier because most walk-ins already have a ceiling fixture you can swap for a recessed LED or add a wall sconce above shoulder height. The NEC clearance rule still applies for any fixture above storage.
Best move for a walk-in: turn the deepest dead-end wall (the one opposite the door) into the reading wall. Push hanging rods to the side walls, mount a swing-arm sconce on the back wall, set the chair facing into the room with the books to the side. The doorway frames you when someone glances in, which feels like a tiny sanctuary instead of a closet you happen to read in.
Frequently Asked Questions
How do you turn a wardrobe into a reading nook without losing storage?
Split it into two vertical zones. Build a bench at 18 inches tall across the bottom, then leave 30 to 36 inches of head clearance above the cushion, then use the top 24 to 30 inches for a hanging rod, a single shelf, or fabric bins. This split keeps your hanging storage and gives you a working reading bench in the same footprint.
Do you need to remove the wardrobe doors?
Not always. Doors swung open and styled (with hooks or small art on the inside) become part of the scene. Doors replaced with cane panels or a tension-rod curtain give you the Narnia reveal look. Doors removed entirely work best for kids’ nooks and tight reach-in closets where the hinges eat usable depth.
Can renters build a wardrobe reading nook?
Yes. Use a freestanding wardrobe (IKEA Pax, Brimnes, or a vintage armoire from Facebook Marketplace), slide in a custom cushion across the base, light it with battery puck lights or a plug-in sconce, and skip every step that involves drilling into walls. The whole setup breaks down in under 30 minutes on moving day.
How do you light a wardrobe reading nook safely?
Use only fixtures with a completely enclosed light source per NEC section 410.16. Keep 12 inches of clearance between the fixture and any storage area. Best options: a plug-in swing-arm sconce, a brass picture light, or battery-operated puck lights. Skip bare bulbs, exposed Edison filaments, and pendant fixtures.
How small can a wardrobe reading nook be?
A wardrobe 30 inches wide by 20 inches deep by 60 inches tall fits a child or a curled-up adult under 5’5″. For most adults, aim for at least 36 inches wide and 72 inches tall. Anything smaller and you’ll feel boxed instead of cocooned.
What cushion fits inside a wardrobe?
A 4-inch high-density foam custom-cut to your bench dimensions, wrapped in linen or canvas. Twin daybed mattresses fit some freestanding wardrobes if the depth is at least 24 inches, but they push you past comfortable seated reading depth in standard reach-ins.
Will an enclosed wardrobe get stuffy or grow mildew?
It can. Crack the doors when you’re inside, drill or add a small vent at the top and bottom of the back panel, and keep a moisture absorber on an upper shelf if the wardrobe sits against an exterior wall. A clip-on USB fan is the renter version of ventilation.
Curl Up Soon
Pick your split first, measure twice, and order the cushion before you frame the bench. That’s the order that keeps the project from stalling. If you want help choosing the lighting setup for your specific wardrobe shape and door type, the lighting guide linked above walks through the picture-light versus swing-arm decision in more detail. Tell me in the comments what wardrobe you’re working with and whether you’re keeping the doors. I’ll help you pick the split.
Keep reading
More cozy nook ideas
 Small Spaces
Read →
Small Spaces
Read →
10 Small Reading Nook Ideas for Adults
One high-back chair, one clamp-on lamp, one $19.99 tray table. At IKEA US prices this month, that’s a full reading corner for…
 Home Library & Bookshelves
Read →
Home Library & Bookshelves
Read →
14 Ideas for a Fireplace with Bookshelves on Each Side on a Budget
Two bookcases, two plug-in lamps, two wall straps. At IKEA US list prices this month, that adds up to $237.98 before tax,…
 Study & Craft Nooks
Read →
Study & Craft Nooks
Read →
16 Kids Homework Station Ideas Little Ones Will Love
Two IKEA pieces, one empty corner, $109.98 before tax. That’s the first kids homework station on this list, and it fits in…