
Reading Nook for Renters: 10 No-Drill, No-Damage Setups That Won’t Cost You Your Deposit

You don’t need a bay window, a renovation budget, or a landlord who likes you. You need three pieces, one afternoon, and a clear list of what you can and can’t do on rental walls. This guide gives you exactly that. Ten complete reading nook setups for renters, every one of them no-drill, no-damage, and deposit-safe. Each setup names the chair, the light, the soft layer, and the install method, so you can stop scrolling Pinterest and start sitting in your nook by Sunday.
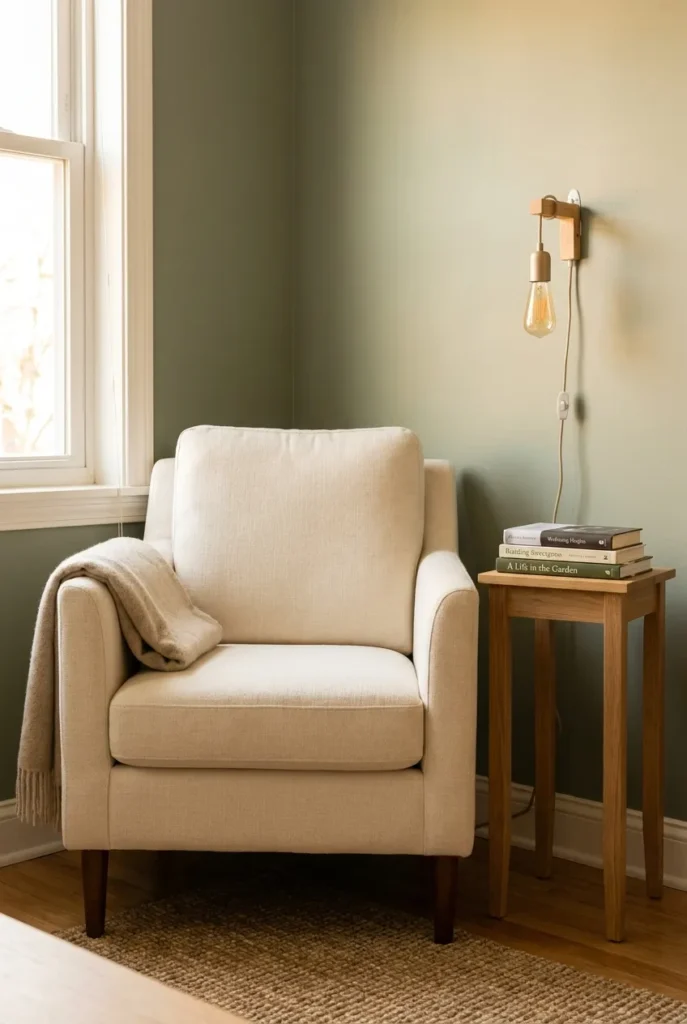
The primary keyword on this page is the same problem you’ve been Googling at 11 p.m. on the couch. A reading nook for renters that actually looks like the saved pins, holds up to a security deposit walk-through, and fits a corner the size of a doormat. Here’s the build.
The Deposit-Safe Three: Non-Negotiable Rules for a Reading Nook for Renters
Before any of the ten setups, three rules. Break them and you’re patching nail holes the morning you move out. Honor them and your landlord won’t notice a thing.
Rule 1: Nothing in the wall. No nails, no screws, no anchors. Adhesive hooks rated for the weight you’re hanging are fine. Tension rods are fine. Freestanding pieces are fine. Anything that breaks paint is not.
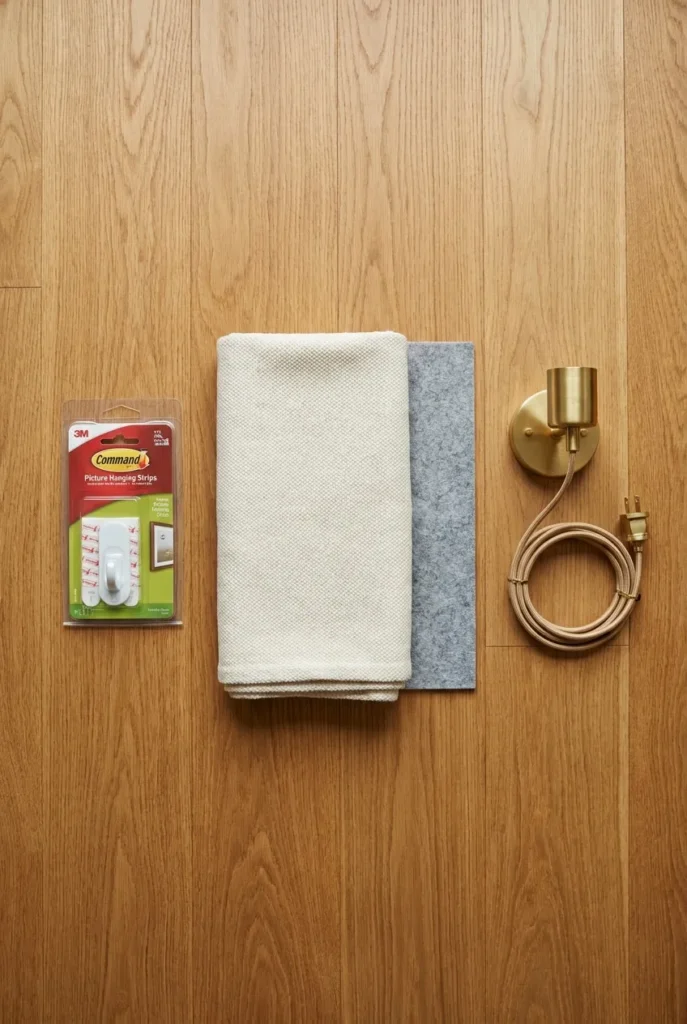
Rule 2: Nothing on the floor that stains. Skip the unfinished jute rug on light hardwood. Use a washable rug with a low-profile non-slip pad. The pad matters more than the rug. Cheap rubber pads can leave a yellow ghost on engineered wood within six months.
Rule 3: Nothing plugged in that pulls more than 60 watts on a single outlet. Reading nooks need warm light, not a power strip on fire. One plug-in sconce or one floor lamp, plus a phone charger. That’s the budget.
That’s the framework. Tape it to your fridge. Every setup below respects all three.
Setup 1: The Corner Chair and Floor Lamp (Under $250 Total)
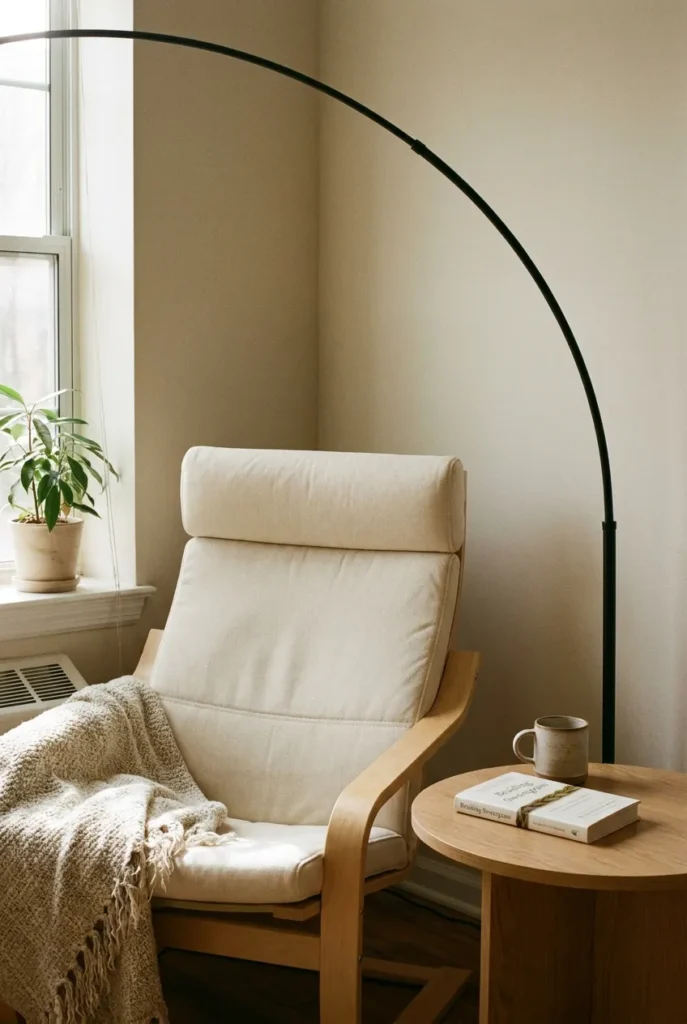
The easiest reading nook for renters in this entire list. One armchair, one arc floor lamp, one small side table. Zero things on the wall. Pick an awkward corner that’s at least 4 feet by 4 feet and you’re done.
Use an accent chair like the IKEA Poäng or the Article Sven Mini. Both sit under $300 used or on sale. Position the chair 18 inches from the wall so the arc lamp can curve over your shoulder without scraping plaster. Drop a 32-inch round side table on the dominant side, the side you’ll set your mug down on. Keep the table 2 inches lower than the chair arm so you’re not reaching up. That’s the 18-inch reach rule, and it’s the difference between a cute corner and a corner you actually sit in.
Honest trade-off: arc lamps tip if you have a curious cat. Weight the base with a bag of rice taped underneath. Not glamorous, very effective.
If you want more corner-specific guidance on chair placement and proportions, I broke down 15 ways to handle awkward corners in corner reading nook ideas that work in small apartments.
Setup 2: The Plug-In Sconce Workaround (No Wiring, No Drilling)
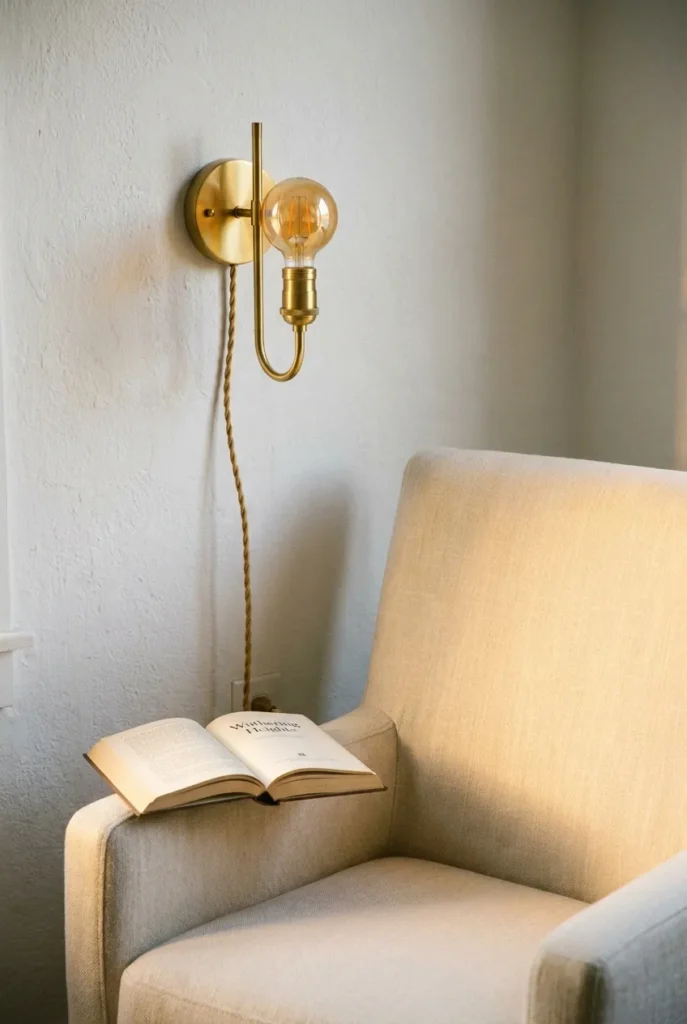
This is the setup that unlocks every “I can’t have wall lights because I rent” reader. Plug-in sconces exist, they’re under $80, and they mount on adhesive hooks rated for 5 pounds. The Hudson Valley Lighting plug-in series, the Brightech Sofia, and several Wayfair private-label options all work.
Here’s the method. Find a wall stud-free patch of paint behind your reading chair. Press two 3M Command large picture hanging strips to the back of the sconce mount. Press firmly for 30 seconds, wait one hour, then hang. Run the cord down behind the chair, secure it with adhesive cord clips, and plug into the wall outlet. The whole install takes 20 minutes.
The bulb matters more than the fixture. Use a 2700K warm white LED, 8 to 10 watts, equivalent to a 60-watt incandescent. Anything cooler than 3000K and your nook reads like a dental office at 9 p.m. The U.S. Department of Energy’s ENERGY STAR lighting guide breaks down Kelvin temperatures clearly if you want a deeper read.
Failure mode: skip the dimmer and your warm bulb still feels harsh. Add a $15 plug-in dimmer between the cord and the wall. Problem solved in five minutes.
Setup 3: The Tension Rod Curtain Cocoon
If your reading nook lives in front of a window, this changes everything. A tension rod fits inside the window frame, no brackets, no drilling, no holes. You get blackout privacy or sheer light filtering without touching the wall.
Measure the inside width of your window frame. Buy a tension rod 1 inch longer than the measurement so it grips. Hang light-blocking thermal curtains for rainy-day reading, or sheer linen for soft 4 p.m. light filtering through. Ikea’s RIKTIG hooks plus tension rod combo lets you mix two layers, sheer plus blackout, on a single rod.
The trick most renters miss: you don’t have to limit tension rods to windows. A wide doorway or a narrow alcove takes a tension rod just as well, and suddenly you have a curtained reading hideaway that closes off from the rest of the apartment. Hygge in under $40.
Quick spec: standard tension rods hold 8 to 15 pounds depending on diameter. A pair of mid-weight cotton curtains weighs roughly 4 pounds together. You’re well under the limit.
Setup 4: The Floor Cushion Cluster (For Tiny Studios)
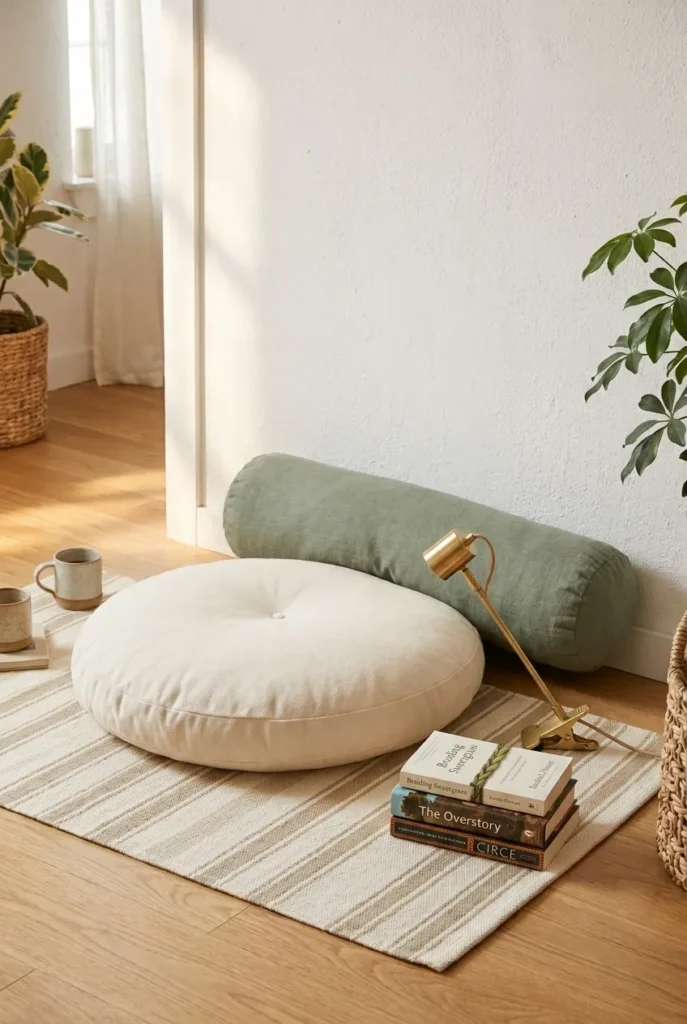
When the apartment is too small for a chair, the floor wins. A 30-inch floor cushion plus two bolster pillows plus a washable 4 by 6 foot rug equals a complete reading nook for renters with zero furniture in the budget.
I’ll be honest. Floor cushions look incredible in photos. After 40 minutes your back will file a complaint. The fix is structural. Lean the cushion against a wall and add a firm 24-inch bolster pillow behind your lower back. Lumbar support changes the whole experience. Without it, you’re folding yourself in half over a paperback by minute fifteen.
For the cushion itself, look for a 28 to 32 inch round filled with shredded memory foam, not polyester fiberfill. Fiberfill flattens in two weeks. Memory foam holds shape for years.
For more on layering soft goods and picking cushion fills that actually hold up, I covered the full breakdown in the best window seat cushions for reading nooks by style and budget. The picks translate directly to floor cushion shopping.
Setup 5: The Bookshelf Cocoon (Two Tall Shelves, One Chair)
The architectural trick magazines won’t tell you. Two tall bookcases positioned 4 feet apart create an instant alcove. Slide an armchair between them and you’ve built a nook out of furniture, not walls. Zero drilling, zero damage, and when you move out it’s just three pieces of furniture.
Use the IKEA Billy in 80-inch height, the Kallax in 5×5, or any pair of identical tall shelves. The matching is what makes the architecture read. Mismatched shelves look like storage. Matched shelves look like a built-in.
Stage the shelves with 60% books, 30% objects (a small lamp, a framed photo, a plant), and 10% open space. Open space is what keeps the cocoon from feeling claustrophobic. Skip this ratio and your nook starts feeling like a storage closet within a week.
Failure mode: top-heavy shelves loaded with books up high can tip if a kid or pet climbs them. Use anti-tip straps that anchor to the back of the shelf and loop around the leg of nearby furniture. No wall anchor required.
Setup 6: The Hammock Chair Hang (Ceiling Hook Workaround)
Hammock chairs feel like a fantasy, but most renters skip them because ceiling-mounting feels off-limits. There’s a workaround. Freestanding hammock chair stands exist, they’re under $150, and they fold flat for moving day.
Look for a stand with a 250 to 300 pound weight rating and a 78-inch arc height. The Vivere brand and the Sorbus C-stand are the two most reliable. Position the stand on a low-pile rug to prevent floor scratches. A small side table within 18 inches of the swing path holds your book and mug.
Soft layer: a sheepskin draped over the hammock seat adds texture and warmth. Linen throw underneath the sheepskin keeps the wool from sliding around during the kind of long, gentle swinging that makes you forget what chapter you’re on.
This setup needs roughly a 6-foot by 6-foot footprint. If your studio is tighter than that, skip it and revisit setup 4.
Setup 7: The Peel-and-Stick Accent Wall (Behind the Chair)
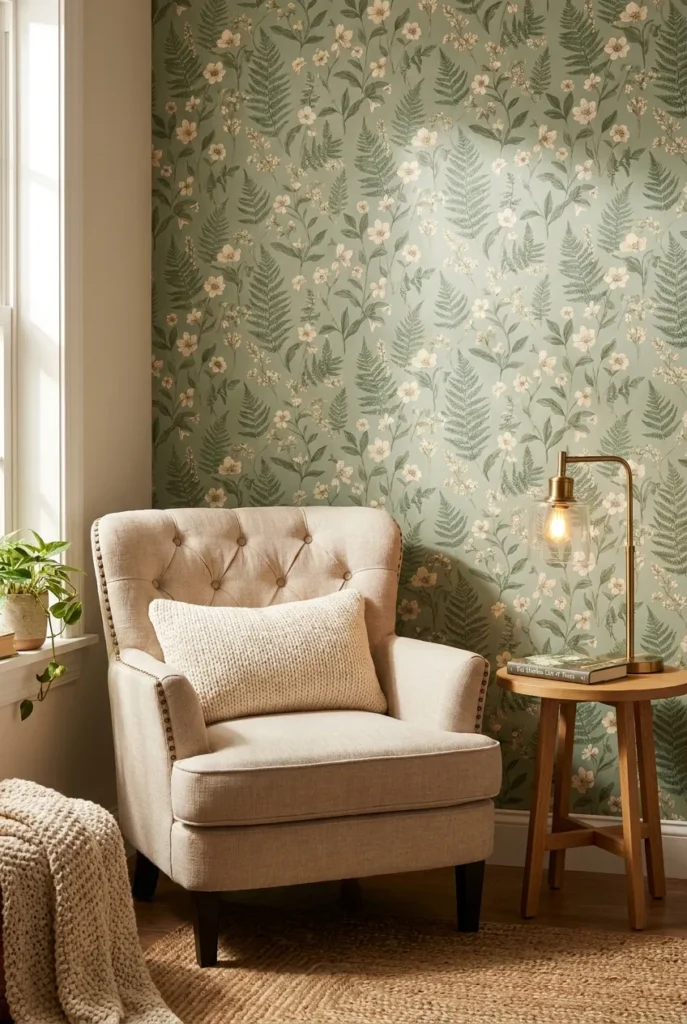
A pattern behind your reading nook does what no other decor move can. It turns a random corner into a clearly defined zone. Peel-and-stick wallpaper from Tempaper, Chasing Paper, or Spoonflower removes cleanly with no residue, costs $35 to $80 per roll, and installs with a credit card and a pair of scissors.
Measure the wall behind your chair. A standard reading nook accent zone is 36 to 48 inches wide and full ceiling height. One roll usually covers it. Go bold here. Botanical prints, dark moody florals, vertical stripes in sage and cream, anything that has a clear pattern repeat. Pale solids look like primer.
For palette guidance on coordinating wall pattern to chair fabric and throw color, I walked through the math of warm-cozy color schemes in reading nook color palette ideas that actually work together.
Honest install note: peel-and-stick goes on best at 65 to 75 degrees Fahrenheit. Below 60 the adhesive doesn’t bond, above 80 it bonds too aggressively and tears the wall when you remove it. Time the install accordingly.
Setup 8: The Closet-Door-Removed Hideaway
If your apartment has a closet you barely use, this is the highest-impact setup on the list. Most closet doors are mounted on lift-off hinges. You can remove the doors in 10 minutes with a screwdriver, store them in a closet or under the bed, and reinstall before you move out. Zero damage.
Inside the closet, lay a 24×36 inch sheepskin or a small washable rug. Add a floor cushion or a low bench, a tension-rod curtain across the closet opening for privacy, and a clip-on book light from above. You’ve turned dead storage into a curtained reading hideaway.
Closet dimensions matter. You need at least 28 inches of interior depth for adult legs. Anything shallower works better as a kids’ reading tent than a real adult nook.
Failure mode: hung clothes still on the closet rod above will brush your head. Remove the rod (also lift-off in most builds) or push everything to one side and cover with a hanging fabric panel.
Setup 9: The Plug-In Picture Light Above a Small Art Cluster
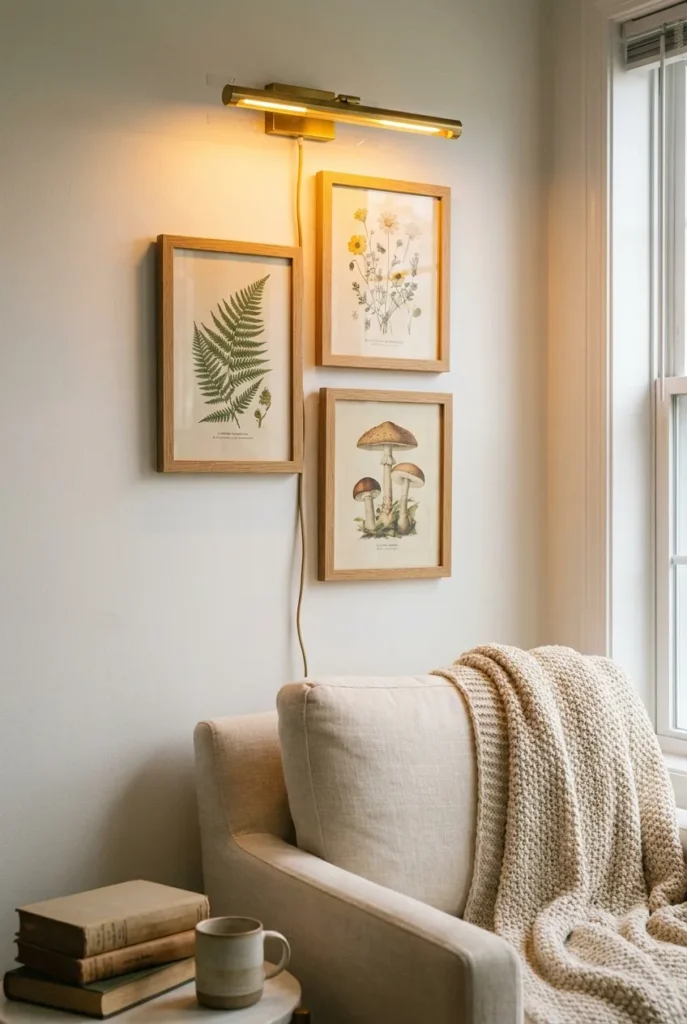
Wall art is the easiest renter win on this list. Use 3M Command picture hanging strips rated for the weight of your frame. The medium strips hold 4 pounds per pair, the large hold 16 pounds per pair. Hang three to five small frames in a loose cluster behind your chair. According to 3M’s official Command product specs, the adhesive removes cleanly from painted drywall with a slow downward pull, leaving no residue when installed and removed correctly.
Above the cluster, mount a plug-in picture light. The Cocoweb plug-in series and the House of Troy brass picture lights both come with adhesive mounting options. Run the cord down the back wall, secure with cord clips, and plug into the nearest outlet.
The art cluster doubles as a focal point that draws the eye to your reading corner from across the room. Suddenly the corner reads as intentional, not accidental. That’s the visual cue that turns a chair against a wall into a designed nook.
Setup 10: The $287 Complete Build (Real Numbers, Real Products)
Most “budget reading nook” articles wave vaguely at affordability. Here’s an actual totaled build under $300, every item linked to a category, every install no-drill.
The $287 reading nook for renters:
- IKEA Poäng armchair, used or on sale: $129
- 30-inch round oak side table from Target, Threshold line: $45
- Brightech Sofia plug-in sconce: $68
- Mainstays 4×6 washable cream rug from Walmart: $24
- Pair of cream lumbar pillows from HomeGoods: $21
Total: $287
Stretch it with a $15 plug-in dimmer and a $12 oat wool throw from Target if budget allows. The base $287 still hits every cozy beat the $1,200 Pinterest pin promises.
Honest reality check: this build sits in a 5 by 5 foot footprint. Smaller corners need setup 4 instead. Bigger spaces can swap the Poäng for a wider Article Sven Mini at $499, which is still well within reasonable. The point is the framework, not the exact dollar.
FAQ
How do I create a reading nook in a rental without damaging walls?
Stick to three rules: nothing in the wall, nothing on the floor that stains, and nothing plugged in that pulls more than 60 watts on one outlet. Use adhesive hooks for art and sconces, tension rods for curtains, and freestanding furniture for the structure. Every setup in this guide follows that framework.
Can Command Strips really hold a sconce or picture frame without damaging paint?
Yes, when used within their weight rating and removed correctly. Medium strips hold 4 pounds, large strips hold 16 pounds. Press firmly for 30 seconds during install, wait an hour before hanging, and remove with a slow downward pull at the tab. Pulling out (away from the wall) is what tears paint.
What chair works best for a small reading nook in a rental?
The IKEA Poäng and Article Sven Mini are the two most reliable picks under $400 because both fit a 4×4 foot corner, support adult body weight without bottoming out, and resell well when you move. Avoid wing chairs and oversized recliners in spaces under 600 square feet.
How do you light a reading nook without rewiring or drilling?
A plug-in sconce mounted with adhesive picture hooks, a freestanding arc floor lamp, or a clip-on book light all work. Use 2700K warm white LED bulbs rated 8 to 10 watts. Add a $15 plug-in dimmer between the lamp and the outlet for evening reading.
What size rug works for a renter reading nook?
A 4×6 foot washable rug fits most reading corners and keeps the chair fully on the rug for visual cohesion. Pair with a thin felt non-slip pad. Skip rubber pads on engineered wood, they can yellow the floor finish over time.
Do I need a window for a reading nook?
No. Setups 1, 2, 5, 8, 9, and 10 all work without natural light. The plug-in sconce and warm 2700K bulb do the work a window would.
How much should I budget for a complete renter reading nook?
Setup 10 totals $287 with real products from Target, Walmart, IKEA, and HomeGoods. Tighter budgets can hit $150 with the floor cushion cluster from setup 4. Stretch builds with hammock chairs or peel-and-stick wallpaper land between $400 and $500.
The Last Thing Worth Saying
The Pinterest version of a reading nook for renters looks like it cost $2,000 and required a contractor. The real version costs under $300, takes one Saturday afternoon, and removes cleanly when your lease ends. The ten setups above all live in the second category. Pick the one that fits your corner, your budget, and your tolerance for sitting on the floor.
What’s the corner you’re staring at right now? The one that’s been collecting laundry baskets and Amazon boxes for six months? That’s the spot. Start with setup 1 if it has at least 4×4 feet of clear space. Setup 4 if it doesn’t. Either way, this is the weekend.
Keep reading
More cozy nook ideas
 Nook Ideas
Read →
Nook Ideas
Read →
10 Dog Nook Ideas You’ll Want to Curl Up In
Warm light from one floor lamp, a chair turned away from the TV, and your dog asleep on a bolster bed beside…
 Nook Ideas
Read →
Nook Ideas
Read →
21 Window Sill Reading Nook Ideas for Adults
Most apartment window sills are deep enough for a candle and not much else. By October the glass breathes cold on your…
 Home Library & Bookshelves
Read →
Home Library & Bookshelves
Read →
12 Ideas for Built-In Bookshelves Around the Fireplace for Book Lovers
Thirty-two inches between uprights. Six inches of bare masonry around the firebox. Twelve inches of shelf depth. Get those three numbers right…
2 Comments