DIY Reading Nook — How to Build One on Any Budget
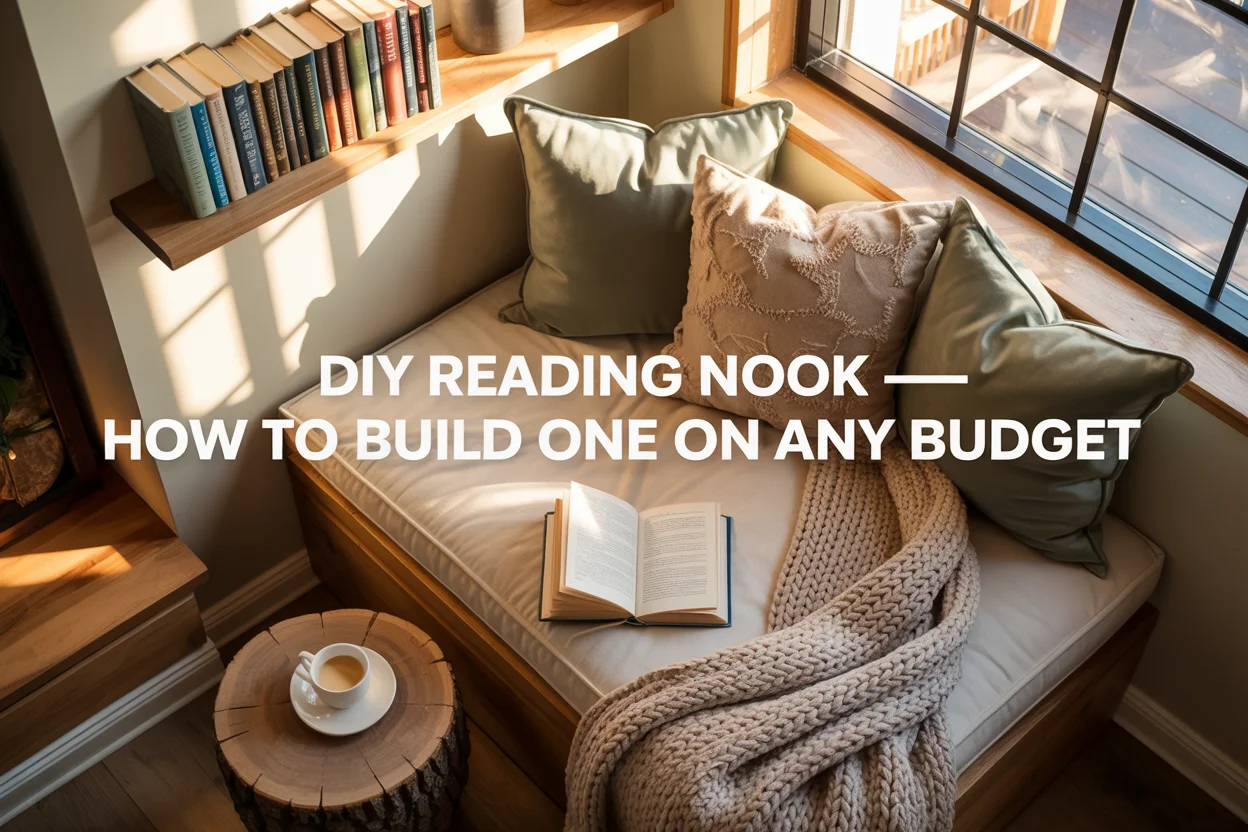
There is something deeply satisfying about carving out a quiet corner in your home where the only thing demanding your attention is the next page of a good book. A DIY reading nook is not a luxury reserved for sprawling farmhouses or Pinterest-perfect homes with bay windows — it is a project anyone can pull off, whether you have $50 or $500 to spend.
Pinterest searches for “reading nook ideas” have surged by 245% this year, and “comfy reading chair small spaces” is up a staggering 455%. People are done with big renovations and drawn toward micro-makeovers — small, intentional pockets of comfort within the spaces they already have. This guide walks you through building your own reading nook step by step, with real budget breakdowns and practical tips that work for renters, homeowners, and everyone in between.
Why Every Home Deserves a Reading Nook
A reading nook is more than a decorating trend. It is a lifestyle upgrade that turns dead space into a daily retreat. That awkward corner beside the staircase, the unused closet in the hallway, or the bare stretch of wall beneath a window — these are all prime candidates for a transformation that costs far less than you think.
The beauty of a DIY approach is control. You choose the size, the style, and the budget. You are not locked into a contractor’s timeline or a furniture store’s markup. And the best part? Even the simplest reading nook — a floor cushion, a lamp, and a stack of books — can become the most-used spot in your house.
If you are looking for broader inspiration before diving into the build, our guide on 25 cozy reading nook ideas for every style and space covers everything from boho corners to dark academia retreats.
Step 1 — Choose Your Spot
The foundation of a great reading nook is location. You want a space that feels slightly separated from high-traffic areas, ideally with access to natural light. Here are the most common spots people overlook:
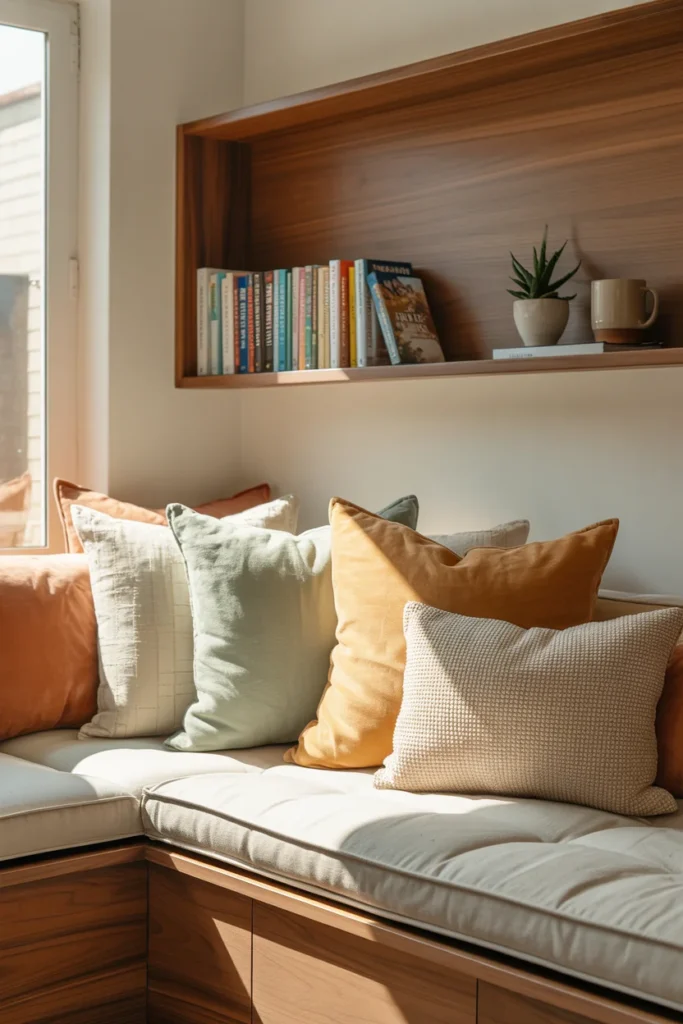
Window recesses are the gold standard. If you have a window with even 12 inches of depth beneath the sill, you can build a bench seat with storage underneath. For dedicated window seat inspiration, check out our collection of window seat reading nook ideas with storage.
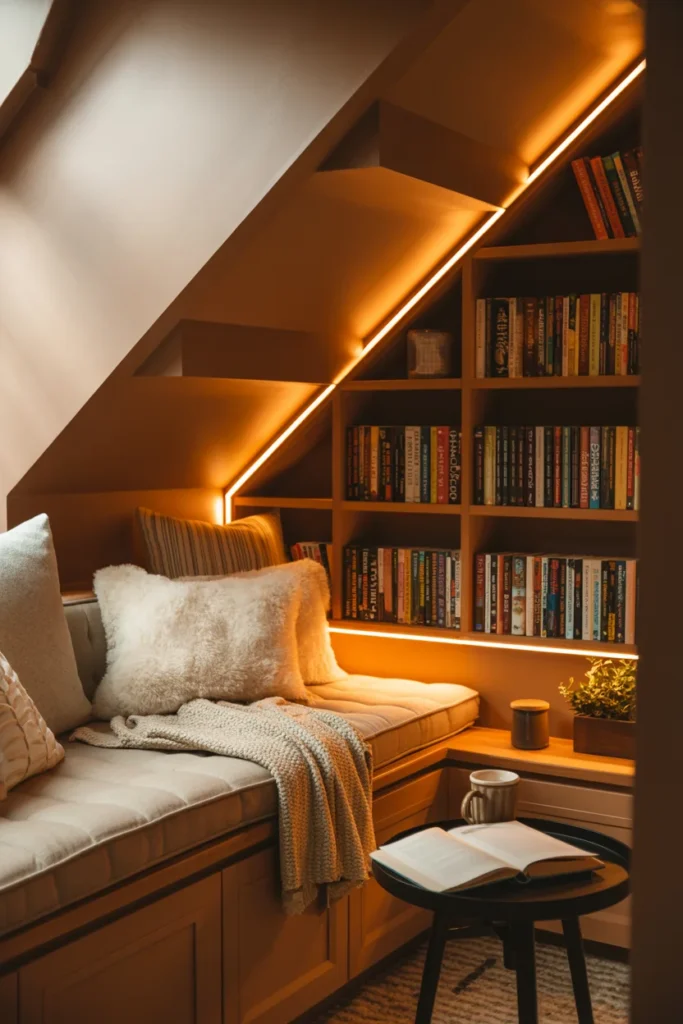
Under-stairs spaces are often wasted on vacuum cleaners and holiday decorations. This spandrel area can be transformed into a jewel-box retreat with a simple bench, cushions, and a few floating shelves. The enclosed feeling makes it naturally cozy without requiring curtains or dividers.
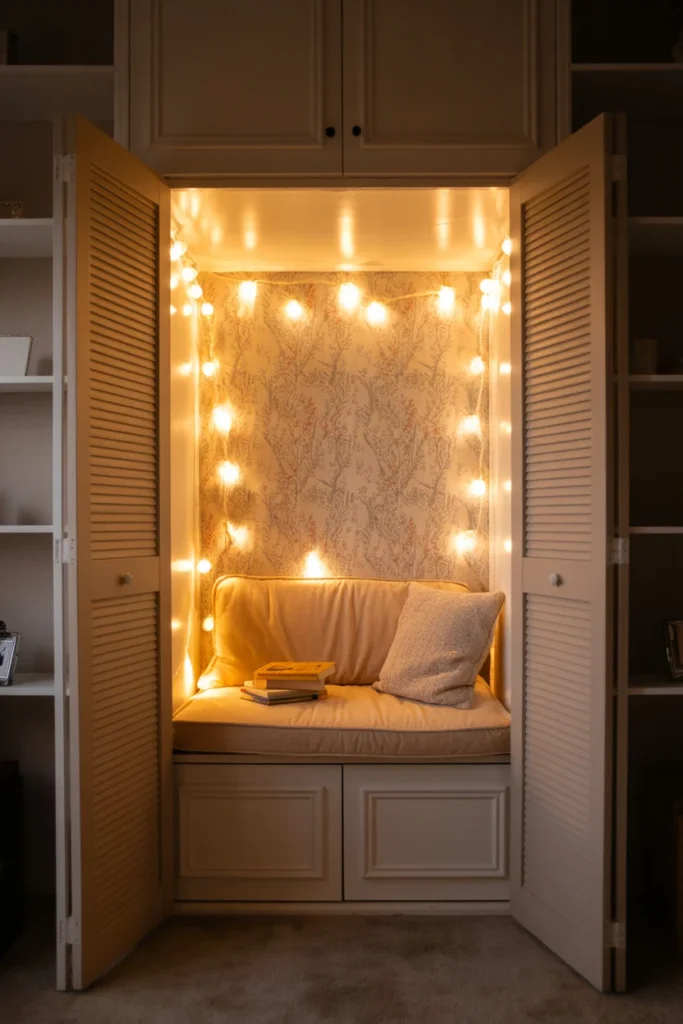
Unused closets are a weekend warrior’s best friend. Remove the doors, add a cushion at seat height, install a reading light, and you have a private escape without touching a single wall stud. Paint or wallpaper the interior for an accent that makes the small space feel intentional rather than improvised.
Empty corners in bedrooms, living rooms, or even hallways work beautifully when you define the area with a small rug and position a comfortable chair at an angle. Our article on reading nook ideas for small spaces has 15 setups specifically designed for tight footprints.
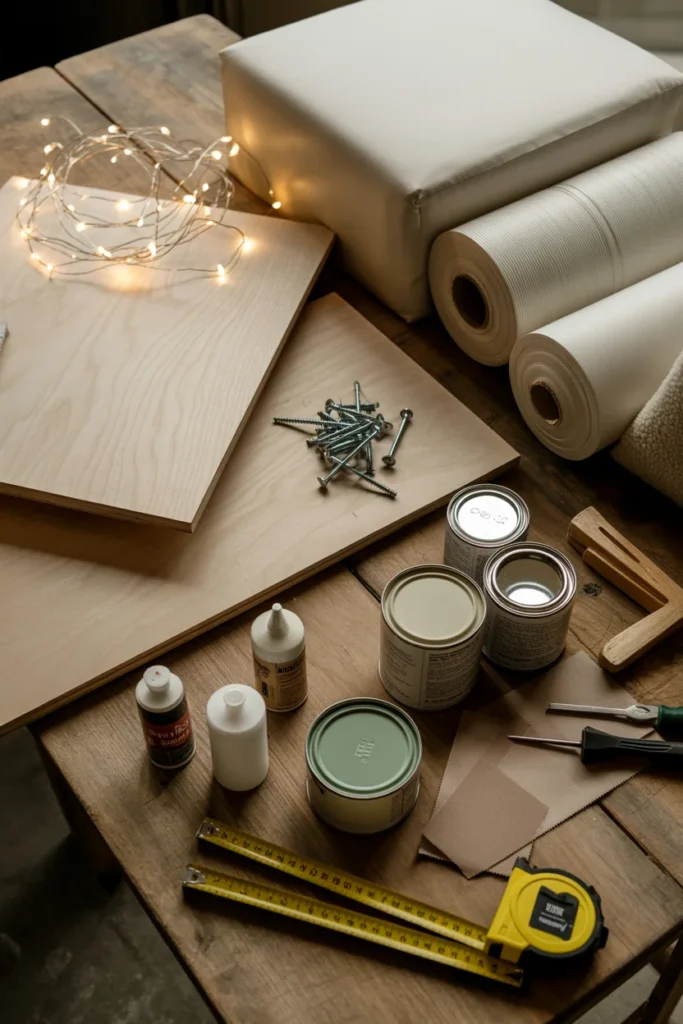
Step 2 — Set Your Budget (and Stick to It)
One of the biggest mistakes people make with DIY projects is starting without a clear spending limit. Here is a realistic breakdown of what a reading nook costs at three different budget levels:
The $0–$50 Nook (The No-Build Nook): This version uses things you already own. Rearrange an existing armchair or stack floor cushions in a quiet corner. Drape a throw blanket over the back, add a pillow, and place a small lamp nearby. Use a stack of hardcovers as a side table. A secondhand area rug from a thrift store defines the space. This approach costs almost nothing and works perfectly in apartments or rentals where you cannot make permanent changes.
The $50–$200 Nook (The Weekend Project): At this level, you can purchase a few intentional pieces. A simple bench made from a repurposed bookshelf laid on its side with a cushion on top costs around $30–$60. Add floating shelves ($15–$25 for a pair), fairy lights or a clip-on reading lamp ($10–$20), and a set of throw pillows ($15–$30). This budget also covers a small area rug and a can of paint if you want an accent wall behind your nook.
The $200–$500 Nook (The Built-In Look): This is where you start building custom seating. A plywood bench with drawer storage underneath is achievable for around $100–$150 in lumber and hardware. Add a custom cushion ($40–$80 for foam and fabric), built-in shelving using pine boards ($30–$50), and quality lighting like a wall-mounted sconce ($25–$60). The result looks like it cost thousands but stays well under $500.
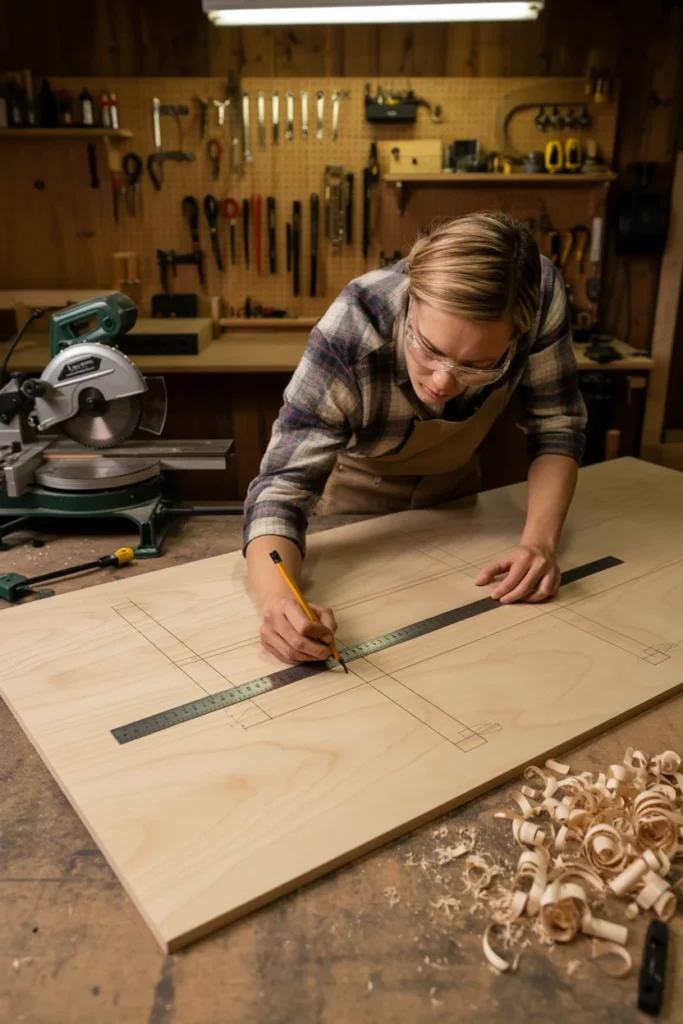
Step 3 — Build Your Seating
Seating is the heart of any reading nook. Get this wrong and no amount of decorating will save the space.
For no-build options, a thick floor cushion (at least 4 inches of foam) placed directly on the floor works surprisingly well. Bean bag chairs are popular but not great for long reading sessions since they lack back support. A better alternative is a large floor pillow propped against the wall with a rolled blanket behind your lower back.
For simple bench builds, the process is straightforward. Cut a piece of three-quarter-inch plywood to fit your nook’s width and depth. Support it with 2×4 lumber legs or a frame of 2x4s secured to the wall studs using lag bolts. Keep the seat height between 17 and 19 inches from the floor, which is standard chair height and comfortable for most adults. If you are building in a closet, you can screw support cleats directly into the side walls and rest the plywood on top — no freestanding legs needed.
For storage-integrated seating, build a box frame from plywood with an open front, then add sliding drawers or fabric bins underneath. Free woodworking plans for twin-size daybed frames are available online and can be modified to fit any nook width. Using leftover lumber or sourcing free materials from community buy-nothing groups keeps costs remarkably low.
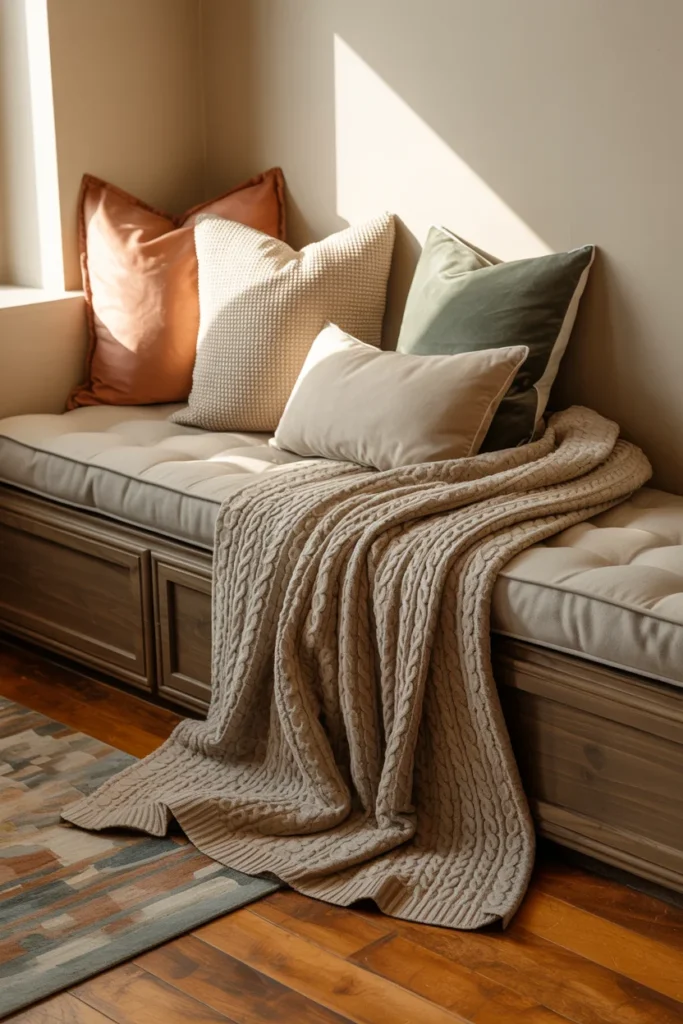
Step 4 — Layer the Comfort
Once your seating structure is in place, textiles transform it from furniture into a retreat.
Start with the cushion. A 4- to 6-inch high-density foam pad cut to size and wrapped in a washable cotton or linen cover is the most comfortable and practical option. You can order foam cut to custom dimensions from most fabric stores or online retailers. A fitted twin sheet works as a quick, affordable cover in a pinch.
Add throw pillows in mixed sizes — two large ones for back support and two to three smaller ones for visual interest. Stick to a cohesive color palette. Warm neutrals with one accent color is a formula that consistently performs well on Pinterest and looks polished without effort.
A throw blanket draped over the arm or folded at the foot of the bench completes the layered look. Chunky knit blankets photograph beautifully and add genuine warmth, but any soft textile you enjoy will work. Wool, cashmere blends, and waffle-weave cotton are all excellent choices depending on your climate.
Finally, define the nook’s footprint with a small area rug placed beneath or in front of the seating. This visual boundary tells the eye where the reading nook begins and the rest of the room ends — an underrated design trick that makes even the simplest setup feel intentional.
Step 5 — Get the Lighting Right
Poor lighting ruins reading nooks faster than anything else. You need functional task lighting for reading and ambient lighting for atmosphere — and ideally both.
Task lighting means a focused light source positioned to illuminate your book without casting shadows. An adjustable wall-mounted sconce with a swing arm is the most space-efficient option. Clip-on reading lamps that attach to a shelf or headboard are a great budget alternative at $10–$25.
Ambient lighting sets the mood. Warm-toned fairy lights draped along a shelf or tucked behind a curtain rod create the kind of soft glow that makes a nook feel magical, especially in evening photos on Pinterest. Battery-operated LED candles grouped on a side table add warmth without any fire risk — a must for enclosed spaces like closet conversions.
If your nook is near a window, sheer curtains filter natural light beautifully during the day while still allowing you to read comfortably. Avoid heavy blackout curtains unless the sun hits your spot directly, because natural light is one of the biggest advantages a reading nook can have.
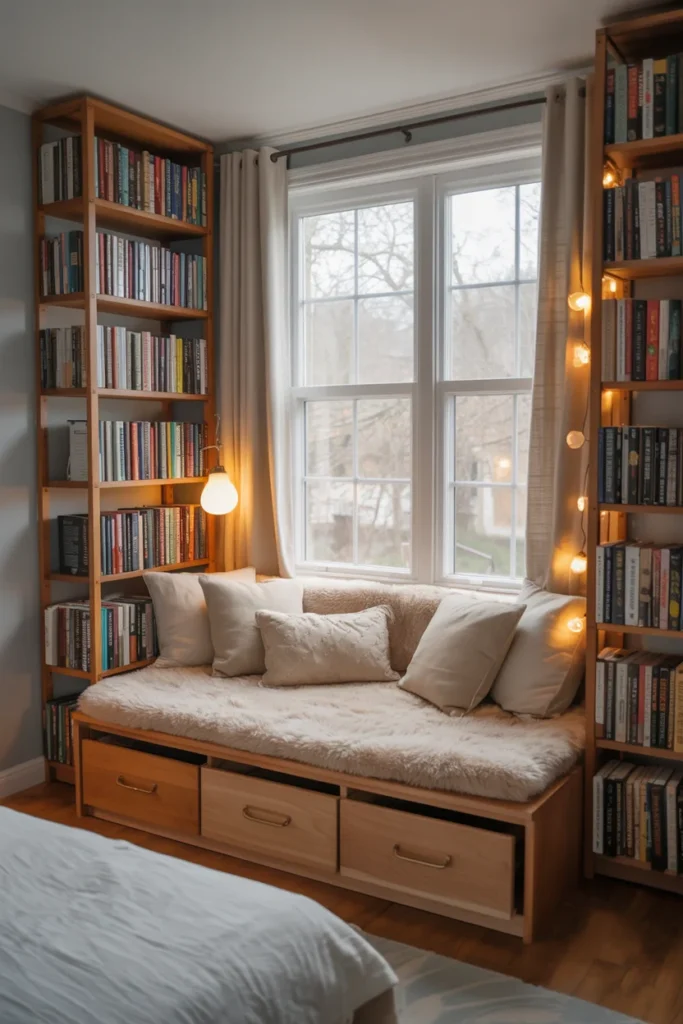
[Image Prompt 7] A reading nook at dusk with a warm wall-mounted reading lamp turned on, fairy lights strung along a shelf, and natural light fading through a window. Alt text: Reading nook at dusk with wall-mounted reading lamp fairy lights and fading natural window light
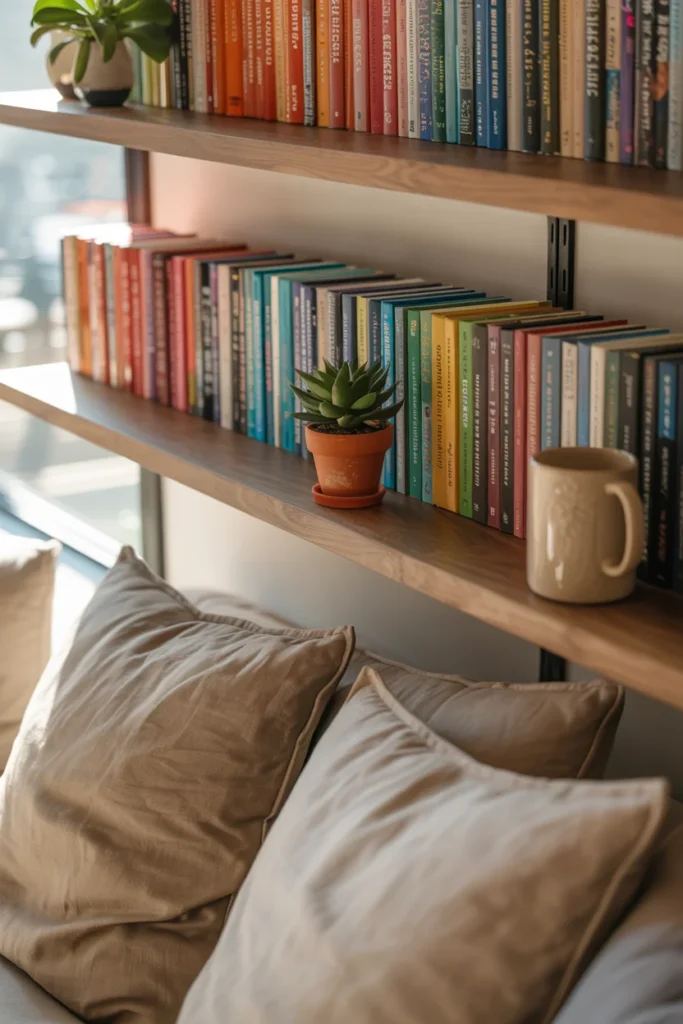
Step 6 — Add Storage and Book Display
A reading nook without books within arm’s reach is just a bench. Integrate storage that is both functional and decorative.
Floating shelves are the most popular option for good reason — they save floor space, cost very little, and display your book collection as part of the decor. Install two or three shelves above or beside your seating, spacing them 10 to 12 inches apart for a clean look.
Wall-mounted crates turned on their sides create rustic cubby-style storage for about $5 per crate from craft stores. Stack two or three vertically for a custom shelving unit that doubles as a design feature.
For built-in nooks, recessed shelving between wall studs is an advanced but rewarding project. The space between studs is typically 14.5 inches wide — perfect for paperbacks and small decor items. This technique requires cutting into drywall but uses no additional floor or wall space at all.
Keep a dedicated spot for your current read, a warm drink, and a reading light. A small side table, a wall-mounted tray shelf, or even a sturdy wooden stool positioned beside your seat handles this job perfectly.
Step 7 — Personalize With Decor and Finishing Touches
This is where your reading nook stops looking like a project and starts feeling like your space.
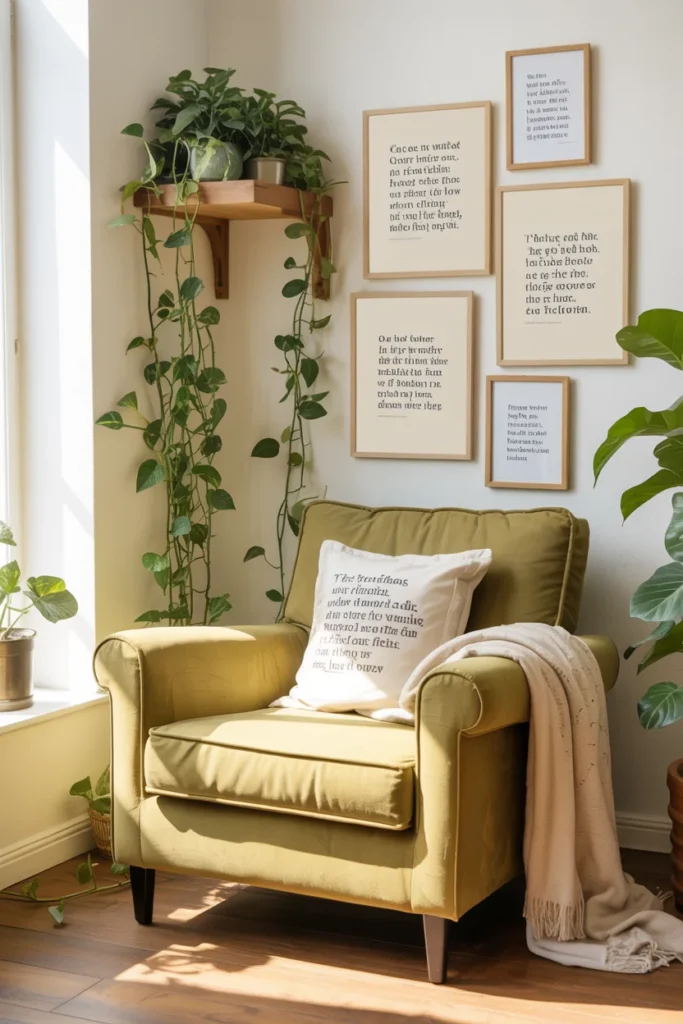
Plants bring life to any corner. Low-maintenance options like pothos, snake plants, or succulents thrive in indirect light and add a natural element that softens hard edges. A small trailing plant on a high shelf creates a particularly beautiful effect.
Wall art gives the nook personality. Frame a few favorite book quotes, hang a small print, or create a simple gallery wall with thrifted frames. Pages from old, damaged books can be framed as free literary art — a trick that is wildly popular on Pinterest and costs nothing if you have an old book you do not mind repurposing.
A canopy or curtain transforms an open corner into a semi-enclosed retreat. Use a tension rod and lightweight fabric to create a privacy screen, or hang a simple curtain from a ceiling hook to drape around the seating area. This works especially well for children’s reading nooks where the sense of a secret hideaway encourages independent reading.
According to the home improvement experts at Better Homes & Gardens, the most inviting reading spaces combine personal mementos with functional comfort — meaning your nook should feel like it belongs to you, not like it belongs in a catalog.
Common Mistakes to Avoid
Even simple builds can go sideways if you overlook a few things. Choosing an uncomfortable seat and trying to fix it with pillows never works — always test your seating height and cushion thickness before committing. Ignoring lighting is the second most common error, particularly in closet and under-stairs conversions where there is no natural light source at all.
Over-decorating is another trap. A reading nook should feel calm and uncluttered. If every surface is covered with accessories, the space loses its purpose as a retreat. Keep decor minimal and meaningful, and leave room to actually set down a book and a cup of tea.
Finally, do not skip the measurement phase. Every nook project starts with accurate dimensions of your available space. Measure twice, order materials once, and you will avoid the frustration of returns and wasted lumber.
The DIY experts at Family Handyman recommend always starting with a sketch or measured drawing of your space, even for simple projects, so you can visualize proportions before buying a single board.
Start Building Your Reading Nook Today
You do not need a contractor, a big budget, or a Pinterest-perfect home to build a reading nook that you will actually use every day. Start with the space you have, set a realistic budget, and focus on the three things that matter most: comfortable seating, good lighting, and books within reach. Everything else is decoration.
The best reading nooks are the ones that get built — not the ones that stay on a Pinterest board forever. Pick your corner, gather your materials, and give yourself permission to start small. You can always add more later.
Looking for more reading nook inspiration? Explore our full collection of cozy reading nook ideas, window seat designs with storage, and small space reading nooks to find the perfect style for your home.
Keep reading
More cozy nook ideas
 DIY
Read →
DIY
Read →
Corner Bookshelf Reading Nook Ideas: 9 Cozy Builds for a Small Space
No bay window, no reno budget, no friendly landlord required. You need one empty corner, a corner bookshelf, and a chair that…
 DIY
Read →
DIY
Read →
Floating Shelf Ideas Around a Reading Chair That Actually Frame Your Seat
Picture 4 pm light, a linen throw over the arm of your chair, and one warm bulb glowing off a wood shelf…
 DIY
Read →
DIY
Read →
How to Build a DIY Book Nook Shelf Insert in One Weekend
Three pieces of foam board, a string of warm lights, and one quiet afternoon. That’s the whole recipe for a DIY book…