
Built-In Reading Bench With Storage: Plans, Dimensions, Real Photos

Three pieces of plywood, one weekend, around $280 in materials. That’s the math on the built-in reading bench you’re about to build. Real dimensions. Real photos. Hidden storage that actually opens without slamming your fingers. And for renters scrolling this on the train, a no-drill version that gives you 80% of the look without a single hole in the wall. Let’s get into it.
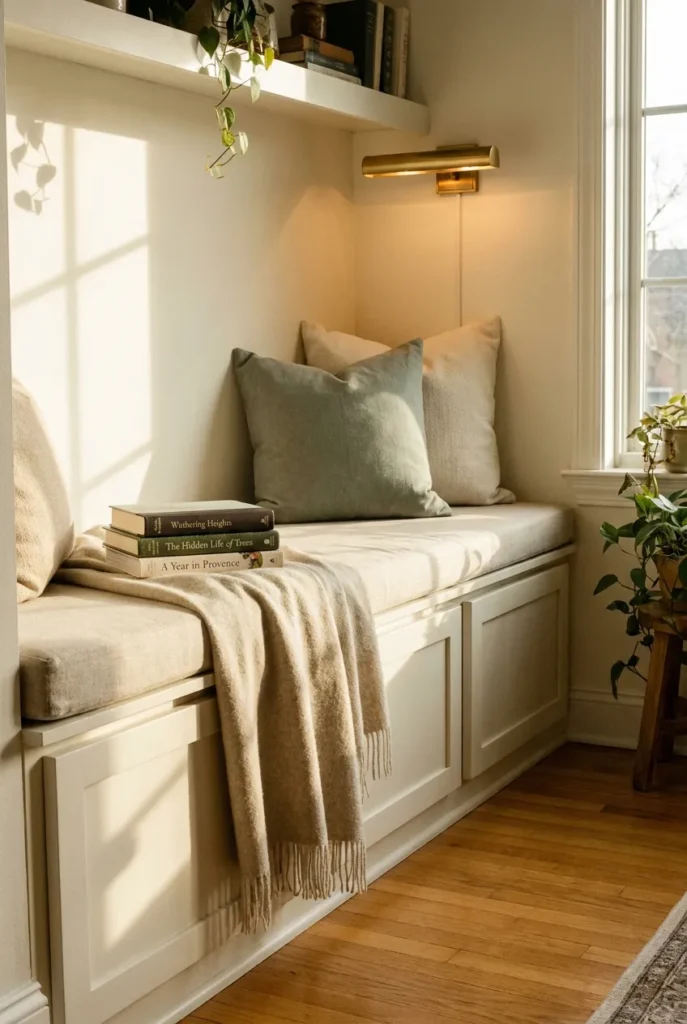
The Pin Promise, Cashed: Your 3-Piece Built-In Reading Bench
Here’s the build in plain English before we touch a saw. You’re constructing three things: a base box that does the heavy lifting and hides the storage, a hinged seat top that lifts for cubby access, and a face frame plus trim that makes it look like the house was built around it. That’s it. Everything else in this guide makes those three pieces look intentional, sit comfortably, and last.
I built my first one in a 14-foot living room corner. The base box took four hours. The seat top took two. Trim and paint ate a full Saturday afternoon. You can do this without a contractor. You cannot do this without a Kreg jig, so factor $40 for one if it isn’t in your garage already.
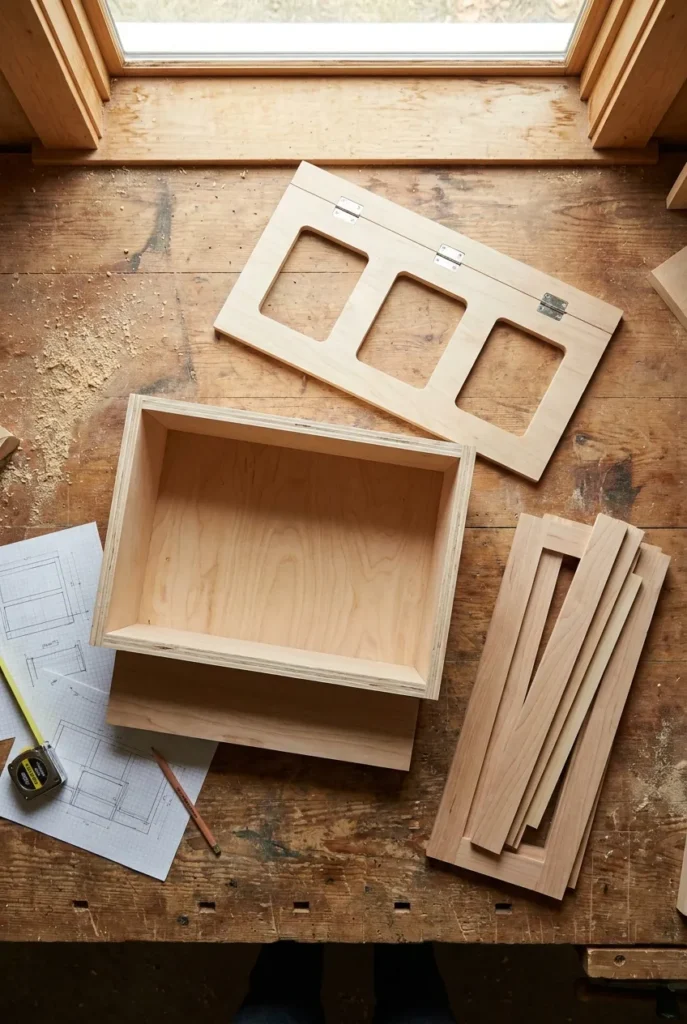
For readers in the renter camp, you’ll find the no-drill version further down under its own H2. If your pin landed you here for that specifically, jump to “The Renter-Safe Built-In Reading Bench (No Drill, No Damage)” and skip the framing section. The rest of you, stay with me. We’re starting with dimensions, because every regret in built-in benches starts with the wrong number.
The Built-In Reading Bench Dimensions Decision Tree (Original Framework)
This is the part nobody publishes. Most tutorials say “build your bench 18 inches deep” and move on. That number works for paperbacks and a 5’4″ reader. It does not work for a 6-foot reader who curls sideways with a hardcover, and it murders the back of anyone over 40 who actually wants to read for an hour.
Here’s the framework I use in my own builds. Pick your row, then your column, then write the number on a sticky note before you cut anything.
Seat depth (front to back, finished):
- Paperback reader, sitting upright with feet on floor: 16 to 18 inches
- Mixed reading, occasional curl-up: 19 to 21 inches
- Side-lying reader (hardcovers, graphic novels, marathon sessions): 22 to 26 inches
Seat height (finished top, including cushion compression):
- Under 5’4″: 16 to 17 inches
- 5’5″ to 5’10”: 17 to 18 inches
- 5’11” and up: 18 to 19 inches
Bench length (interior, excluding face frame):
- Solo reader: 42 to 48 inches
- Solo plus dog or lap blanket spread: 54 to 60 inches
- Two readers or a kid plus parent: 66 to 72 inches
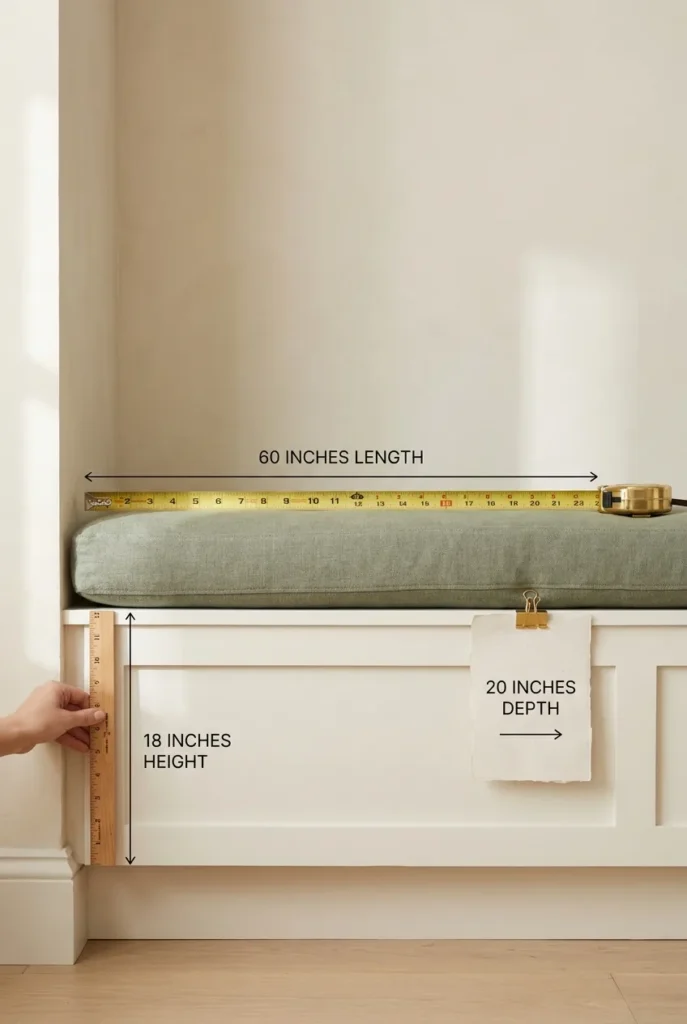
Two warnings from my own mistakes. First, the cushion compresses. A 2-inch foam cushion lands roughly 1.25 inches once you sit on it. Build your wood top that much lower than your target finished height. Second, the toe kick (the recessed strip at the floor, usually 3 to 4 inches tall and 2 to 3 inches deep) eats into your interior storage by exactly that depth. Account for it before you order plywood.
For readers planning the build inside a tight footprint, our deep-dive on reading nook ideas for studio apartments walks through how to claim 14 square feet without losing useable floor space. Worth a scan if your room is under 600 square feet.
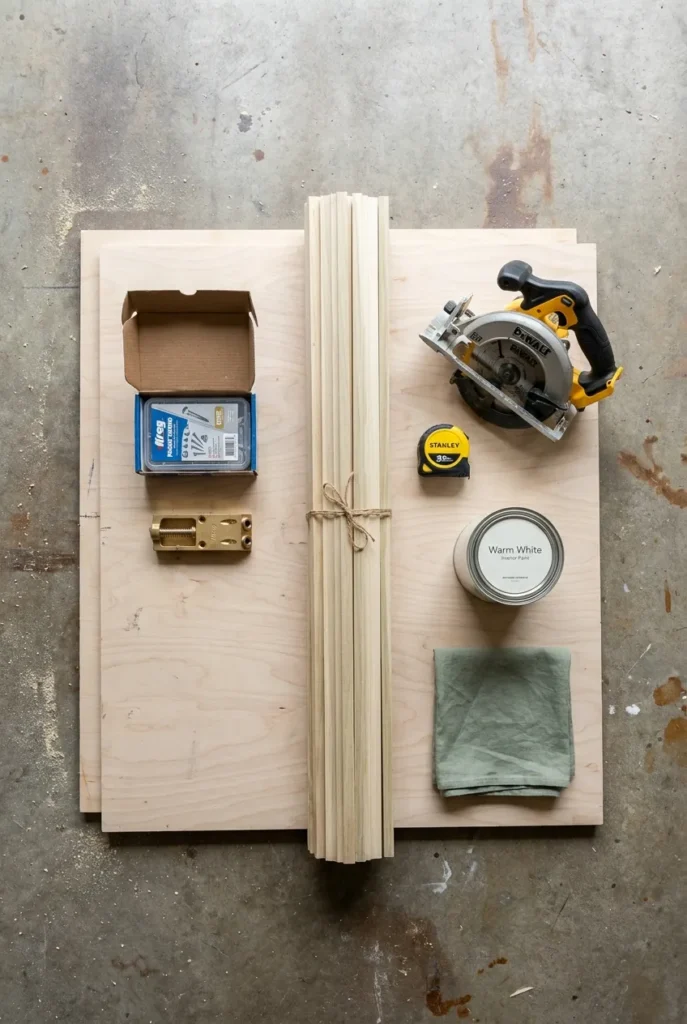
Materials List for the Standard Built-In Reading Bench (60″ Length)
This list assumes a 60-inch long, 20-inch deep, 18-inch tall bench with three hinged storage compartments. Scale up or down using the framework above. Prices are 2026 averages from Home Depot and Lowe’s in the US, and they hover at the upper end if you live in California or the Northeast.
- One sheet 3/4-inch birch plywood, 4×8 feet: $72 to $95
- One sheet 1/2-inch birch plywood (for back panel and dividers): $58 to $70
- 10 linear feet of 1×3 poplar (face frame and trim): $32 to $40
- Three sets of soft-close cabinet hinges: $24 total
- 2-inch high-density foam cushion, cut to size: $55 to $80
- 2 yards medium-weight linen or cotton upholstery fabric: $40 to $60
- Wood glue, Kreg pocket screws (1.25-inch), 2-inch finish nails: $25 bundle
- Quart of interior latex paint (semi-gloss or satin), tinted to match trim: $22
- Sandable wood filler and caulk: $14
Total materials, no tools: approximately $282 to $338.
Tools you need on hand: circular saw or table saw, drill, Kreg jig, brad nailer or hammer, level, tape measure, pencil, 120-grit sandpaper, paintbrush, caulk gun. If you’re missing the brad nailer, finish nails work, your forearm just resents you by hour three.
How to Build the Base Box (Hour One Through Four)
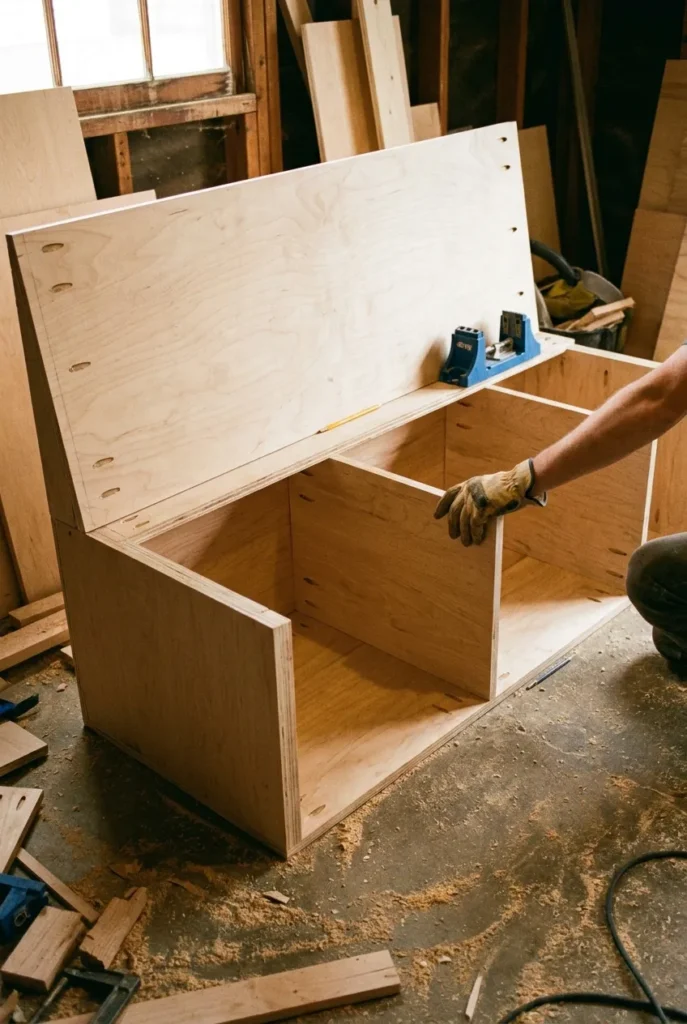
Cut your 3/4-inch plywood into the base box pieces first. For a 60x20x14.75 inch base (the 14.75 leaves room for a 3/4-inch top and a 2-inch compressed cushion to land at 18 inches finished), you need: two side panels 14.75 x 19.25 inches, one back panel 60 x 14.75 inches, one front panel 60 x 14.75 inches, two interior dividers 14.75 x 19.25 inches, one bottom panel 60 x 19.25 inches.
Drill pocket holes along the inside edges of the side panels, the back panel, and both dividers. Pocket holes are angled screw holes the Kreg jig makes for you, and they let you screw two pieces of plywood together without splitting the edges. If you’ve never used one, watch a single 4-minute YouTube tutorial before you start. The learning curve is roughly nothing.
Assemble in this order: bottom panel flat on the floor, sides screwed in, back screwed in, dividers screwed in at 20 inches and 40 inches from one end (this creates three roughly equal compartments), front panel screwed in last. Check for square with your tape measure: the two diagonal measurements from corner to corner should match within 1/8 of an inch. If they don’t, push the box until they do, then add a temporary diagonal brace until the glue cures.
Cut and attach the toe kick. This is a 60 x 3 inch strip of 3/4-inch plywood that sets back 2.5 inches from the front face. Screw it to the bottom edge of the front panel from inside the box.
How to Build the Hinged Seat Top With Hidden Storage
The seat top is where 80% of built-in reading bench builds go wrong. People make one giant lid, then can’t lift it without breaking their wrist. Or they make three lids with no overhang, then realize the cushion seam falls exactly where the hinge gap is. Both ruin the look.
Here’s the fix. Cut three lid panels from 3/4-inch plywood, each measuring 19.5 x 20 inches. Notice they’re slightly smaller than the compartment openings: that’s intentional, the 0.5 inch gap accounts for the soft-close hinge mechanism plus a 1/8-inch reveal you’ll feel grateful for the first time you close a lid on your knuckle.
Cut one continuous “frame strip” from 3/4-inch plywood, 60 x 1.5 inches, and attach it across the front edge of the top of your base box. This is the lip the lids rest against and what keeps them from sliding forward when closed. Repeat at the back: a 60 x 1.5 inch strip across the back edge.
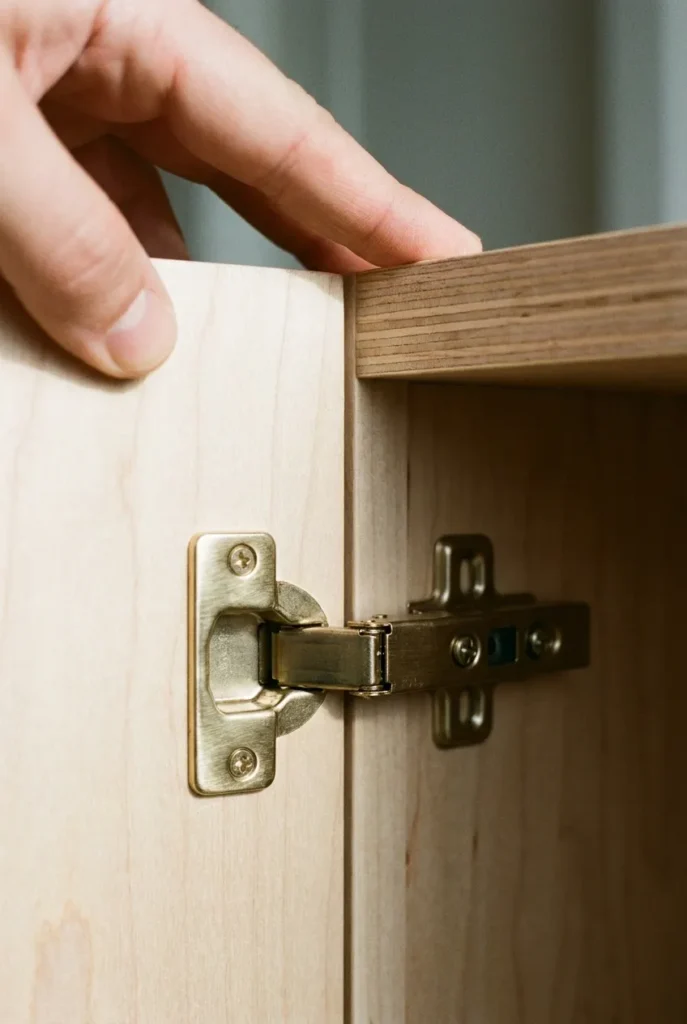
Mount the soft-close cabinet hinges to the back edge of each lid and the matching back frame strip. Soft-close hinges run about $8 each, last a decade, and prevent the slam that wakes up everyone in the house at 11 p.m. when you’re putting your book away. The cheap friction hinges feel fine in the store and disappoint within six months.
For ventilation (and to stop musty book smell building up inside), drill three 1-inch holes along the back of each lid panel, hidden under the cushion. This is the trade-off honesty piece nobody mentions: closed wood storage holding books, blankets, and humidity becomes a damp little box within a year if you don’t vent it.
If you want a deeper walk-through of window-specific reading nook builds with a slightly different framing approach, our full DIY window seat reading nook guide with measurements and cushion formula covers the bay-window variant in granular detail.
Face Frame, Trim, and the Paint Step That Sells the Built-In Look
This is the step that separates “wow, did the house come with that?” from “you can tell it was DIY.” Cut 1×3 poplar to face-frame the front of your base box: one horizontal piece across the very top (60 x 2.5 inches), one across the very bottom just above the toe kick (60 x 2.5 inches), and four vertical pieces aligned with your interior dividers and the two outside edges. The verticals visually conceal the divider locations and stop the front from looking like a flat plywood wall.
Attach the face frame with wood glue and 2-inch finish nails or brads. Set the nail heads slightly below the surface with a nail punch. Fill every hole and seam with sandable wood filler. Let it dry overnight. Sand at 120 grit. Wipe clean.
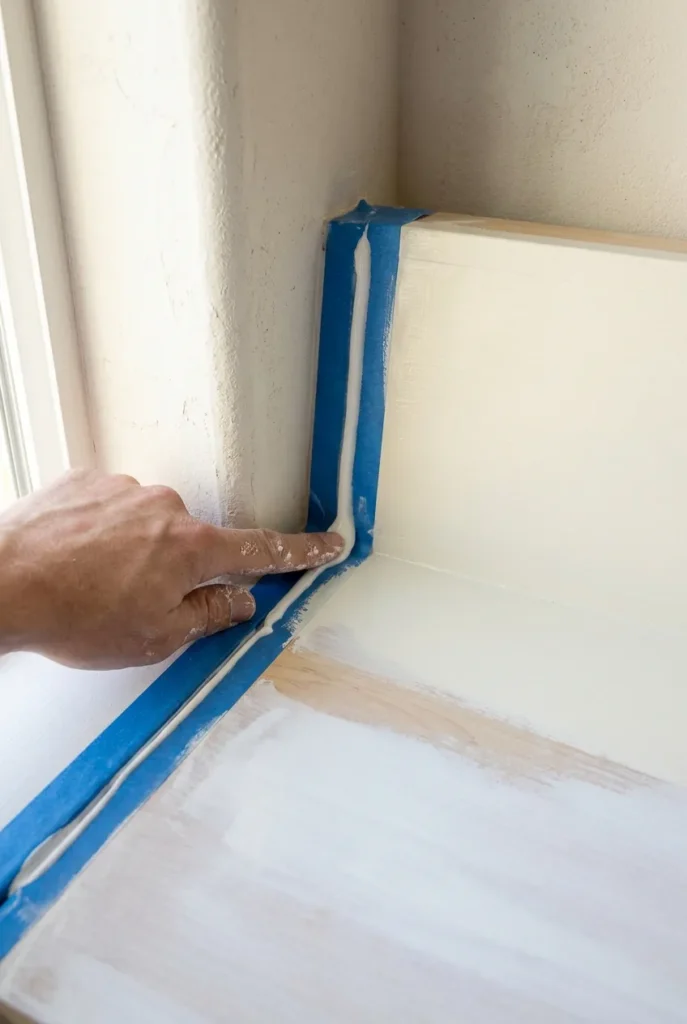
Caulk every seam where the bench meets the wall and the floor with paintable latex caulk. Smooth the bead with a wet fingertip. This is the trick. Houses bought with built-ins have caulked seams. Houses where someone added a freestanding “looks like a built-in” thing have a 1/8-inch gap between the side panel and the wall. The caulk closes that gap and the eye reads “permanent.”
Paint two coats of semi-gloss or satin interior latex. Semi-gloss reads more traditional, satin reads more modern Scandi or japandi. Sand lightly with 220-grit between coats. The bulb temperature you read under matters here: under a warm 2700K bulb, a warm white paint glows; under a cool 4000K bulb, the same paint looks chalky. Pick your bulb before you pick your paint.
For warm white that holds up against warm bulbs, Benjamin Moore’s white-paint guidance from their official color collection breaks down which whites lean warm vs. cool. Worth five minutes before you buy the gallon.
Cushion, Pillows, and the Comfort Math Most Builds Skip
A 2-inch foam cushion looks plump in the photo and feels like sitting on a kitchen counter after 20 minutes. The real-world sweet spot is 3 to 4 inches of high-density foam (35 ILD rating, the number printed on most foam sleeves at JOANN or Foam Factory). Below 30 ILD, the foam compresses to nothing within six months. Above 45 ILD, you feel like you’re sitting on a pew.
Wrap the foam in a layer of polyester batting before you sew the cover. Batting softens the corners and stops the foam from squeaking against the linen, a noise you don’t notice in showroom photos and will absolutely notice on a quiet Sunday morning. Cut your fabric with 1 inch of seam allowance on all sides, sew a zipper into the back seam so you can wash the cover.
For pillow stacking on a 60-inch bench: one long lumbar (24×14 inches), two square (18×18 inches), one round bolster (8 inches diameter, 20 inches long) at the back wall. Four pieces. Stop there. Five pillows on a 60-inch bench reads “showroom” and means you spend more time staging than reading. According to the American Library Association’s reader comfort guidance for library furniture, library-tested seating depths and back support correlate strongly with reading-session length, which is exactly what we’re optimizing for.

The Renter-Safe Built-In Reading Bench (No Drill, No Damage)
Now for the audience the top 5 ranking articles abandon. If you rent, you can’t frame into studs, you can’t remove baseboards, and you definitely can’t caulk into drywall without getting flagged on move-out. Here’s how to build a version that gives you the look without the lease violation.
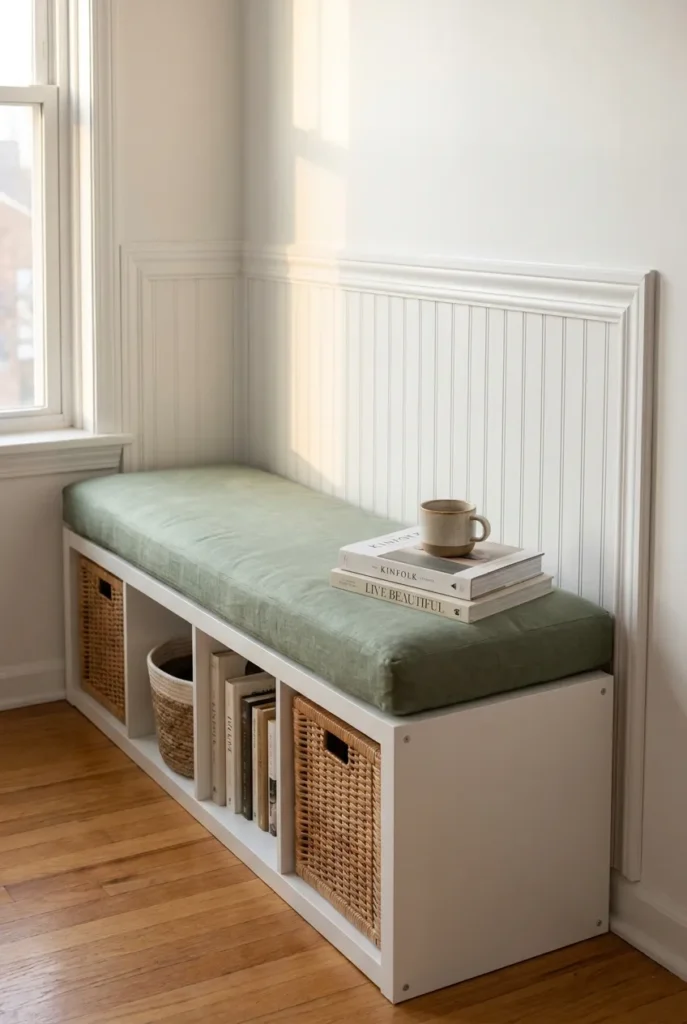
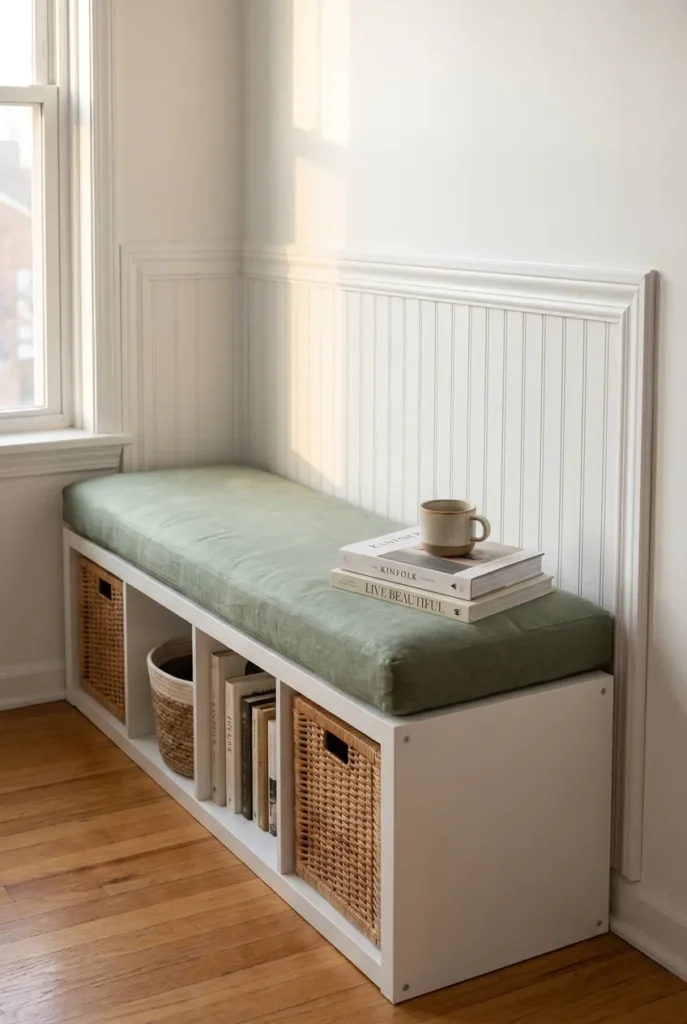
Skip the face frame attaching to the wall. Build the entire bench as a freestanding box (same plans above, but treat it as furniture, not architecture). Use an IKEA Kallax 4×1 horizontal cube unit as your base box. The Kallax sits at 16.875 inches tall, which is close enough to the 17-inch sweet spot for most readers. Run a 3/4-inch plywood top across it, covered in foam and linen. Add removable peel-and-stick wallpaper or beadboard panels (3M Command-strip mounted, not nailed) on the wall behind the bench to suggest a built-in surround.
The visual trick: paint the bench top the same color as your baseboards, push it tight against the wall, and run a removable 1×4 board along each side (held in place by tension, not screws) to fake the side returns. On move-out day, the boards lift away, the wallpaper peels off, and your bench becomes furniture again.
Budget for the renter version: $145 to $190 total. The 4×1 Kallax runs $89, the plywood top about $30, foam and fabric about $50, peel-and-stick panel material about $25.
For readers in the rental column who want a wider menu, our 10 no-drill reading nook setups for renters guide lays out every approach we’ve tested without losing a deposit. Worth keeping open in another tab.
Storage Smart: What Actually Goes Inside Those Hidden Compartments
The compartments under a built-in reading bench are the highest-utility hidden storage in your home. The mistake most people make is using them like a junk drawer. Within four months you can’t lift the lid because a phone charger and a pair of slippers and three takeout menus are jammed in the hinge corner.
Here’s the system. Compartment one: lap blankets and throws, folded vertically (file-folder style, not stacked flat, so you can grab the bottom one without removing the top three). Compartment two: out-of-rotation books, organized by genre so you can swap your TBR pile seasonally. Compartment three: reading accessories: book lights, page holders, reading glasses cases, the small flat box of bookmarks you keep meaning to use.
Three hard rules. No electronics chargers (they snake into the hinge and break the soft-close). No food (mice love a wooden box). No documents (humidity from the closed compartment warps paper within a year). The 1-inch ventilation holes you drilled help but don’t fully solve this.
Common Built-In Reading Bench Mistakes (Mine Included)
Mistake one: building the bench before painting the wall behind it. I did this in my first build. Cut-in painting around a 60-inch bench seam took two hours and the line still wobbles. Paint the wall first. Always.
Mistake two: skipping the dimmer on the wall sconce. A 2700K bulb on an undimmed sconce reads warm at full brightness but harsh in the evening. A $15 dimmer switch fixes this. Skip it and your bench reads like a dentist’s office at night.
Mistake three: using construction-grade pine for the face frame. Pine grain telegraphs through paint, leaving visible ridges even after two coats. Poplar costs $4 more per board and finishes glass-smooth. Worth it.
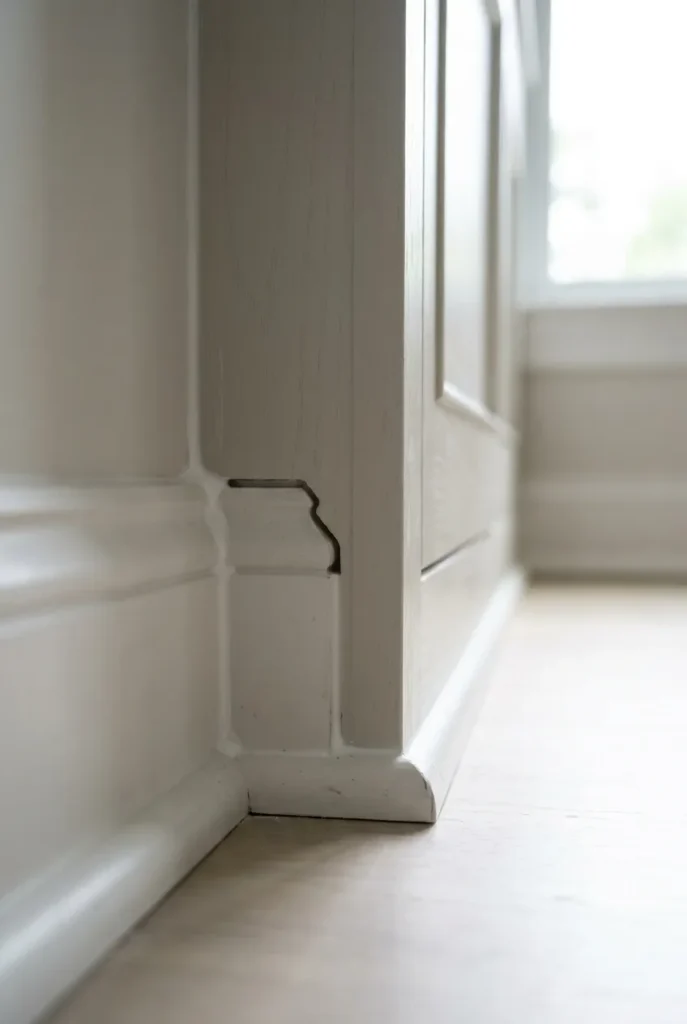
Mistake four: not leaving a baseboard return. If your bench butts against an existing baseboard, the baseboard has to either be removed, or the bench side panel has to be notched around it. Most builds skip this and end up with a 3/4-inch gap that catches dust forever.
FAQ
How deep should a built-in reading bench be?
For paperback readers sitting upright, 16 to 18 inches works. For mixed reading or occasional curl-up, build it 19 to 21 inches deep. For side-lying readers with hardcovers, go 22 to 26 inches. Anything under 16 inches feels like a step. Anything over 26 inches feels like a daybed.
What is the standard height of a built-in bench?
Standard finished seat height runs 17 to 18 inches, accounting for cushion compression. Adjust up or down based on the reader’s height. Build the wood frame 1.25 inches lower than your target finished height to allow for a 2-inch compressed foam cushion.
Do you need a permit to build a built-in reading bench?
For a non-structural interior bench that doesn’t tie into framing or remove load-bearing elements, no permit is required in most US jurisdictions. Always check your local building department if you live in a condo with HOA rules or a historic district. This is general info, consult a qualified US professional for your specific situation.
How much does a built-in reading bench cost to build?
A 60-inch standard build runs $282 to $338 in materials in 2026, not counting tools. The renter-safe IKEA-base version runs $145 to $190. A contractor-built version of the same bench typically quotes between $1,400 and $2,800 depending on region.
Can you build a built-in reading bench without removing the baseboard?
Yes. You have two options. Either notch the bench side panels around the existing baseboard profile (slower, more precise, looks seamless) or build a freestanding bench that sits in front of the baseboard with a removable side return board (faster, renter-safe, slightly less integrated look).
What is the best wood for a built-in reading bench?
Use 3/4-inch birch plywood for the base box and lids (strong, stable, takes paint well). Use poplar for the face frame and trim (smooth grain, no telegraphing through paint, accepts caulk cleanly). Avoid construction-grade pine for any surface that will be painted.
How thick should the cushion be on a reading bench?
Three to 4 inches of high-density foam (35 ILD rating) wrapped in polyester batting. Below 30 ILD compresses to nothing within months. Above 45 ILD feels like a church pew. The 3 to 4 inch range balances plush with structural support for long reading sessions.
Ready to Build Yours?
A built-in reading bench takes one focused weekend, around $280 in materials for the standard version, and exactly the dimensions you choose for your body and your books. Print the framework. Cut the plywood. Caulk the seams. Pick a 2700K bulb and a dimmer. Then sit down with the hardcover that’s been waiting on your nightstand.
If you build it, the corner you walk past every morning becomes the corner you walk toward instead. What dimension are you starting with first, depth or length?
Keep reading
More cozy nook ideas
 DIY
Read →
DIY
Read →
Corner Bookshelf Reading Nook Ideas: 9 Cozy Builds for a Small Space
No bay window, no reno budget, no friendly landlord required. You need one empty corner, a corner bookshelf, and a chair that…
 DIY
Read →
DIY
Read →
Floating Shelf Ideas Around a Reading Chair That Actually Frame Your Seat
Picture 4 pm light, a linen throw over the arm of your chair, and one warm bulb glowing off a wood shelf…
 DIY
Read →
DIY
Read →
How to Build a DIY Book Nook Shelf Insert in One Weekend
Three pieces of foam board, a string of warm lights, and one quiet afternoon. That’s the whole recipe for a DIY book…