
How to Build a DIY Under Stairs Reading Nook (Step by Step, Any Budget)

You walk past it every single day. That weird triangular dead zone tucked under your staircase, currently holding a vacuum, three Amazon boxes you keep forgetting to break down, and a tangle of phone chargers nobody claims. It looks unfinished because it is unfinished. And every time you scroll Pinterest at 11 p.m., you see a glowing little reading corner where yours just sits empty.
Here’s the good news. A DIY under stairs reading nook is one of the highest-payoff home projects you can take on, even if you’re a renter, even if you’ve never held a power drill, and even if your budget tops out at $150. We’ve built three versions of this nook (one rental-friendly, one mid-range, one full custom) and tested every shortcut so you don’t have to guess.
This guide is organized by build method, from no-construction renter setups to full custom built-ins. Inside each build, you’ll find style options for Cottagecore, Modern Farmhouse, Japandi, and Boho readers, plus the original 4-Layer Nook Build Method we use to make sure no nook ends up flat or forgotten.
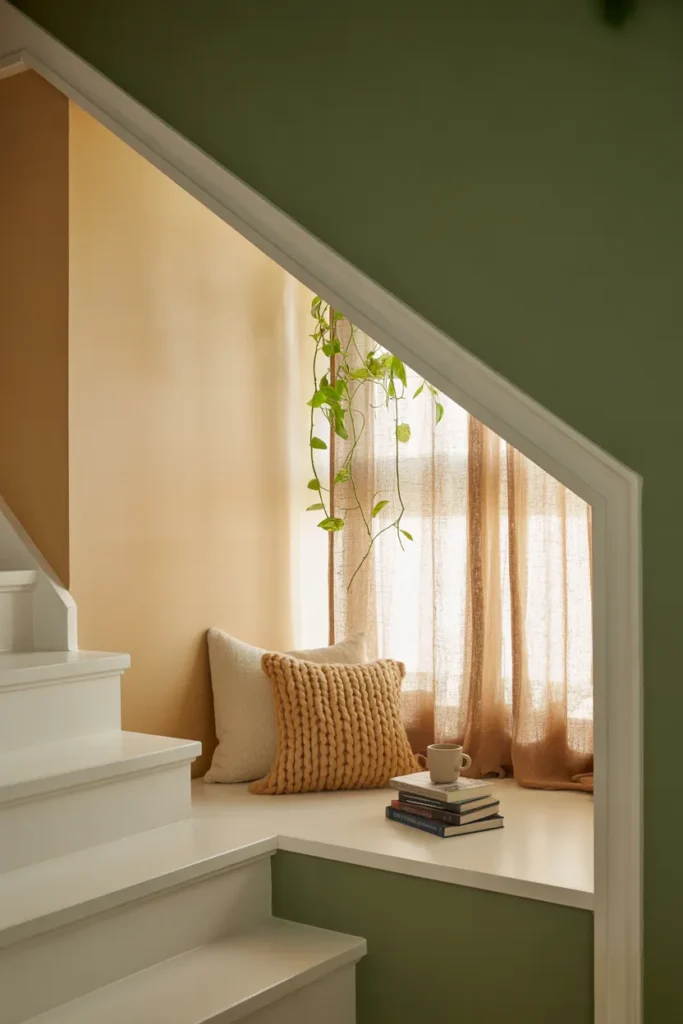
Who This Guide Is For
This walkthrough is built for four kinds of readers:
- Renters who want a cozy reading corner with zero drilling, zero permanent changes, and a setup that breaks down on move-out day.
- Homeowners ready to do a real weekend build with paint, lighting, and basic carpentry.
- Small-space dwellers working with under-stair openings as narrow as 28 inches.
- Budget-conscious DIYers who want a clear breakdown of where to save and where to spend.
If you fall into any of these camps, you’re in the right place. Save this post now (you’ll want to come back to the checklist).
Why the Space Under Your Stairs Is the Best DIY Project in the House
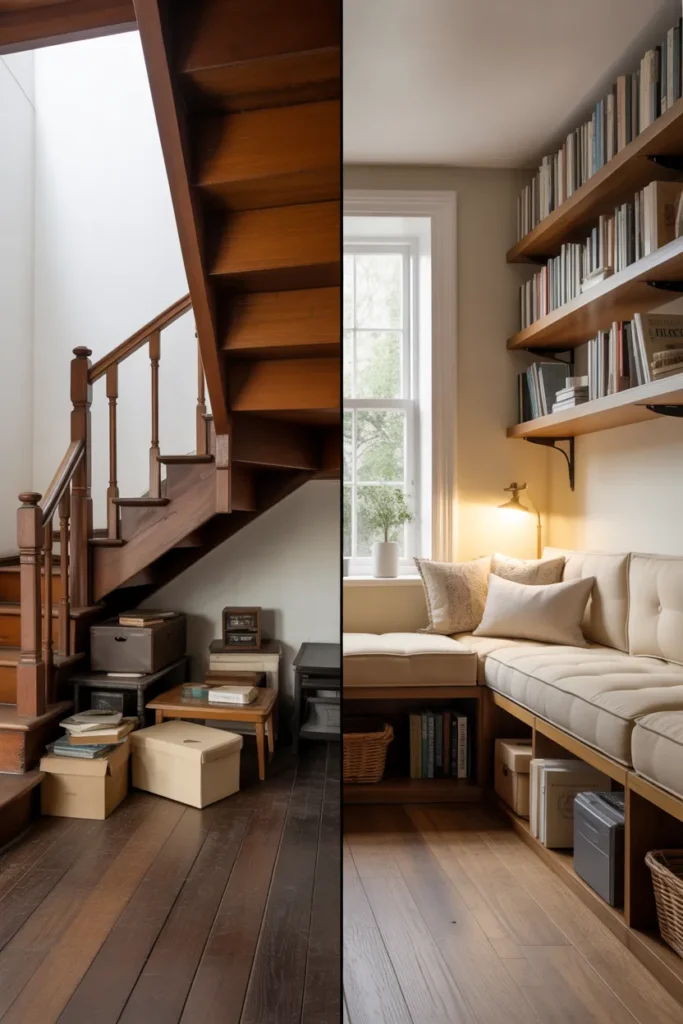
Most homes waste 18 to 40 square feet of usable floor under the staircase. That’s bigger than most powder rooms. Yet it sits empty, used as a junk drop or hidden behind a closet door nobody opens. Converting it into a reading nook gives you three things at once: a quiet retreat, a styled focal point that pulls visitors’ eyes, and serious resale appeal (real estate agents call these “character moments”).
For a quick safety reference before you start any structural work, the International Residential Code stair guidelines cover headroom and clearance rules you’ll want to follow, especially if you’re cutting into a wall under a staircase.
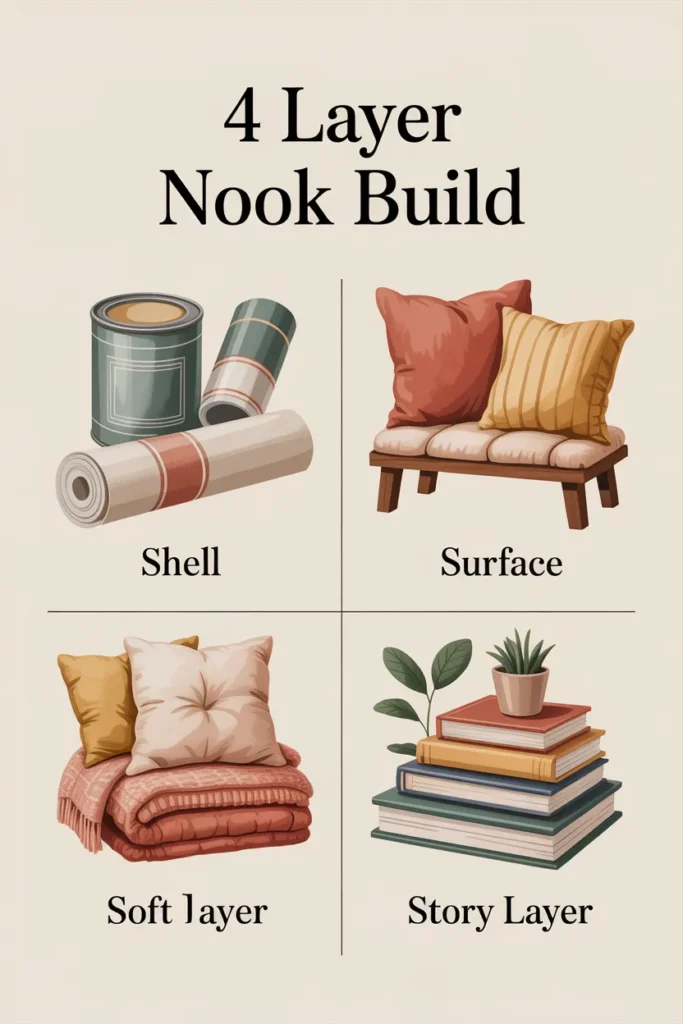
The 4-Layer Nook Build Method (Save This Checklist)
Every nook we’ve ever built (and every Pinterest-worthy one we’ve studied) hits four layers. Skip a layer and the nook feels flat or unfinished. Hit all four and it photographs beautifully from any angle.
Layer 1: Shell. The walls, ceiling, and back wall of the nook itself. This is your paint color, wallpaper, beadboard, or peel-and-stick treatment.
Layer 2: Surface. The bench, daybed, floor cushion, or seating platform you actually sit on.
Layer 3: Soft Layer. Cushions, throws, pillows, and any textile that adds touch and warmth.
Layer 4: Story Layer. The styled details that give the nook personality. Books, a small lamp, a framed print, a tiny ceramic vase, a trailing plant.
Print this list. Tape it to your fridge. Every decision you make from here forward should fit into one of these four layers.
Build Method 1: The Renter-Friendly No-Construction Nook (Under $150)
If you can’t drill, can’t paint, and can’t touch the walls, you can still build a beautiful under stairs reading nook. This is the version we tested first, and it’s genuinely our favorite for how forgiving it is.
What It Is
A floor-cushion based reading nook that uses freestanding pieces, peel-and-stick treatments, and battery-operated lighting. Nothing permanent. Everything packs into a closet on move-out day.
Why It Works
Renters lose deposits over drill holes and paint. This setup has zero of either. It also assembles in about 90 minutes with no tools.
How to Execute It
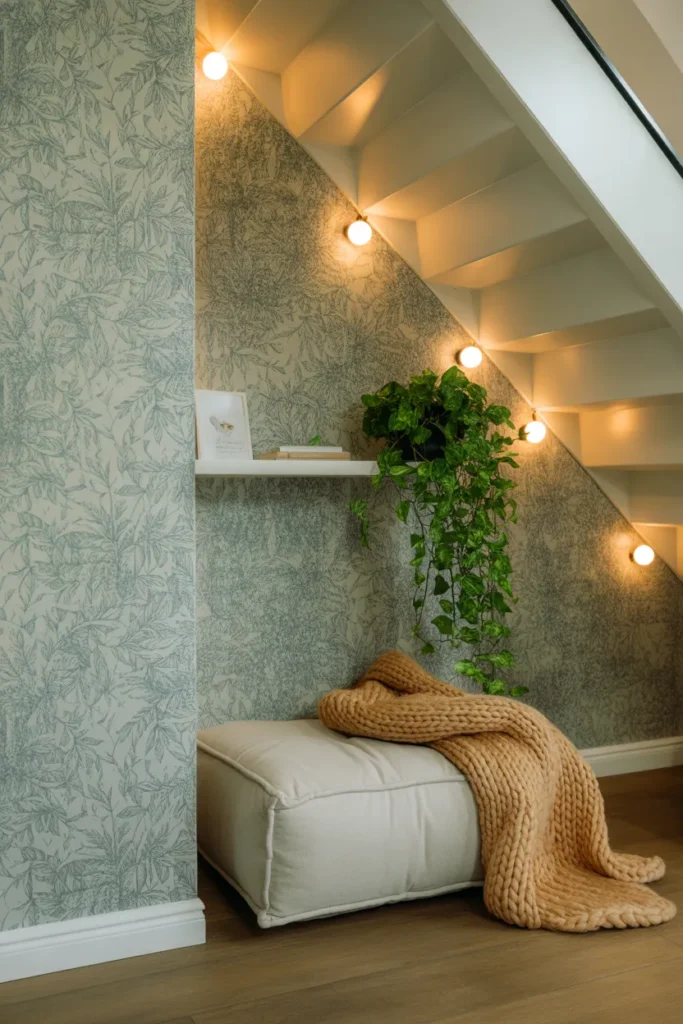
Shell layer: Use a removable peel-and-stick wallpaper from Target or Amazon for the back wall of the nook. Look for muted floral prints (Cottagecore), shiplap-style patterns (Modern Farmhouse), or solid linen-textured options (Japandi). One roll usually covers the back wall of a nook 36 inches wide.
Surface layer: A floor cushion or oversized poof works better than a bench here. Target’s chunky knit floor cushions run around $50, and IKEA’s DIHULT poof is $40. Layer two cushions for adult-height comfort.
Soft layer: One large throw pillow (18 inches or bigger), one lumbar pillow, one chunky knit throw. Stick to three textures: linen, knit, and faux sheepskin.
Story layer: Battery-operated puck lights with adhesive backing tucked into the corners, a small stack of hardcover books, one trailing plant (pothos thrives in low light), and a small framed print leaned against the back wall (no nail needed).
Rental-Friendly Quick Flags
- No drilling required
- Command-strip safe (use 3M Command hooks for the curtain rod if you want privacy)
- Removes in under 15 minutes
- Wallpaper peels off without residue when removed within 2 to 3 years
Build Method 2: The Mid-Range Weekend Build ($150 to $600)
This is the version most homeowners land on. You can finish it in a single weekend, you’ll need basic tools (drill, level, stud finder), and the result looks like a proper built-in even though it’s mostly hacked together.
What It Is
A painted under-stair nook with a freestanding or wall-attached bench, plug-in sconce lighting, and a styled back wall using paint or beadboard panels.
Why It Works
Paint and one focal back-wall treatment do 80% of the visual work. The bench gives you proper seating and hidden storage. Plug-in sconces eliminate the need for an electrician.
How to Execute It
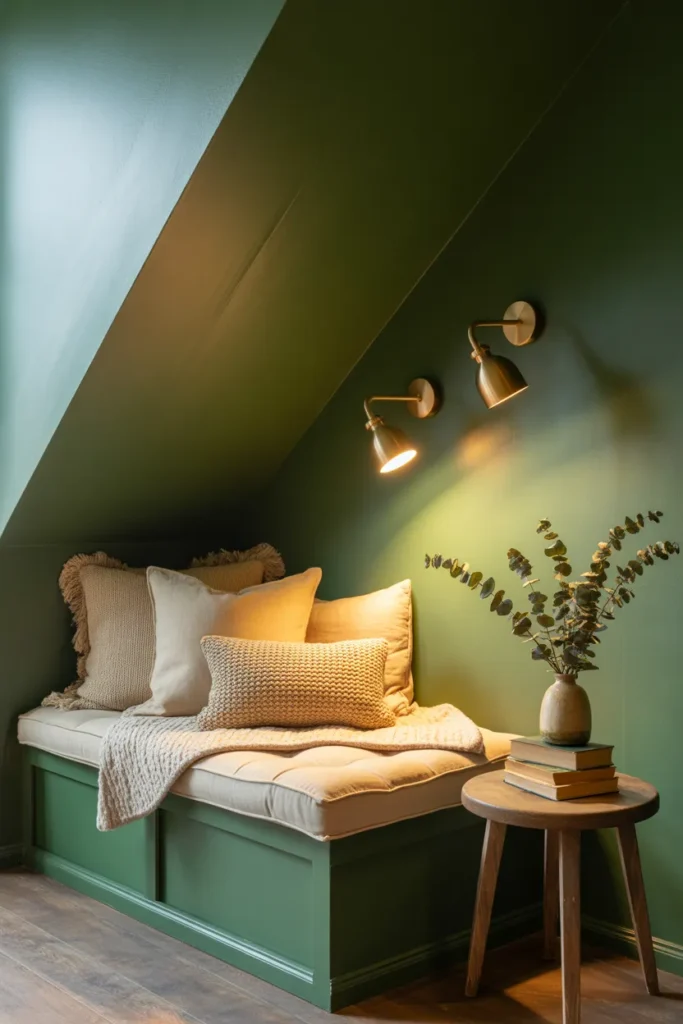
Shell layer: Paint the back wall in a saturated color (deep sage, warm terracotta, or muted navy work best for cozy nooks). Use a matte or eggshell finish. For sheen guidance straight from the source, Sherwin-Williams’ paint sheen guide explains why eggshell is the sweet spot for low-traffic walls. If you want texture, install peel-and-stick beadboard panels from Home Depot ($25 to $40 per panel).
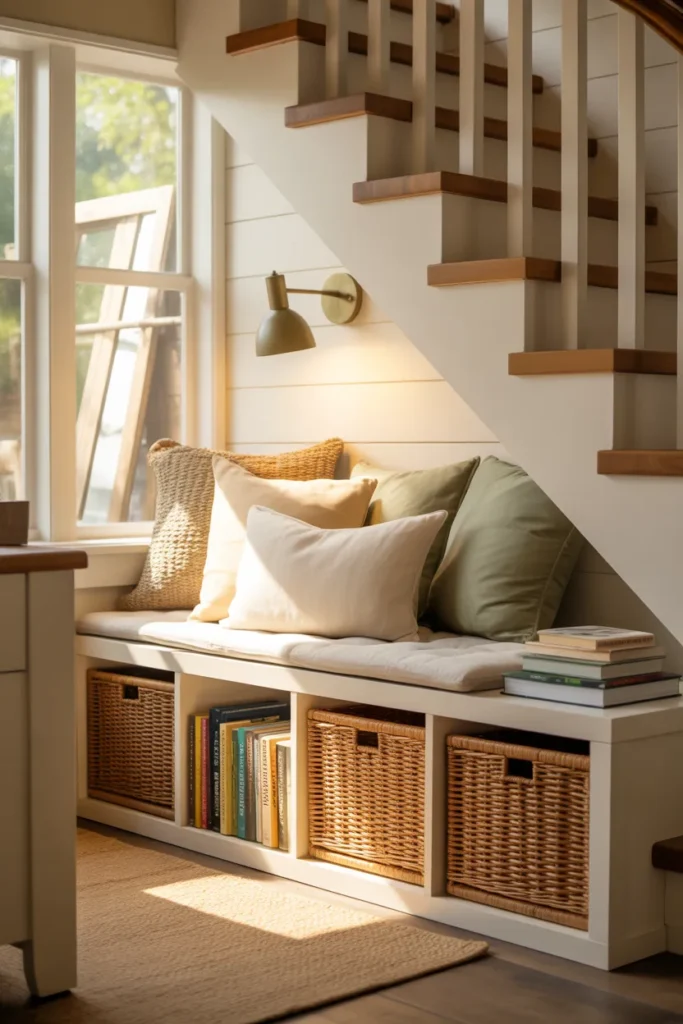
Surface layer: An IKEA KALLAX shelf laid on its side makes a perfect bench base ($70 to $130). Top it with a 4-inch foam cushion wrapped in linen or canvas. Total bench cost: around $180 with cushion.
Soft layer: Layer 4 to 6 pillows in mixed textures, sizes, and a single accent color. One oversized lumbar (24 inches), two square pillows (18 to 20 inches), one small throw pillow, one chunky knit throw draped diagonally.
Story layer: Two plug-in wall sconces (Target carries options around $40 each), a small wood side table or stack of vintage books as a side surface, a tiny ceramic vase with dried eucalyptus, and a curated stack of 6 to 8 books with the prettiest spines facing out.
Mid-Range Budget Breakdown
- Paint and supplies: $50
- Beadboard panels (optional): $80
- IKEA KALLAX bench base: $90
- Foam cushion and linen cover: $90
- Two plug-in sconces: $80
- Pillows and throw: $120
- Story layer details: $90
- Total: around $600
Build Method 3: The Full Custom Built-In ($600 to $2,500+)
This is the splurge version. Custom carpentry, real built-in bench with hidden storage drawers, hardwired lighting, and a styled back wall that looks like it came out of an Anthropologie catalog. Plan for a long weekend or a two-weekend project, and budget for a tile or trim upgrade if you really want to push it.
What It Is
A custom-framed bench with under-seat storage drawers, full back-wall treatment (board and batten, vertical shiplap, or wallpaper from Anthropologie or Magnolia), hardwired sconces or recessed picture light, and high-end textiles.
Why It Works
This is the version that adds resale value and shows up in real estate listings as a featured detail. The hidden storage solves the “where do I put the kids’ books” problem.
How to Execute It
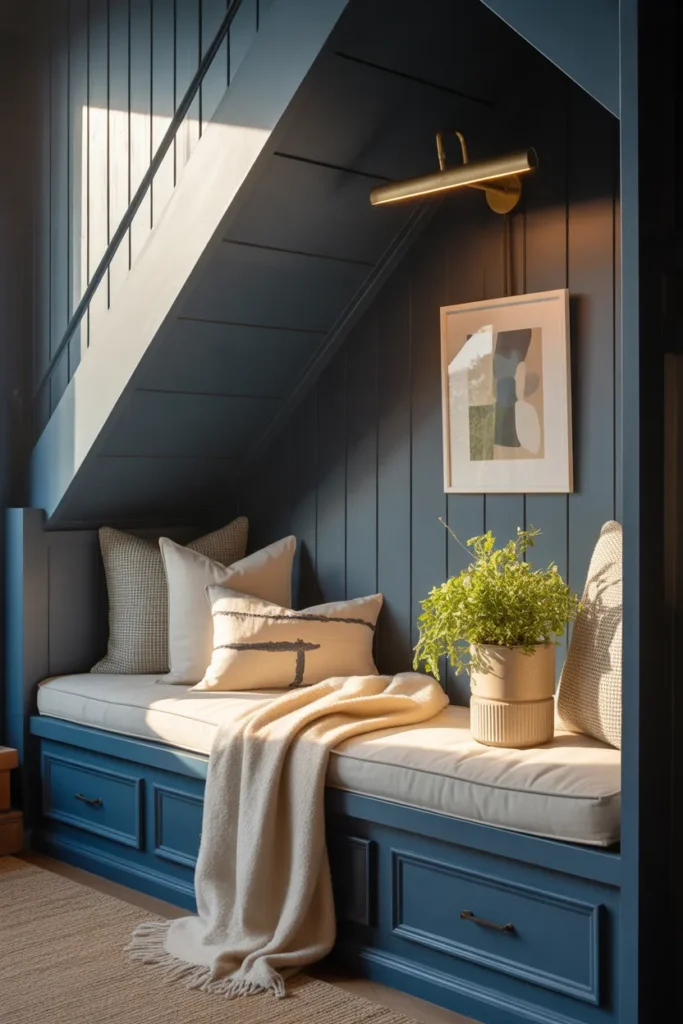
Shell layer: Board and batten on the back wall in a Cottagecore-leaning home, or warm-toned vertical shiplap for Modern Farmhouse. Painted in a rich color (Benjamin Moore Hale Navy, Sherwin-Williams Evergreen Fog, or Farrow & Ball Pigeon are all crowd-pleasers).
Surface layer: Custom-built bench frame with two pull-out storage drawers underneath. If carpentry isn’t your skill, a local handyman quote runs $400 to $800 for the frame, drawers, and install. Top with a custom 5-inch foam cushion wrapped in performance linen ($150 to $250).
Soft layer: Splurge on a West Elm or Crate & Barrel lumbar pillow as the hero piece ($80 to $120), surrounded by Target and HomeGoods supporting pillows ($25 to $40 each). One oversized throw in alpaca or merino blend ($100 to $200).
Story layer: A hardwired brass picture light or two flush-mount sconces ($120 to $300 installed), a small piece of original art or a vintage frame, a curated bookshelf moment, and a single statement plant in a textured ceramic pot.
Budget vs Splurge Comparison Table (Screenshot This)
| Element | Budget Under $150 | Mid-Range $150-$600 | Splurge $600-$2,500+ |
|---|---|---|---|
| Back wall | Peel-and-stick wallpaper | Painted accent + beadboard | Board and batten + designer paint |
| Seating | Floor cushion or poof | IKEA KALLAX bench hack | Custom bench with storage drawers |
| Lighting | Battery puck lights | Plug-in wall sconces | Hardwired picture light or sconces |
| Pillows | 1 throw + 1 lumbar | 4-6 layered pillows | Designer hero pillow + layers |
| Throw | Target chunky knit | West Elm or HomeGoods knit | Alpaca or merino blend |
| Time investment | 90 minutes | One weekend | 2 weekends or hire help |
Style Mood Boards: Match Your Nook to Your Aesthetic
This is the layer almost every other DIY guide skips. Pick the style that matches the rest of your home, then pull your shell, surface, soft, and story layer choices from that mood board.
Cottagecore Reading Nook
Floral peel-and-stick or hand-painted floral mural on the back wall, ruffled linen cushion in cream or buttery yellow, vintage brass sconce, antique books with worn spines, a small ironstone pitcher with dried wildflowers, lace-edged throw.
Modern Farmhouse Reading Nook
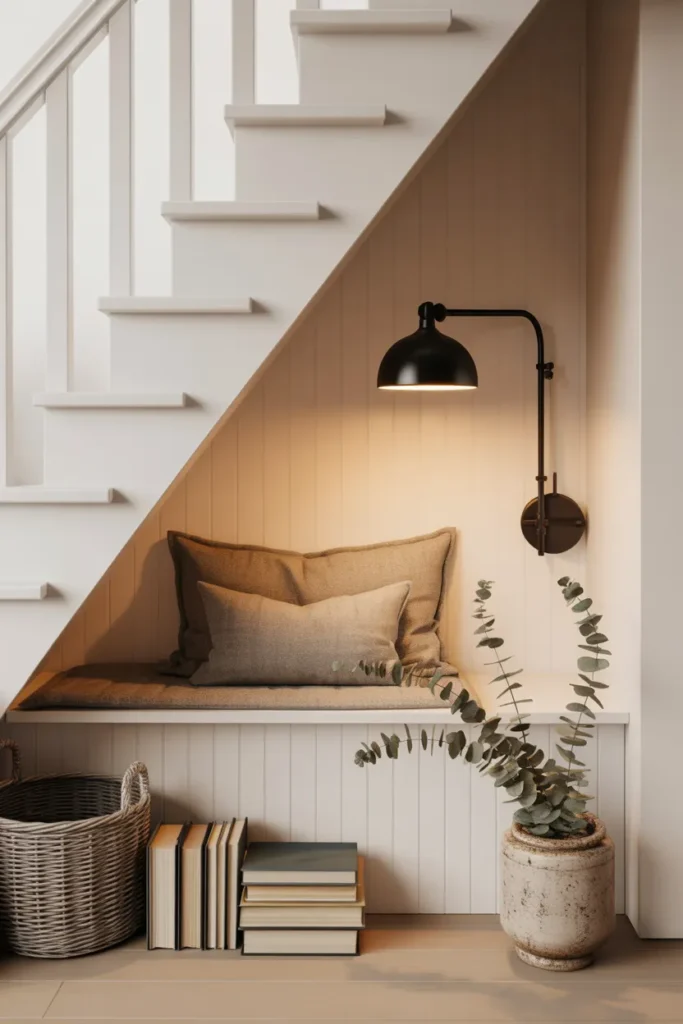
Vertical shiplap painted in warm white or sage, neutral linen cushion, black or oil-rubbed bronze sconces, stack of hardcover classics, woven seagrass basket for blanket storage, eucalyptus stems in a stoneware crock.
Japandi Reading Nook
Solid linen-textured wallpaper or warm white paint, slim wood-frame bench with a low-profile boucle cushion, paper lantern wall light, three carefully chosen books, one small ceramic vessel with a single dried branch, no clutter.
Boho Reading Nook
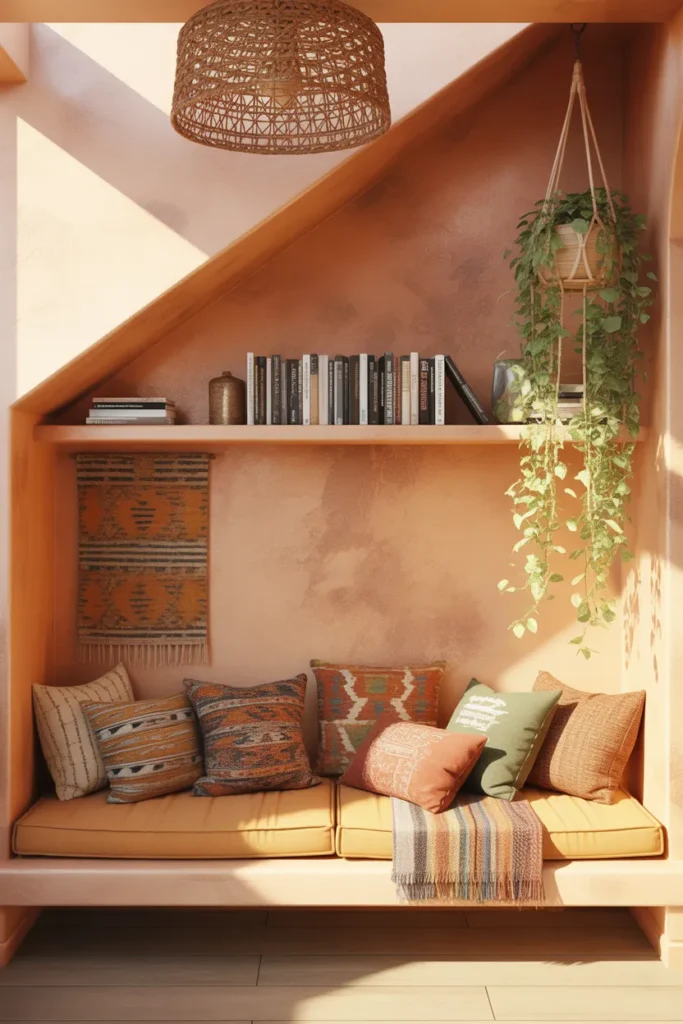
Layered textured wallpaper or a hand-applied lime-wash treatment, low platform bench piled with mixed-pattern pillows in earth tones, woven rattan pendant light, vintage rug fragment as a wall hanging, a stack of art books, trailing plants in macramé hangers.
Lighting a Nook Without Calling an Electrician
Lighting makes or breaks a reading nook. Bad lighting (overhead, cool-toned, too bright) makes the space feel like a closet. Good lighting (warm, layered, low) makes it feel like a hideaway.
If you’re not hardwiring anything, you have three solid options. Plug-in wall sconces with a swag cord that hides behind the bench give you the built-in look without the electrician bill. Battery-operated puck lights tucked into the back corners cast a soft glow without any cord at all. A small clip-on book light on the bench gives focused reading light when the ambient layer isn’t enough.
Stick to warm bulbs in the 2,700 to 3,000 Kelvin range. Anything cooler and the nook stops feeling cozy.
For an inspiration pull on creating reading-friendly lighting in small spaces, our cozy small space lighting tips post breaks down bulb temperature, layering, and the budget plug-in fixtures we use most.
Adding Built-In Storage Inside the Nook
Pinterest searchers pair “under stairs reading nook” with “storage” more than any other term. If your nook is wider than 36 inches, you have room to build storage right into the bench.
The easiest method is the IKEA KALLAX hack we mentioned earlier. Lay a 4-cube KALLAX on its side, drop in fabric storage boxes, and top with a foam cushion. You instantly get four cubbies for books, throws, board games, or kid toys.
For deeper storage, a custom bench frame with two front-pull drawers gives you hidden space for less attractive items (paperbacks you don’t want on display, extra blankets, holiday throws). A handyman can build this in a day for $400 to $800.
For under-bench open shelving, bracket-mounted floating shelves underneath the seat work for shoe storage or basket bins. This works well in entryway-adjacent nooks where you double-duty as a sit-and-tie-your-shoes spot.
If you’re combining reading and storage in a tight space, our small space storage solutions guide has more bench and shelving hacks worth bookmarking.
Common Mistakes to Avoid
After building three of these and watching dozens of friends attempt theirs, these are the mistakes that show up over and over.
Choosing the wrong cushion depth. A 3-inch cushion looks chic but kills your back after 20 minutes. Go 4 inches minimum, 5 inches if the bench is for adult lounging.
Lighting that’s too cool. Anything above 3,000 Kelvin makes the nook feel clinical. Always check the bulb temperature before installing.
Ignoring headroom. The lowest part of the staircase often has only 36 to 48 inches of clearance. Sit in the space before you commit to a bench height. The seat plus cushion plus your seated head height should leave at least 4 inches of clearance to the underside of the stairs.
Skipping the back wall treatment. A flat painted wall in the same color as the rest of the room makes the nook disappear. The back wall needs contrast. Always.
Wrong paint sheen. High-gloss reflects every imperfection in the drywall. Stick to matte or eggshell on walls, satin on any trim.
Overcrowding the story layer. Three to five small objects total. Not eight. Not ten. The Pinterest photos that go viral are the ones with restraint.
Frequently Asked Questions
What to do with wasted space under stairs?
A reading nook is the highest-impact use, but other strong options include a built-in pantry, a dog room with a custom bed and feeding station, a shoe storage cubby, a small home bar, or a pull-out desk. The key is matching the use to your home’s biggest functional gap. If you already have plenty of seating and storage, lean toward the reading nook for maximum visual payoff.
What is the 27 stair rule?
The 27 stair rule is a building code reference stating that any straight run of stairs longer than 27 risers (vertical steps) must include a landing. It applies more to commercial and multi-story residential builds than to a single-flight under-stair nook conversion, but it’s worth knowing if your project involves any structural changes to the staircase itself.
What to do with a nook under the stairs?
Beyond a reading nook, the top performers we’ve seen are a built-in pet bed area, a wine rack and bar zone, a mudroom drop-zone with hooks and a bench, a kids’ playhouse for homes with young children, and a hidden home office with a fold-down desk.
How do you use dead space under stairs?
Frame it, finish it, and give it a single clear purpose. The mistake most homeowners make is leaving it half-finished or using it as catch-all storage. Pick one function, build to that function, and style it intentionally.
How do I do this in a small space or rental?
Use Build Method 1 from this guide. Floor cushion, peel-and-stick wallpaper on the back wall, battery-operated lights, no drilling. The whole setup runs under $150 and removes in 15 minutes.
What is the budget version of this idea?
Under $150 total, using a Target or IKEA floor cushion, peel-and-stick wallpaper from Amazon, battery puck lights, and one chunky knit throw. The full breakdown is in Build Method 1 above.
What if I do not have a back wall?
If your nook is open on multiple sides (common in finished basements where the staircase floats), use a freestanding bookshelf as the visual back wall. A 4-foot tall slim bookcase from Target or IKEA creates the enclosed feel a nook needs, plus it doubles your story-layer real estate.
How long does this project take?
Build Method 1 takes 90 minutes. Build Method 2 takes one weekend (16 to 20 hours including paint dry time). Build Method 3 takes two weekends or one weekend plus a hired handyman day.
Your Next Step
Pick your build method based on your space, your budget, and your patience. If you’re just dipping your toe in, start with Method 1 this weekend and upgrade later. If you’re ready to commit, Method 2 hits the sweet spot for cost and impact.
Save this post to your home decor board on Pinterest so you can pull it up while you’re shopping for cushions and paint chips. The 4-Layer Nook Build Method checklist alone is worth pinning.
Want more cozy small-space inspiration? Our guide on cottagecore decor ideas for small homes walks through styling moments that pair beautifully with the nook you just built.
Now go take a real look at that under-stairs space. You’ll be sitting in your finished reading nook by Sunday night.
Keep reading
More cozy nook ideas
 IKEA Hacks
Read →
IKEA Hacks
Read →
20 IKEA Besta Ideas That Look Custom, Not Homemade
Four skinny legs, a gap at the wall, a cushion that slides off every time you lean back. That’s how most IKEA…
 DIY
Read →
DIY
Read →
12 Furniture Makeover Ideas for Beginners Who Have Never Painted a Thing
Your dresser is fine. It works, it holds socks, and it has looked exactly the same since the day you carried it…
 DIY
Read →
DIY
Read →
How to Make a DIY Headboard (Even If You’re Not Handy)
No saw. No garage. No conversation with your landlord. A DIY headboard is really just three things: one flat panel, something soft…