
9 Study Nook Mistakes That Make It Hard to Focus (and the Fix for Each)

If your study nook right now is a laptop on the bed, a dining chair that numbs your legs by the second hour, and a ceiling light that bounces straight off the screen, you don’t need a bigger room. You need to undo a few setup mistakes.
Below are nine of the most common ones, with a fix for each. Wherever there’s a renter-safe option, it comes first, so there’s no drilling unless you choose it.
Most of these mistakes happen before the desk is even out of the box. A corner gets picked because it looks good in a photo. Only later does it turn out that the nearest outlet is behind the bed and the window glares right into the screen.

That’s why the first fix is a three-point check you can run on any corner tonight. It works in a bedroom, a living room, an alcove, or an under-stair cubby. It costs nothing and takes a few minutes.
Mistake 1: Picking the Corner Before the Plug, Pane, and Path Test
Most study nook ideas start with a photo: a pretty corner, a little desk, a trailing plant. Then the desk arrives and the trouble shows up. The only outlet sits behind the headboard, the window throws glare across the screen, and every trip to the closet means squeezing past your chair.
Flip the order. Check the corner first, then shop. Three questions settle it, and you can answer all of them with your eyes and a phone flashlight.
The Plug, Pane, and Path Test
If the corner fails on Plug, the renter-safe fix is a flat-plug extension cord run along the baseboard and held with adhesive cord clips. Plug the lamp and charger into one surge-protected power strip, and never plug one strip into another.

Safety note: anchor tall furniture to the wall, keep candles and cords away from fabric, and use a licensed electrician or contractor for hardwired lighting, ceiling mounts, or anything structural.
Mistake 2: Facing the Window Head-On (or Sitting With It Behind You)
A desk pushed right up to a window looks lovely in daylight photos. In real life, the bright glass sits directly behind your screen, and your eyes keep readjusting between the two all afternoon.
Turn the desk around and the problem just moves. With the window at your back, the screen picks up the reflection, and your own head throws a shadow across the notebook.
OSHA’s computer workstation guidance has a simple answer: set the screen at a right angle to the window. Daylight comes in from the side, lights the page, and stays out of the screen.
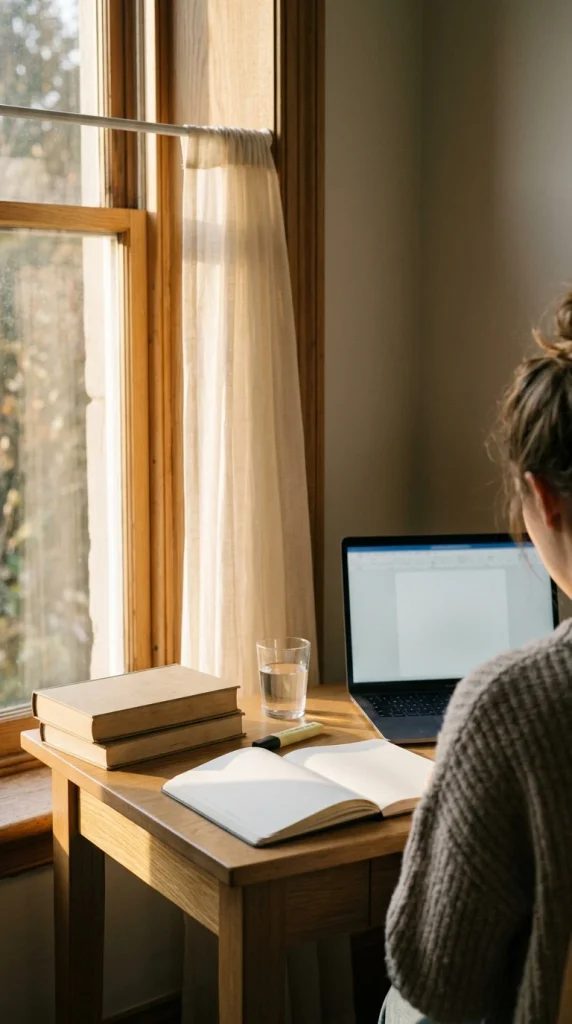
The desk faces the window. Bright glass sits behind the screen, and you’re squinting by midafternoon. Or the window is at your back, and the screen shows a reflection of the room.
The desk turns 90 degrees, so the window is at your side. A sheer panel softens the harsh hours, and the screen tilts back no more than 10 to 20 degrees.
Can’t turn the desk because of the room’s layout? Hang a sheer panel on a tension rod inside the window frame. You lose a little daylight and gain a screen you can actually read.
One honest downside: a side-window setup often leaves the desk jutting into the room instead of hugging a wall. Run the Path check again after you turn it.
Mistake 3: Lighting a Study Nook With One Ceiling Fixture
One overhead light does two bad jobs at once. It drops your head’s shadow onto the page, and it bounces off the screen.
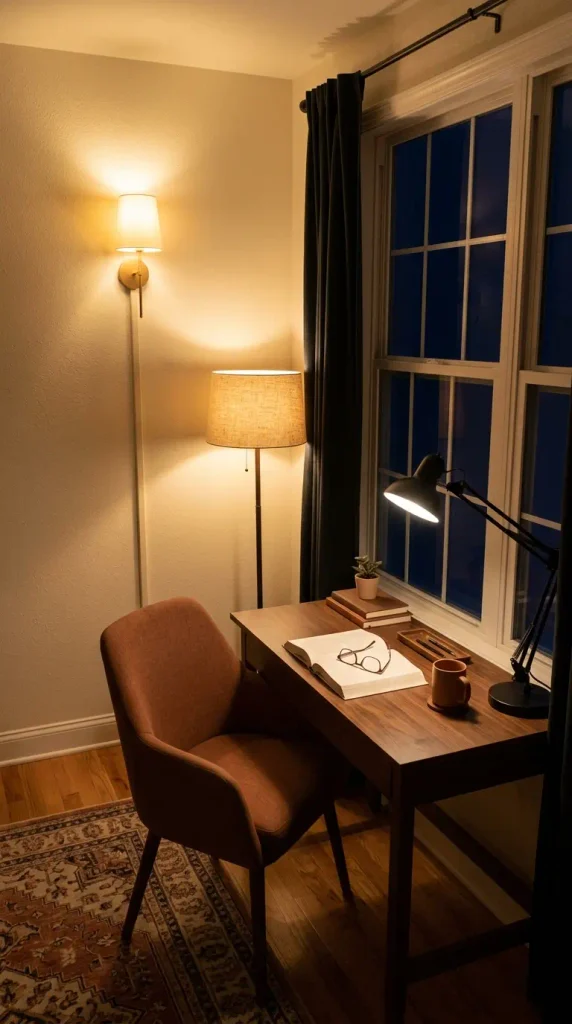
Study light works in layers. A room light keeps the corner from feeling like a cave. A task lamp puts a bright pool right where you read and write. Aim that lamp from the side opposite your writing hand, so your hand doesn’t shade the line you’re on.
Bulb color matters more than most people expect. The Department of Energy’s guide to lighting terms recommends 2700 to 3600K for most indoor general and task lighting, and it calls 2700 to 3000K the warm end. A warm 2700K bulb in the floor lamp with something closer to 3500K in the desk lamp gives you a soft room and a crisp page.
| Layer | Its job | Renter-safe pick |
|---|---|---|
| 🏠 Room light | Keeps the screen from being the brightest thing you see | Floor lamp, or the ceiling fixture you already have |
| 💡 Task light | Puts a bright, aimed pool of light on the page | Swing-arm desk lamp or clamp lamp |
| 🕯️ Accent light | Softens the wall behind the desk after dark | Plug-in sconce with a cord cover |
Mistake 4: Buying a Small Desk by Width and Ignoring Depth
Narrow corners push you toward the widest, slimmest desk that will fit. Width gets all the attention. Depth decides if you can actually work there.
Take IKEA’s MICKE, a popular small desk. Its listed size is 41 3/8 inches wide, 19 5/8 inches deep, and 29 1/2 inches tall, and IKEA US listed the white version at $99.99 in October 2026.
A laptop and a notebook fit side by side on it. A full keyboard in front of an external monitor is a different story, and a common complaint from MICKE owners is that the screen ends up too close to their eyes.
IKEA MICKE desk, listed dimensions
If you work on a laptop only, a shallow desk is fine. If you use an external monitor, you have three options:
- Pull the desk a few inches off the wall, so the back of the monitor has room. OSHA suggests exactly this.
- Use a corner. OSHA notes that corners give you more desk depth than a straight run.
- Add a clamp-on monitor arm, which lifts the screen off the desktop entirely.
Before you buy anything, outline the desk’s footprint on the floor with painter’s tape and live with it for a day. Walk past it. Roll a chair into it. Tape costs a lot less than a return trip.

Mistake 5: Borrowing a Dining Chair for Long Study Sessions
A dining chair is fine for a quick email. Two hours into an essay, the hard front edge starts pressing into the back of your thighs, and you end up perched forward with your shoulders creeping toward your ears.
Run this fit check on whatever chair you plan to use. It follows standard workstation guidance, and it takes about a minute.
The one-minute chair fit check
If your chair fails two or more of these, it’s the one upgrade worth paying for. Save on everything around it instead, like a thrifted lamp, a basket, or a secondhand shelf.

The trade-off is that an adjustable task chair rarely looks as good as an upholstered accent chair. Pick one with a fabric seat in a color already in the room, and it stops looking like it came from an office park.
Mistake 6: Letting Storage Spread Across the Desktop
Small desks fill up fast. Add a pen cup, a charger, three textbooks, and a mug, and suddenly there’s no room left to open a notebook.
Storage belongs above and below the work surface, not on it. A rolling cart parks beside or under the desk and slides out when you need it. A narrow bookcase or ladder shelf next to the desk takes the textbooks. Wall shelves work too, but they mean drilling, so renters usually start with freestanding pieces.
Freestanding comes with one rule: anchor anything tall. It sounds fussy until you read the CPSC’s Anchor It tip-over figures: 459 children in the US died in tip-over incidents between 2000 and 2018. An anti-tip strap leaves one small screw hole, so ask your landlord before you install it, and keep the heaviest books on the bottom shelf.
Keep daily supplies in a rolling cart under the desk.
Put the heaviest books on the lowest shelf.
Strap tall bookcases to the wall.
Stacking textbooks on the desktop “for now.”
A tall, unanchored shelf in a room where kids play or visit.
Keeping heavy items up high where a child might climb for them.

Mistake 7: Building a Work Zone With Nowhere to Read
Here’s the mistake most study nook ideas skip. Studying isn’t all typing. Plenty of it is reading a chapter, marking up a printout, or running through flash cards, and doing all of that bolt upright at a desk wears you down by evening.
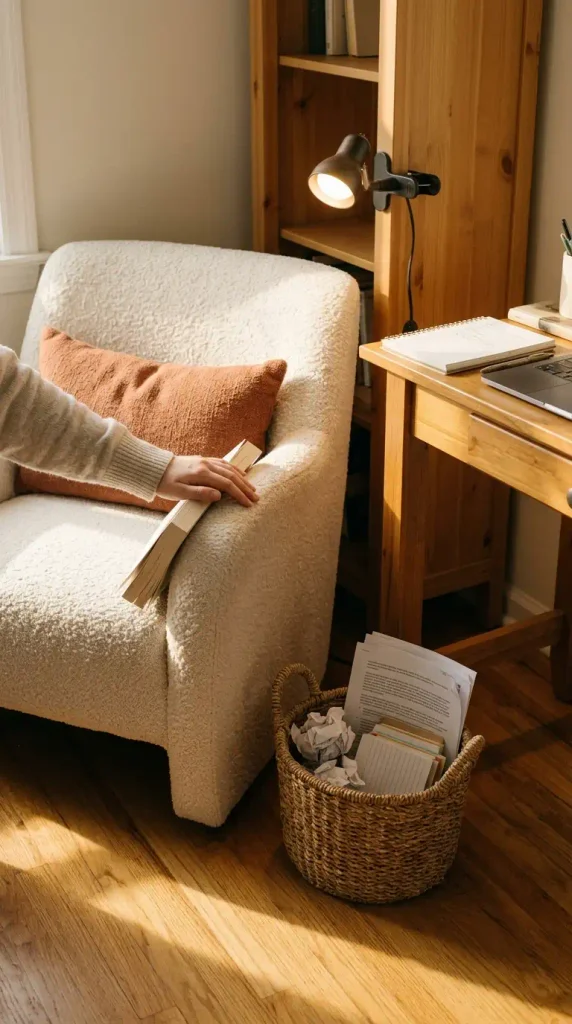
Give the nook a second posture. A lean-back seat right beside the desk lets you switch from writing to reading without leaving the corner.
Pick a lean-back seat that fits the corner: a small armchair, a floor cushion against the wall, or the end of the bed with a firm bolster.
Give it its own light. A clamp lamp on the bookcase beside it keeps you from reading in the desk lamp’s shadow.
Park your reading material in a basket between the desk and the seat, so you move and the pile stays put.
A floor cushion costs the least, but it suits a chapter, not a whole evening. For the chair side of the corner, these small reading nook setups for adults build a full reading spot from one chair, one lamp, and one small table.
Mistake 8: Letting a Study Nook in the Bedroom Bleed Into Bedtime
If you can see the laptop from your pillow, the study day never really ends. A study nook in the bedroom needs an off switch you can actually see.
Start with the floor. A rug under the desk and chair marks off the zone, and it muffles the clack of chair casters on hardwood, which matters if someone sleeps on the other side of the wall. For sizes and textures, browse these rug ideas for nooks and corners.
Then give yourself a door. A curtain on a tension rod across an alcove, or a folding screen beside a corner desk, hides the work at night without a single screw.

📌 Good To Know
Close the nook like a shop. The laptop goes into a lidded box or drawer, the chair gets pushed in, the task lamp goes off, and the curtain or screen comes across. It takes a minute, and it tells your brain the workday is over.
Mistake 9: Designing a Homework Nook Only for This School Year
Kids grow faster than desks wear out. A tiny desk and chair that fit a first grader in September can feel cramped by the next fall.
Buy for the bigger kid and adapt down. A standard-height desk with an adjustable chair and a removable footrest fits now and still works years later.
- Keep supplies low. Put everyday supplies on low, anchored shelves, so a short reader isn’t climbing to reach the markers.
- Hide the cords. Tuck lamp and charger cords behind the desk, out of small hands’ reach.
- Go cordless at the window. If the nook sits near a window, choose cordless blinds or shades.
For more layouts sized to younger kids, these homework station setups for younger kids use footrests, rolling carts, and corners you already have.
Buy the desk for the kid they’ll be in a few years. Use a footrest for the kid they are today.

Study Corner Questions, Answered
What is a study nook?
A study nook is a small, defined spot for focused work, usually a corner, alcove, or closet with a desk, a chair, a task light, and a little storage. It doesn’t need its own room. What makes it a nook is the boundary: a rug, a shelf, or a curtain that says this corner is for studying and the rest of the room is not.
How much space do you need for a study nook?
Less than most people think. A popular small desk like IKEA’s MICKE measures 41 3/8 inches wide and 19 5/8 inches deep, so a clear wall run of about 4 feet can work. Leave room behind the desk for the chair to roll back without hitting a bed, door, or closet swing. Tape the footprint on the floor first to check.
How do you create a study space in a bedroom?
Put the desk where you can’t see the screen from your pillow, or plan a way to hide it at night. A rug under the desk zone marks it off, a tension-rod curtain or folding screen closes it, and a lidded box holds the laptop after hours. Turn the desk so the window sits to one side, not behind the screen.
How do you design a study nook in a small space?
Start with the Plug, Pane, and Path test: an outlet within reach, a window to the side, and a clear walkway. Then build up instead of out, with a narrow shelf or bookcase beside the desk and a rolling cart underneath. Anchor anything tall, and keep the desktop for the work itself.
How do you make a study nook without a desk?
Use any sturdy surface at a seated work height, like a narrow console table, or a wall-mounted fold-down desk if you’re allowed to drill. For reading-heavy studying, a firm armchair with a lap desk and a clamp lamp covers a lot of ground. Whatever you use, check that your forearms stay roughly level when you write or type.
What lighting is best for a study nook?
Layer it. Use a room light so the screen isn’t the brightest thing in view, plus a task lamp aimed at the page from the side opposite your writing hand. The US Department of Energy recommends bulbs between 2700 and 3600K for most indoor general and task lighting. Keep bright lamps and windows out of the screen’s reflection.
Before You Buy a Single Desk
A good study nook comes down to a few quiet decisions made in the right order. Check the outlet, the window, and the walkway first. Then pick a desk deep enough for how you actually work, a chair that passes the one-minute fit check, and at least two layers of light. Give it a second seat for reading, and a way to close it all off at night.
Run the Plug, Pane, and Path test on your corner tonight. Then save this list to your study nook board, so it’s there waiting when the desk arrives.
Keep reading
More cozy nook ideas
 Study & Craft Nooks
Read →
How to Set Up a Study Room Without Drilling a Single Hole
Your lease says no holes. Your laptop lives on the couch. And the only free space is a 4-foot stretch of wall…
 Study & Craft Nooks
Read →
16 Kids Homework Station Ideas Little Ones Will Love
Two IKEA pieces, one empty corner, $109.98 before tax. That’s the first kids homework station on this list, and it fits in…
2 Comments